

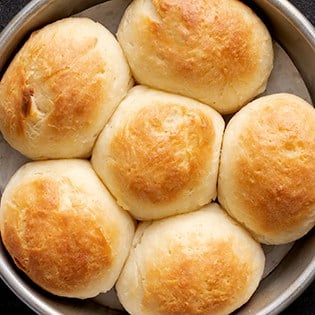
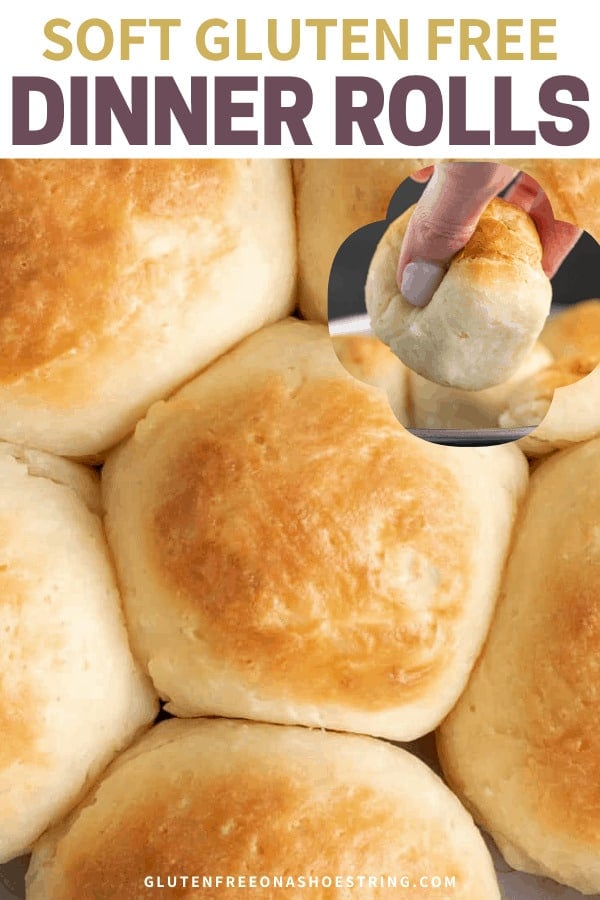
Bake up these gluten free dinner rolls, and you will have the household operating to the desk. These smooth and squishy gf yeast rolls actually are really easy to make!
Tender home made gluten free dinner rolls which can be fast and simple sufficient for busy weeknights, however nonetheless match for any vacation desk or celebration. By no means go with out bread once more!
Why that is the very best gluten free dinner rolls recipe
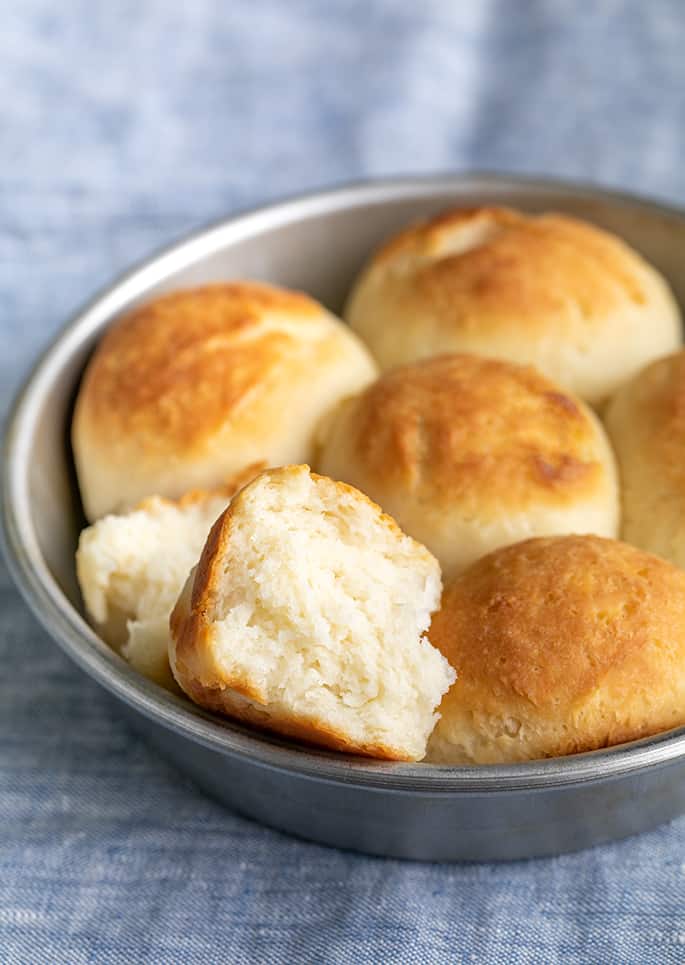
These rolls are extremely enriched, which simply signifies that they’ve loads of butter and milk within the recipe. Plus, the addition of practically 1 full cup of tapioca starch helps present loads of stretch to the rolls, as baked, and makes the dough very straightforward to form with virtually no added flour.
These gluten free dinner rolls are smooth and squishy, in order that they’re ultimate for serving with any homestyle meal. Think about them on the aspect of your plate of gluten free spaghetti and meatballs, since they’re straightforward sufficient for a weeknight.
They’re additionally excellent in your vacation desk. I’ve made our recipe for gluten free Texas Roadhouse rolls many occasions for Thanksgiving, however they’re extra of an appetizer-type roll.
For our subsequent vacation season, I believe I’ll be making this gluten free rolls recipe as they’re made for absorbing the final bits of gluten free gravy from that vacation plate.
What’s the very best gluten free flour for these gf dinner rolls?
To make gluten free bread, the bottom mix I like to recommend is Higher Batter or my mock Higher Batter all function gluten free flour mix.
Even when our bread recipe requires our gluten free bread flour, which we’re not utilizing right here, the bottom is (mock Higher Batter). It has the correct steadiness of gluten free flours once you want a recipe to carry its form throughout rising and baking.
Including practically a full cup of tapioca starch/flour to the recipe lightens the gluten free rolls with out diluting the power of Higher Batter. It additionally offers elasticity to the uncooked dough, which makes for simpler shaping, and to the baked rolls.
When you can’t have tapioca starch/flour, you possibly can attempt changing it each within the mock Higher Batter and as a separate ingredient on this recipe with superfine glutinous rice flour (which is simply rice flour made out of starch, short-grain white rice). I’ve had some success with that substitution, however can’t promise outcomes.
Extra gluten free yeast roll ingredient notes
- On the spot yeast – This recipe calls for fast yeast, however in the event you don’t have any available or would like to make use of energetic dry yeast, you’ll have to hydrate the yeast first in among the milk. You’ll additionally want 15 grams of energetic dry yeast relatively than simply 12 grams of immediate yeast.
- Sugar – The first position of the sugar is to “feed” the yeast in order that your gf rolls come out massive and fluffy. However the sugar additionally enhances the salt on this recipe, supplying you with that scrumptious steadiness of flavors.
- Milk – Heat milk prompts the yeast, so it could possibly begin feeding and doing its factor. It’s essential that the milk isn’t too sizzling; in any other case, you’ll kill the yeast and gained’t get your rise.
- Butter – Butter provides richness to those straightforward gluten free rolls and in addition helps with their rise.
- Egg whites – These egg whites contribute so much to the recipe: they add construction, help with the rise, they usually assist the gf yeast rolls maintain their form.

Learn how to make gluten free dinner rolls rise
It is a yeasted recipe, so you have to present a correct setting for the industrial yeast to breed after it’s uncovered to the milk within the recipe. Yeast rises at a really excessive vary of temperatures.
The desired dough temperature seems to be 78°F, however I don’t spend a lot of any time worrying about that. I usually set yeasted dough to rise on prime of my oven (by no means inside), and switch the oven on to about 300°F. The ambient warmth offers simply sufficient heat to assist the dough rise uniformly.
Yeasted dough will rise at decrease temperatures, even within the fridge at 40°F, simply extra slowly. A slower rise creates extra of that considerably bitter, yeasty taste within the dough, and is greatest for leaner, non-enriched bread doughs that don’t have a lot, if any, fats.
The worst placement for getting rolls to rise is someplace too sizzling. Gradual-rising dough could be very irritating, however a too-hot temperature dangers killing the yeast and stopping any rise in any respect.
Enrichments just like the milk, egg whites, and butter in these gluten free rolls assist the dough rise extra shortly. However rising occasions for yeasted dough like these dinner rolls can range considerably.
A dry local weather will even inhibit yeast progress, so you possibly can attempt including a tablespoon of extra heat milk or water to the dough in the event you are likely to wrestle with getting yeast dough to rise. Don’t add an excessive amount of, although, or the rolls are prone to overproof after which deflate as they cool (leaving them gummy inside).
Extra ideas for making the very best gluten free rolls
Measure out your gluten free flour appropriately
When you’ve tried a few of my different gluten free bread recipes, you’ve probably seen this tip — that’s as a result of it’s such an essential one. The success of your gluten free baking actually depends on precision. If you wish to obtain the identical outcomes I do, it is advisable to do precisely as I do.
In relation to gluten free flour, you wish to make sure you use exactly the quantity that I do. That’s unattainable to realize with a measuring cup, nevertheless it’s very straightforward to do with a kitchen scale.
Positively use a stand mixer
You really want to make use of a stand mixer for this gluten free yeast rolls recipe. It’s actually the one manner to make sure you get the graceful dough that’s obligatory for the fluffiest, squishiest rolls.
When you don’t have a stand mixer, you may get away with utilizing a meals processor fitted with a metal blade.
Sadly, a hand mixer gained’t work, and there’s completely no option to adequately combine this dough by hand.
Eat your home made gluten free rolls immediately
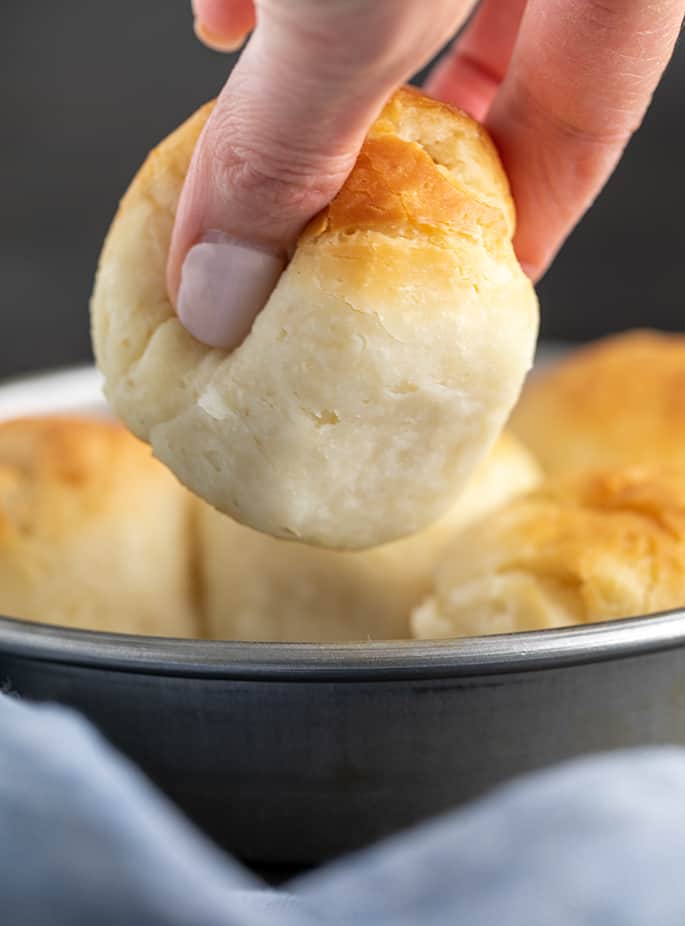
Eat your gluten free baked items straight from the oven! That’s not one thing you’ll see me say usually, if ever. However that’s actually what you must do with these gluten free rolls.
Not like different gluten free bread recipes, these rolls are supposed to be eaten shortly. They arrive out of the oven sustaining their form, so that you don’t have to fret about them deflating or falling aside.
Nervous that you simply gained’t be capable to scarf down all these rolls in a single sitting? Think about halving the recipe by slicing each single ingredient quantity in half.
When you make 8 rolls as a substitute of 16, you most likely gained’t have any bother consuming all of them earlier than night time’s finish. Solely baking for 1 or 2? Attempt slicing the recipe all the way down to 25%.

Gluten free bread rolls: storage ideas
Storing leftover gf dinner rolls
Whereas I don’t advocate it, you possibly can retailer leftover rolls in the event you made too many. As a result of yeast breads are likely to get tougher the longer they sit round, you wish to take care to be sure to retailer your rolls in an hermetic container.
They’ll keep good at room temperature for round 2 days, and I recommend sprinkling them evenly with water after which popping them into the microwave for 10 or 15 seconds or the toaster oven at 300°F for a couple of minutes to refresh them earlier than consuming.
Making gluten free yeast rolls upfront
From begin to end, this gluten free bread rolls recipe takes about 2 hours to finish. This implies these rolls aren’t one thing you possibly can whip up final minute.
I do know what you’re pondering: “I’ll simply make the dough and freeze it till I want it!” However I don’t ever advocate freezing uncooked yeast dough. It might not rise after having been frozen.
“That’s okay,” you say. “I’ll go away the dough within the fridge till I want it!” I additionally don’t advocate letting the dough rise within the fridge for greater than 24 hours, because the oven rise tends to be very irregular throughout baking once you try this.
So what do you do once you wish to make gluten free rolls forward of time? Parbake and freeze. Utilizing this methodology, your dinner rolls will final no less than a month.
Learn how to parbake these gf rolls
To parbake the rolls, comply with the recipe by way of baking (remember to separate the uncooked rolls, leaving about 2-inches between each other), however solely set the oven to 300°F. Bake for about quarter-hour or till the rolls seem puffed and are not moist inside.
Take away the rolls from the oven, and permit them to chill fully. Freeze in a single layer, after which wrap tightly in freezer-safe wrap. Remove as a lot air as attainable, as air is what causes freezer burn.
Whenever you’re prepared in your dinner rolls, simply defrost them at room temperature after which end baking them on the unique 375°F till totally browned and 190°F inside.
Gluten free dinner rolls: substitutions
Gluten free, dairy free dinner rolls
When you can’t have dairy, attempt changing the melted butter with melted vegan butter. Soften and Miyoko’s Kitchen manufacturers are my favourite.
Rather than dairy milk, any unsweetened nondairy milk ought to work. Keep away from utilizing something nonfat, although, as richness is the purpose.
Gluten free, egg free dinner rolls
There are 2 egg whites on this recipe, they usually present construction to the rolls. You could be capable to change them with aquafaba, or the brine from a can of unsalted chickpeas.
Typically aquafaba is an ideal substitute for egg whites in baking, and different occasions it seems to not work. I’m afraid I’m not skilled sufficient on this type of substitution to foretell the probability of success.
Learn how to use energetic dry yeast as a substitute of immediate yeast in these gf rolls
I at all times bake with immediate yeast (which can also be referred to as bread maker or fast rise yeast) in yeasted recipes like this one. You can not get rid of the yeast on this recipe, however you may make dinner rolls with our recipe for yeast free gluten free dinner rolls.
You can not change the yeast on this recipe with wild yeast sourdough. Sourdough recipes are totally distinct.
When you favor to make use of energetic dry yeast, you’ll want to make use of extra, and to “proof” the yeast in among the milk first. The overall rule of thumb is to make use of 25% extra energetic dry yeast than immediate yeast, by weight. Right here, that’s 15 grams of energetic dry yeast rather than 12 grams of immediate yeast.

FAQs
Is yeast gluten free?
Yeast in itself is gluten free, and most manufacturers that you simply discover on grocery store cabinets don’t comprise any components containing gluten.
Nevertheless, you at all times wish to play it secure. Purple Star Platinum is a well-liked model, and it’s not gluten free because it consists of gluten-containing components.
Does gluten free flour actually work with yeast?
Sure, yeast completely can and does work with gluten free flours.
The key to getting your gluten free dough to rise is to take exacting care when measuring out substances and use the correct gluten free flour mix, as specified within the recipe.
What’s the very best yeast for this gluten free dinner rolls recipe?
I don’t have a selected model that I like greater than one other, however I do favor to make use of immediate yeast to simplify the preparation course of. Whenever you use immediate yeast, you possibly can dump all of your substances collectively and go.
Why doesn’t this gluten free rolls recipe want baking powder?
When a gluten free bread rolls recipe already incorporates yeast, there’s no purpose to make use of baking powder. Each substances are leaveners, which imply they assist with a bread’s rise.
When you’re in search of a dinner roll recipe that makes use of baking powder as a substitute, take a look at my Yeast Free Gluten Free Dinner Rolls.
Why didn’t my fast gluten free rolls rise?
Truthfully, there are loads of explanation why your gf dinner rolls could not have risen. Most could be traced again to not following my recipe to a degree. Listed below are some examples:
- Dangerous measurements: Utilizing an excessive amount of flour will scale back the hydration ratio of the dough, stopping the yeast from activating; not utilizing sufficient sugar gained’t give the yeast the meals it must do its job.
- Improper temperatures: In case your milk is just too chilly, it is going to decelerate activation of the yeast; if it’s too sizzling, it is going to kill it. You additionally gained’t get a superb rise in the event you go away your gluten free yeast dough within the fridge and not using a tight-fitting lid or in a drafty a part of the kitchen.
- Expired yeast: Dangerous yeast will also be a offender. When you’re unsure whether or not yours is nice, add a bit to a combination of heat water and sugar. If it’s not frothy after 10 minutes, your yeast isn’t any good.
Why are my gluten free bread rolls dense?
Dense gluten free smooth rolls are normally the results of an excessive amount of flour. Because of this I at all times recommend that you simply measure yours out utilizing a kitchen scale relatively than depend on a measuring cup.
Another excuse for dense rolls might be the omission of xanthan gum. Ensure your gluten free flour mix incorporates it; in any other case, it is advisable to add it individually.
Can I freeze gluten free rolls?
Sure, making and freezing gluten free buns is a good way to save lots of time.
To do that, comply with my directions above for shaping and parbaking your rolls. Freeze them as soon as they’re fully cool, after which allow them to defrost earlier than popping them again into the oven to complete baking earlier than dinner.
Gluten Free Dinner Rolls Recipe | Tender, Squishy Yeast Rolls
Bake up these gluten free dinner rolls, and you will have the household operating to the desk. These smooth and squishy gf yeast rolls actually are really easy to make!
Yield: 16 rolls
Elements
- 3 ¼ cups (455 g) all function gluten free flour mix Higher Batter is good right here; click on by way of for beneficial flour blends
- 1 ¾ teaspoons xanthan gum omit in case your mix already incorporates it
- ⅞ cup (105 g) tapioca starch/flour plus extra for sprinkling
- 4 teaspoons (12 g) immediate yeast See Recipe Notes
- ¼ cup (50 g) granulated sugar
- 1 teaspoon kosher salt
- 1 ⅝ cup (13 fluid ounces) heat milk (about 90°F)
- 8 tablespoons (112 g) unsalted butter melted and cooled (plus extra for brushing)
- 2 (50 g) egg whites at room temperature
Directions
-
Within the bowl of a stand mixer (See Recipe Notes), place the flour, xanthan gum, tapioca starch/flour, immediate yeast, and granulated sugar, and whisk to mix effectively. Add the salt, and whisk once more to mix.
-
Add the milk, melted butter, and egg whites. Utilizing the paddle attachment, beat vigorously. The combination will come collectively in a clump and clear the edges of the bowl. Preserve beating till it begins to look whipped, and sticks to the aspect of the blending bowl once more (about 6 minutes whole).
-
Switch the combination to a evenly oiled bucket or bowl with a really tight-fitting lid. The container needs to be massive sufficient for the dough to almost double (though it gained’t double totally).
-
Set the container apart for no less than 2 hours at room temperature, and as much as 24 hours within the fridge. Don’t let the dough relaxation/rise for too lengthy, or your rolls will rise far more irregularly after shaping.
-
When you’ve let the dough relaxation within the fridge, take away it from the chilly and place it, nonetheless lined, on the kitchen counter. Enable it to heat to room temperature earlier than working with it.
-
Grease 1 / 4 sheet pan or a number of spherical cake pans for baking, and set them apart. You’ll later resolve in the event you’d wish to crowd the rolls, and have them rise then bake touching, or have them separate.
-
Divide the dough into 16 equal parts, every 2 1/2 ounces in weight. Working with one piece at a time, knead the dough in your clear, dry fingers, with out including any extra flour of any sort, pinching any seams that separate.
Flour a clear, dry work floor very evenly with tapioca starch, and coax the dough right into a spherical. The dough needs to be agency, however straightforward to work with. -
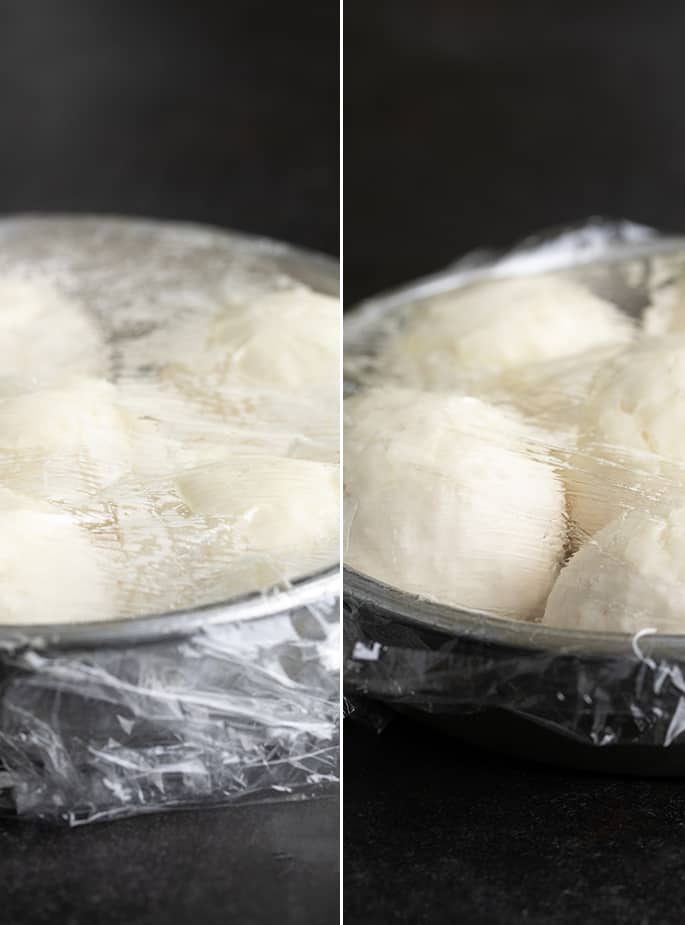
Place the formed rounds of dough in your chosen baking pan both touching (they are going to rise principally up), or a bit greater than 1-inch aside, taking care to not crowd them (the need stand up and out). Cowl the pan with evenly greased plastic wrap, place in a heat, draft-free location, and permit to rise till about 150% of their unique dimension.
-
This rise can take wherever from 45 minutes to hours, relying upon the ambient temperature in your kitchen. Overproofing isn’t very probably, and could be detected when the floor of your uncooked rolls begins to tackle a pockmarked look.
-
When the rolls are nearing the tip of their rise, preheat your oven to 375°F. As soon as the rolls are correctly risen, take away the plastic wrap from the pan(s), and brush generously on all uncovered sides with melted butter.
-
Place the baking pan(s) within the middle of the preheated oven and bake till an immediate learn thermometer inserted into the middle of every roll reads about 190°F.
-
If there’s any house between the rolls after they’ve risen, they are going to take round 20 minutes till totally baked.
-
If the rolls are touching each other, decrease the oven temperature to about 350°F at 18 minutes and proceed to bake for about one other 5 minutes or till the correct inner temperature is reached within the middle roll.
-
Take away the pan from the oven, and with the rolls nonetheless within the sizzling pan, brush once more with melted butter and serve instantly.
Notes
When you’d like use energetic dry yeast rather than immediate yeast, you’ll have to hydrate the yeast first in among the milk. You’ll additionally want 15 grams energetic dry yeast to switch 12 grams of immediate yeast.
For the stand mixer
When you don’t have a stand mixer, I like to recommend making the dough in a meals processor fitted with the metal blade. I don’t advocate a hand mixer, or attempting to combine by hand.
Initially printed on the weblog in 2021; in 2022, some textual content assets added, however recipe, images, video unchanged.
Gluten Free Dinner Rolls Recipe | Tender, Squishy Yeast Rolls
Bake up these gluten free dinner rolls, and you will have the household operating to the desk. These smooth and squishy gf yeast rolls actually are really easy to make!
Yield: 16 rolls
Elements
- 3 ¼ cups (455 g) all function gluten free flour mix Higher Batter is good right here; click on by way of for beneficial flour blends
- 1 ¾ teaspoons xanthan gum omit in case your mix already incorporates it
- ⅞ cup (105 g) tapioca starch/flour plus extra for sprinkling
- 4 teaspoons (12 g) immediate yeast See Recipe Notes
- ¼ cup (50 g) granulated sugar
- 1 teaspoon kosher salt
- 1 ⅝ cup (13 fluid ounces) heat milk (about 90°F)
- 8 tablespoons (112 g) unsalted butter melted and cooled (plus extra for brushing)
- 2 (50 g) egg whites at room temperature
Directions
-
Within the bowl of a stand mixer (See Recipe Notes), place the flour, xanthan gum, tapioca starch/flour, immediate yeast, and granulated sugar, and whisk to mix effectively. Add the salt, and whisk once more to mix.
-
Add the milk, melted butter, and egg whites. Utilizing the paddle attachment, beat vigorously. The combination will come collectively in a clump and clear the edges of the bowl. Preserve beating till it begins to look whipped, and sticks to the aspect of the blending bowl once more (about 6 minutes whole).
-
Switch the combination to a evenly oiled bucket or bowl with a really tight-fitting lid. The container needs to be massive sufficient for the dough to almost double (though it gained’t double totally).
-
Set the container apart for no less than 2 hours at room temperature, and as much as 24 hours within the fridge. Don’t let the dough relaxation/rise for too lengthy, or your rolls will rise far more irregularly after shaping.
-
When you’ve let the dough relaxation within the fridge, take away it from the chilly and place it, nonetheless lined, on the kitchen counter. Enable it to heat to room temperature earlier than working with it.
-
Grease 1 / 4 sheet pan or a number of spherical cake pans for baking, and set them apart. You’ll later resolve in the event you’d wish to crowd the rolls, and have them rise then bake touching, or have them separate.
-
Divide the dough into 16 equal parts, every 2 1/2 ounces in weight. Working with one piece at a time, knead the dough in your clear, dry fingers, with out including any extra flour of any sort, pinching any seams that separate.
Flour a clear, dry work floor very evenly with tapioca starch, and coax the dough right into a spherical. The dough needs to be agency, however straightforward to work with. -
Place the formed rounds of dough in your chosen baking pan both touching (they are going to rise principally up), or a bit greater than 1-inch aside, taking care to not crowd them (the need stand up and out). Cowl the pan with evenly greased plastic wrap, place in a heat, draft-free location, and permit to rise till about 150% of their unique dimension.
-
This rise can take wherever from 45 minutes to hours, relying upon the ambient temperature in your kitchen. Overproofing isn’t very probably, and could be detected when the floor of your uncooked rolls begins to tackle a pockmarked look.
-
When the rolls are nearing the tip of their rise, preheat your oven to 375°F. As soon as the rolls are correctly risen, take away the plastic wrap from the pan(s), and brush generously on all uncovered sides with melted butter.
-
Place the baking pan(s) within the middle of the preheated oven and bake till an immediate learn thermometer inserted into the middle of every roll reads about 190°F.
-
If there’s any house between the rolls after they’ve risen, they are going to take round 20 minutes till totally baked.
-
If the rolls are touching each other, decrease the oven temperature to about 350°F at 18 minutes and proceed to bake for about one other 5 minutes or till the correct inner temperature is reached within the middle roll.
-
Take away the pan from the oven, and with the rolls nonetheless within the sizzling pan, brush once more with melted butter and serve instantly.
Notes
When you’d like use energetic dry yeast rather than immediate yeast, you’ll have to hydrate the yeast first in among the milk. You’ll additionally want 15 grams energetic dry yeast to switch 12 grams of immediate yeast.
For the stand mixer
When you don’t have a stand mixer, I like to recommend making the dough in a meals processor fitted with the metal blade. I don’t advocate a hand mixer, or attempting to combine by hand.
Initially printed on the weblog in 2021; in 2022, some textual content assets added, however recipe, images, video unchanged.