

Making do-it-yourself glazed doughnuts is simpler than you assume, however requires a bit persistence. Prepared in about 2.5 hours, these style like doughnuts out of your favourite bakery, however they’re made within the consolation of your individual house. For doughnut success, comply with my step-by-step pictures, useful success ideas, and video tutorial. Utilizing this identical doughnut dough, you possibly can create different flavored frosted doughnuts too!
With that signature bakery style and texture, doughnuts from a doughnut store are extremely scrumptious and indulgent. When you possibly can’t choose up your favourite doughnuts, why not make them at house as a substitute? They’ve at all times been a baking bucket record recipe for me, and at present I’m taking you on a deep dive into do-it-yourself doughnuts—fried, sugary, old school, and comforting. I initially shared this recipe in 2016, and I’ve extra step-by-step pictures and a video tutorial to information you.
It’s a lot enjoyable to have the ability to make them from scratch with out leaving the comforts of house. There’s so much to cowl at present, so let’s get began!
These Home made Glazed Doughnuts Are:
- Gentle and candy
- Flavored with a bit nutmeg
- Fully from-scratch
- Prepared in about 2.5 hours (most of that is rise time!)
- A enjoyable and scrumptious weekend venture
- Excellent for sharing
Greatest Elements to Use for Home made Doughnuts
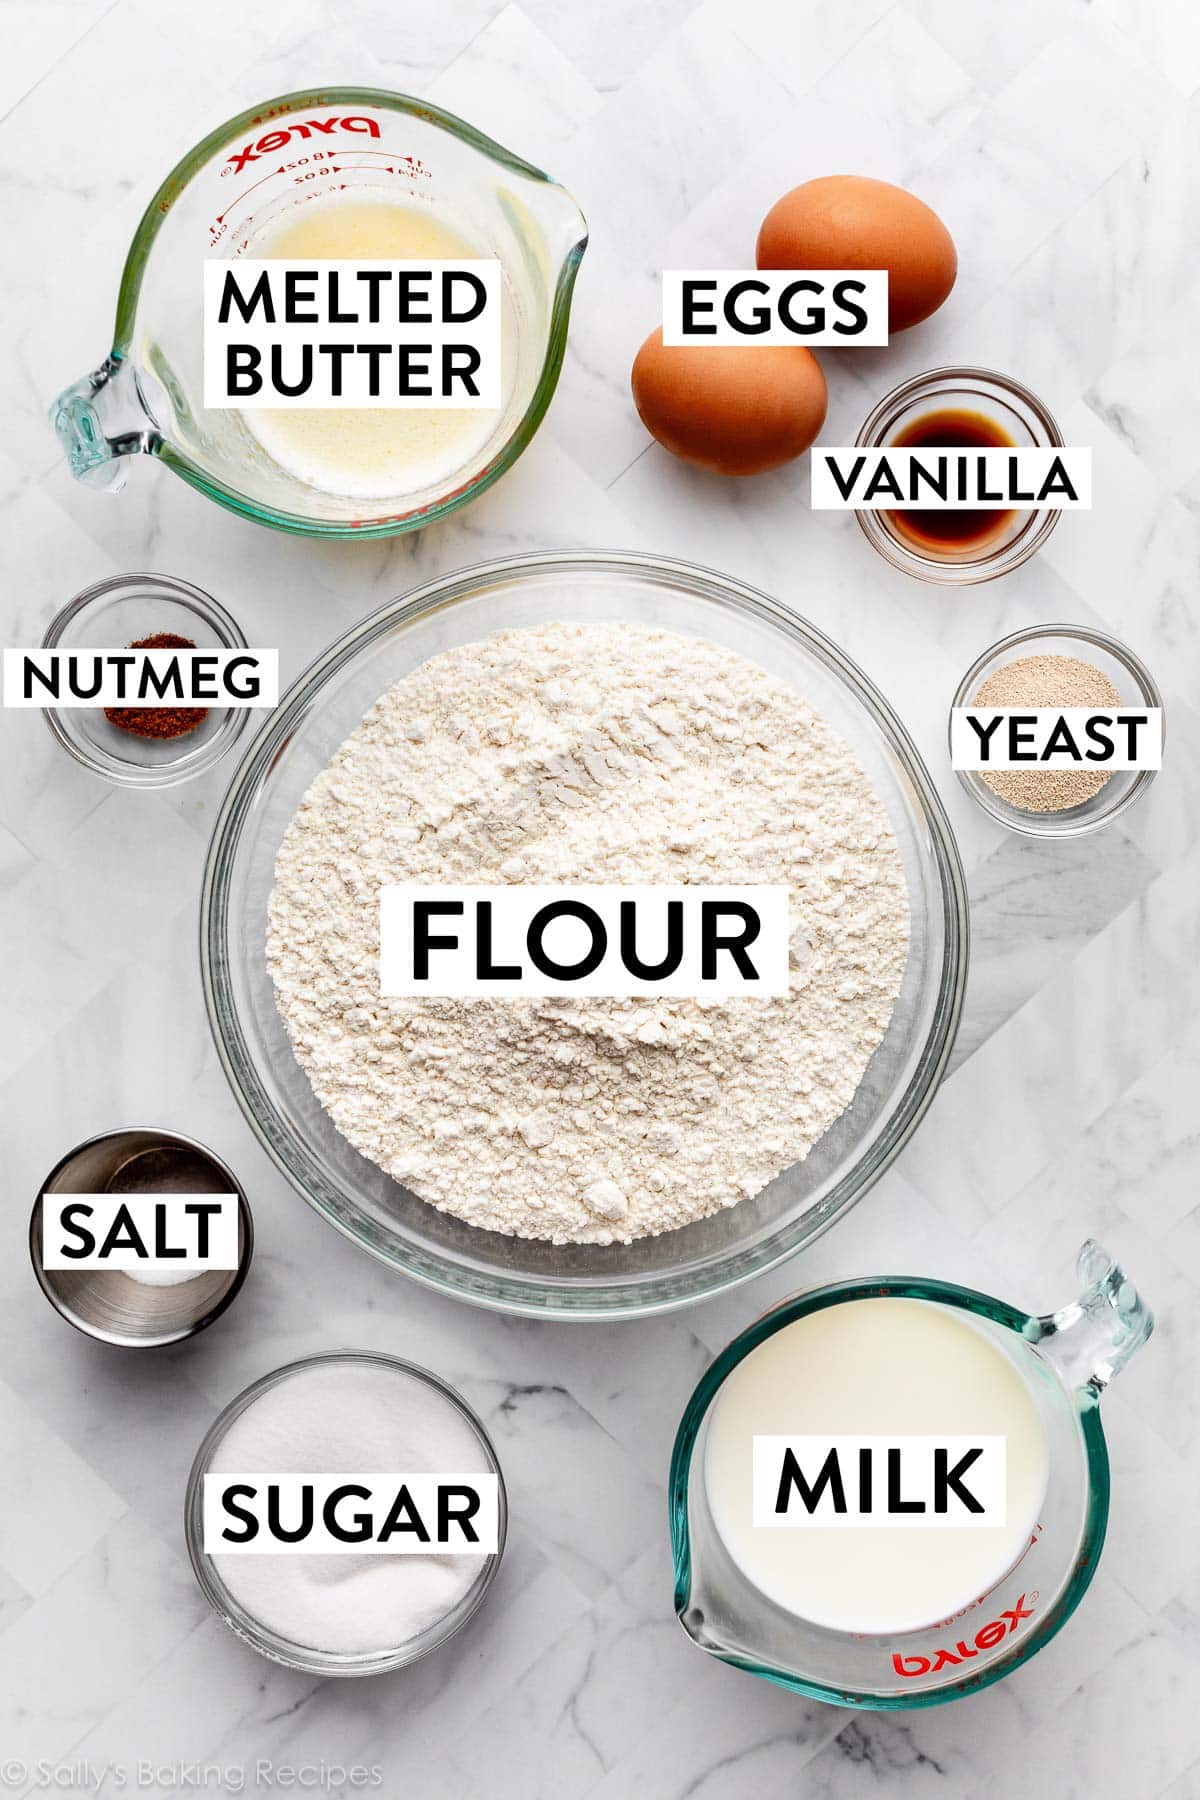
It is a fairly easy, no-frills yeasted dough. You want just some elements to start:
- Milk: Liquid prompts the yeast. Entire milk is a should for essentially the most tender dough—or you possibly can attempt buttermilk. Decrease fats or nondairy milks work in a pinch, however the doughnuts aren’t as flavorful or wealthy.
- Yeast: You should use lively dry yeast or immediate yeast. If utilizing an immediate yeast, your rise time might be a bit shorter.
- Sugar: Sugar sweetens the doughnuts, nevertheless it additionally feeds the yeast, will increase its exercise, and tenderizes the dough.
- Eggs: Eggs present construction and taste.
- Butter: Melted butter guarantees enhanced taste.
- Salt & Vanilla Extract: Each add taste. You may even attempt utilizing do-it-yourself vanilla extract!
- Nutmeg: Slightly nutmeg is the key ingredient to that cozy, comforting bakery style. For those who’ve ever made my chocolate chip muffins, you realize it provides a scrumptious pop of taste!
- Flour: All-purpose flour is the dough’s construction. You’ll be tempted so as to add increasingly flour as you combine the dough, however don’t. You desire a very comfortable, pillowy dough for comfortable, pillowy doughnuts. The dough can nonetheless be barely sticky. When kneading, use additional flour in your fingers and work floor.
Are You a Yeast Newbie?
Reference this Baking with Yeast Information everytime you work with baker’s yeast. I embody sensible solutions to your whole frequent yeast questions.
Overview: Easy methods to Make Home made Glazed Doughnuts
Let me stroll you thru the method so that you perceive what you’re doing. Home made glazed doughnuts appear a bit intimidating, however I guarantee you—they’re actually not!
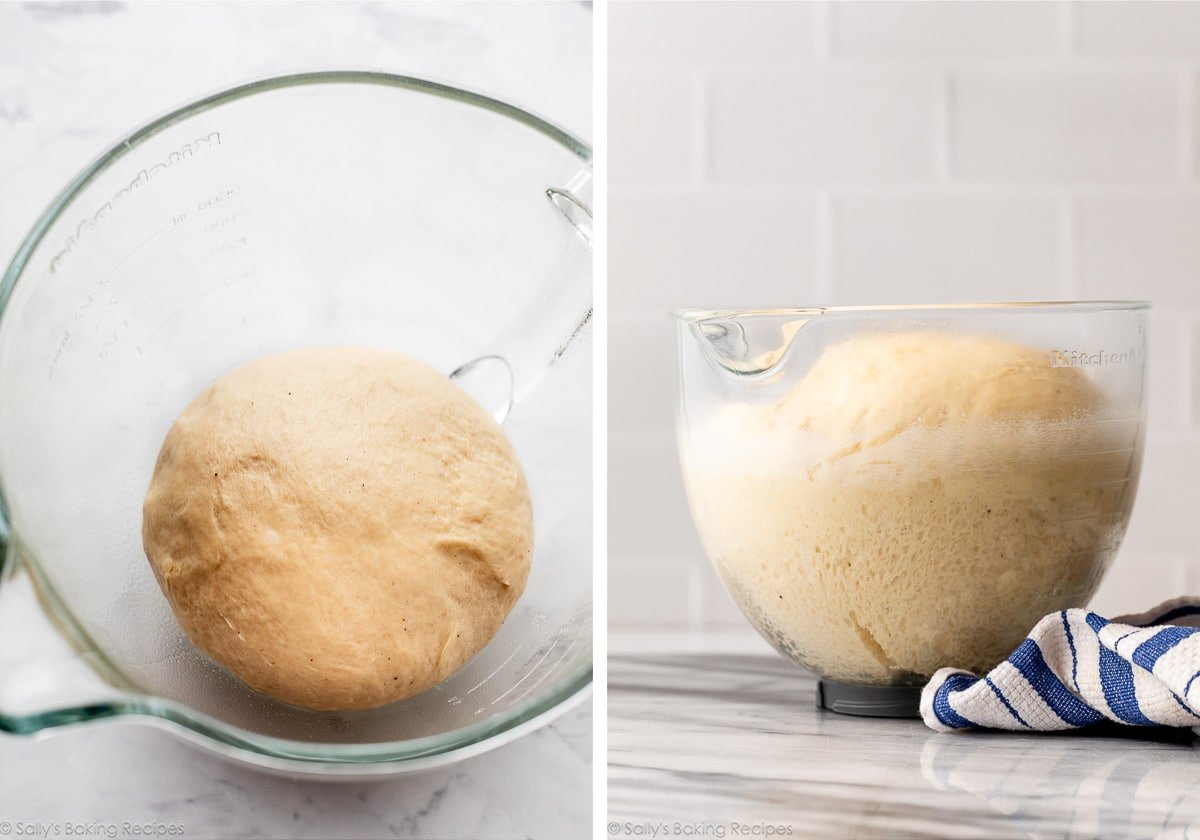
Put together the dough. The dough comes along with a mixer. You can too make the dough by hand, nevertheless it requires a little bit of arm muscle. After the dough comes collectively within the mixing bowl, knead it for 5-7 minutes.
Let the dough rise. In a comparatively heat atmosphere, the dough rises in about 90 minutes.
Punch down the dough to launch the air.
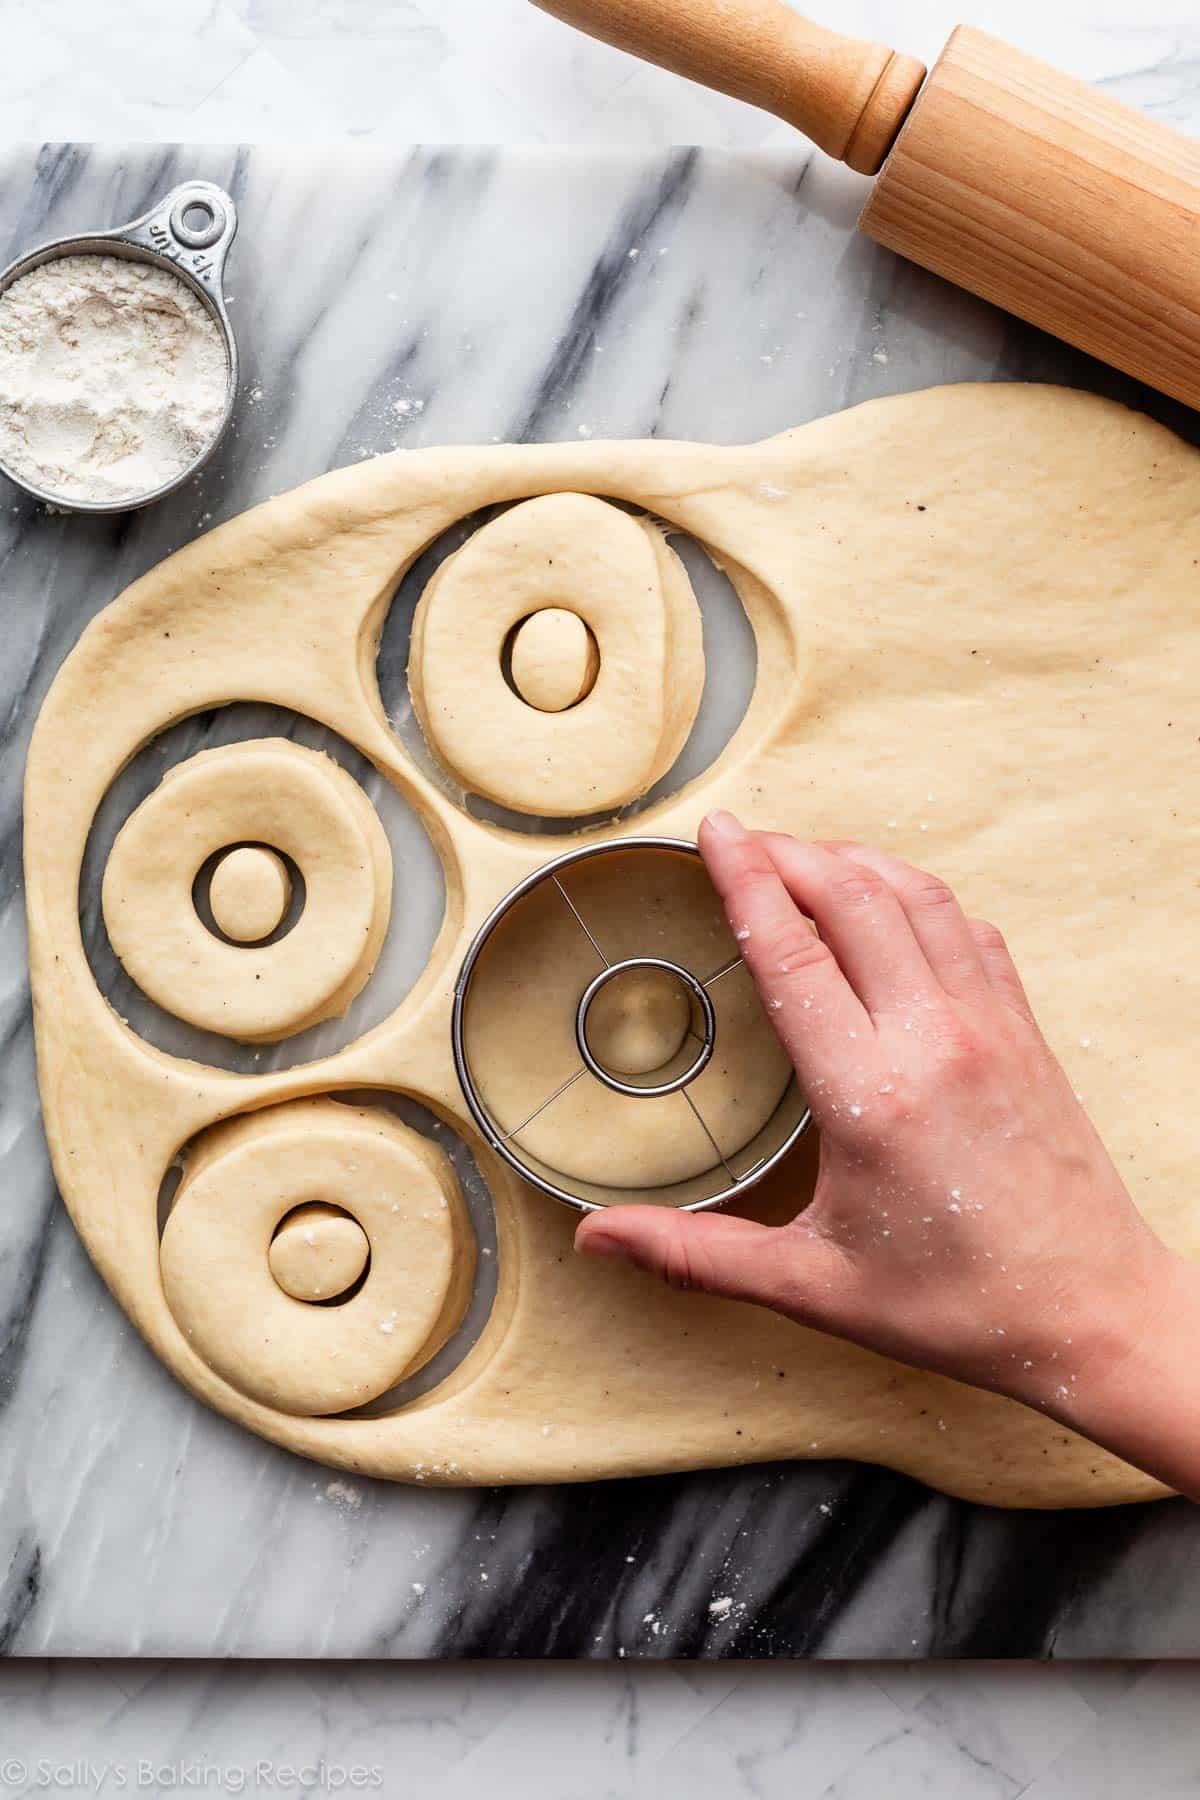
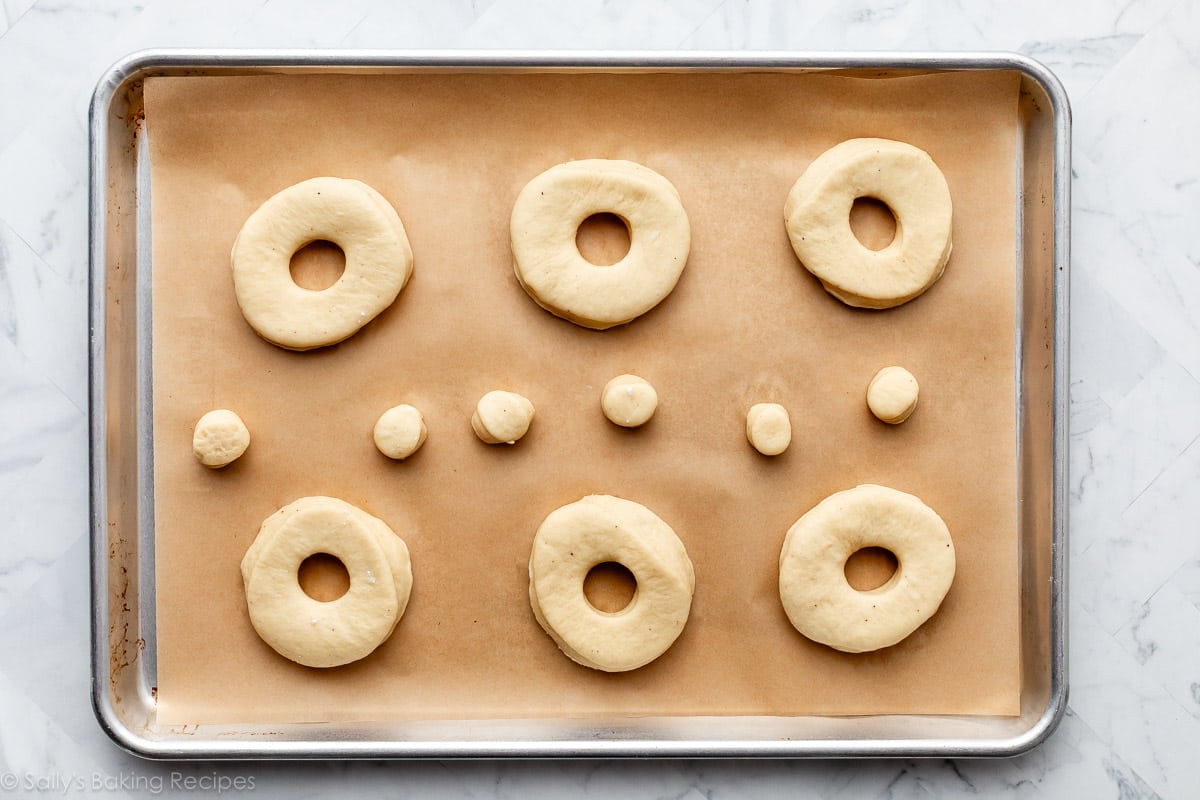
Roll & minimize into doughnuts. Roll the dough out to 1/2 inch thickness. Reduce the doughnuts utilizing a 3-3.5 inch doughnut cutter. Line 1-2 baking sheets with parchment paper or a silicone baking mat. Place doughnuts (and doughnut holes!) onto the lined baking sheet, then frivolously cowl and permit to relaxation for half-hour as you put together the oil.
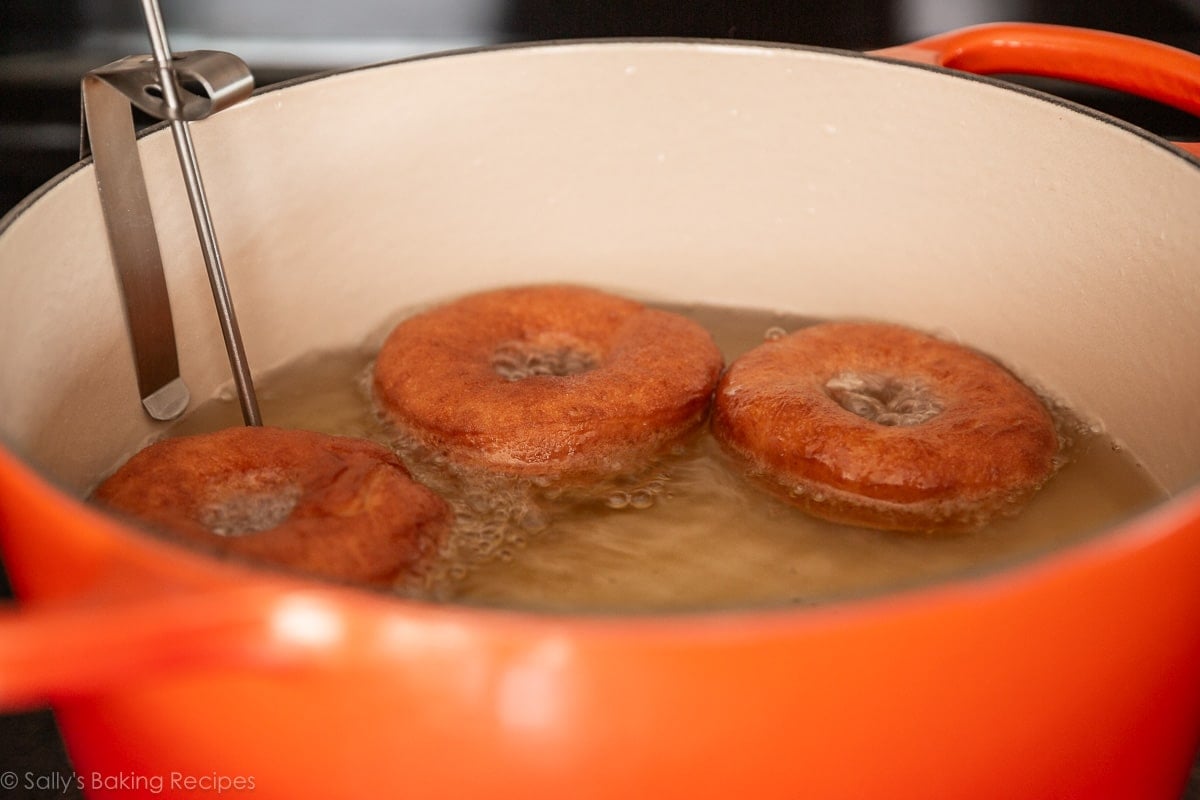
Put together the oil. Utilizing a heavy-bottomed pot or dutch oven and an oil thermometer, warmth the oil to 375°F (191°C).
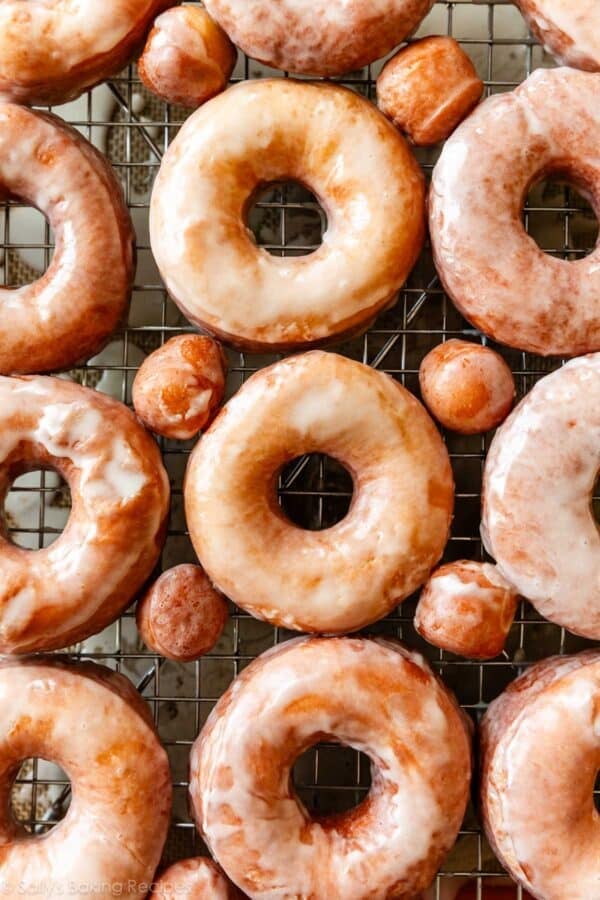
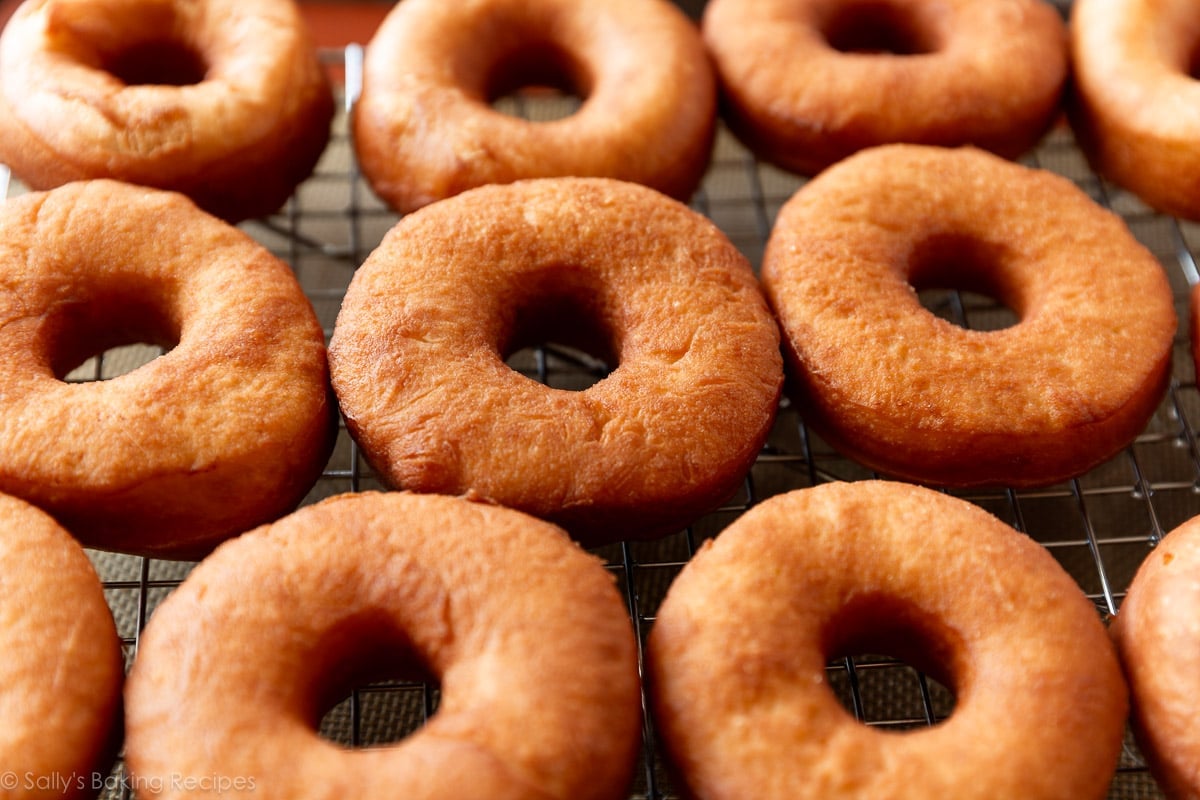
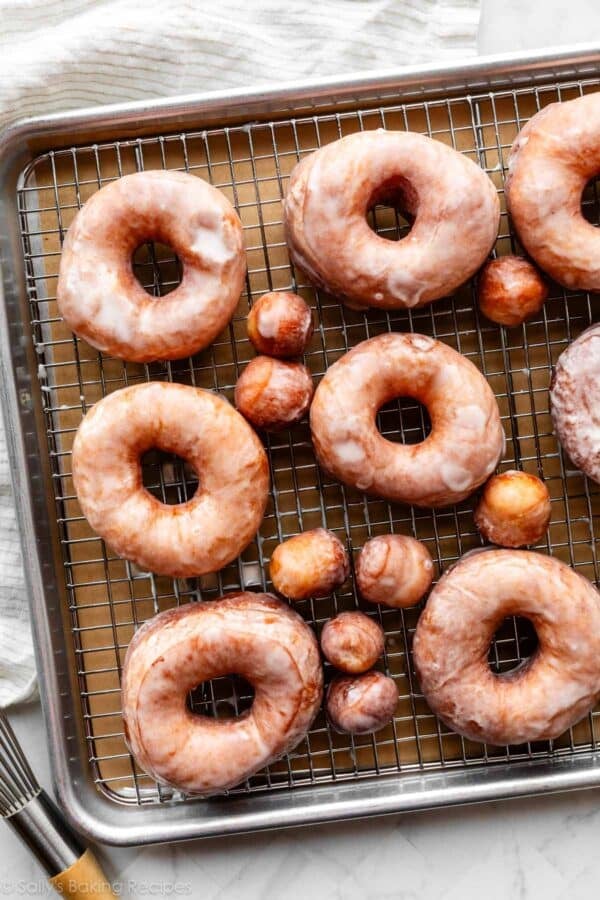
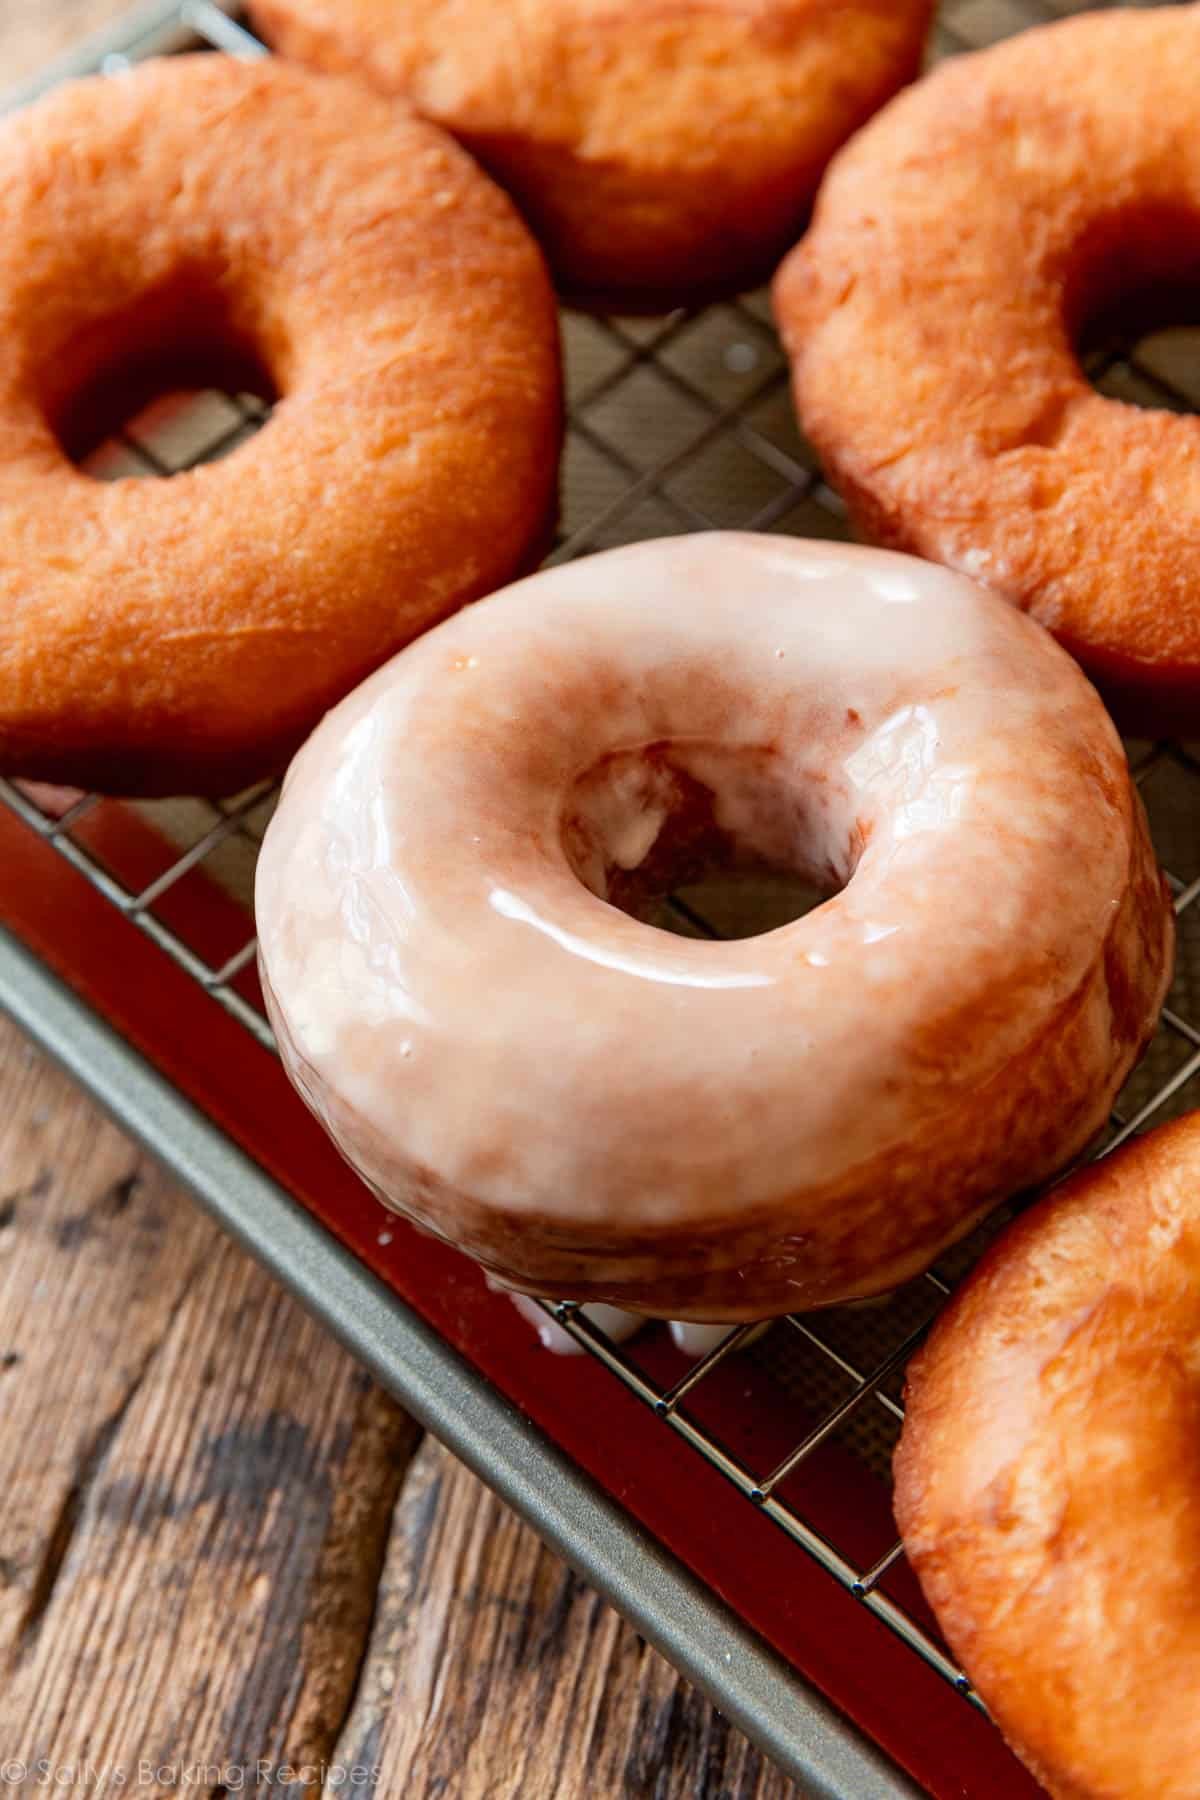
Fry the doughnuts. Working with 2-3 doughnuts at a time, cook dinner for 1 minute on either side. Fastidiously take away from the oil and place onto ready rack. Repeat with remaining doughnuts. (See my recipe notice about making the doughnut holes.)
Easy methods to Make the Glaze for Donuts
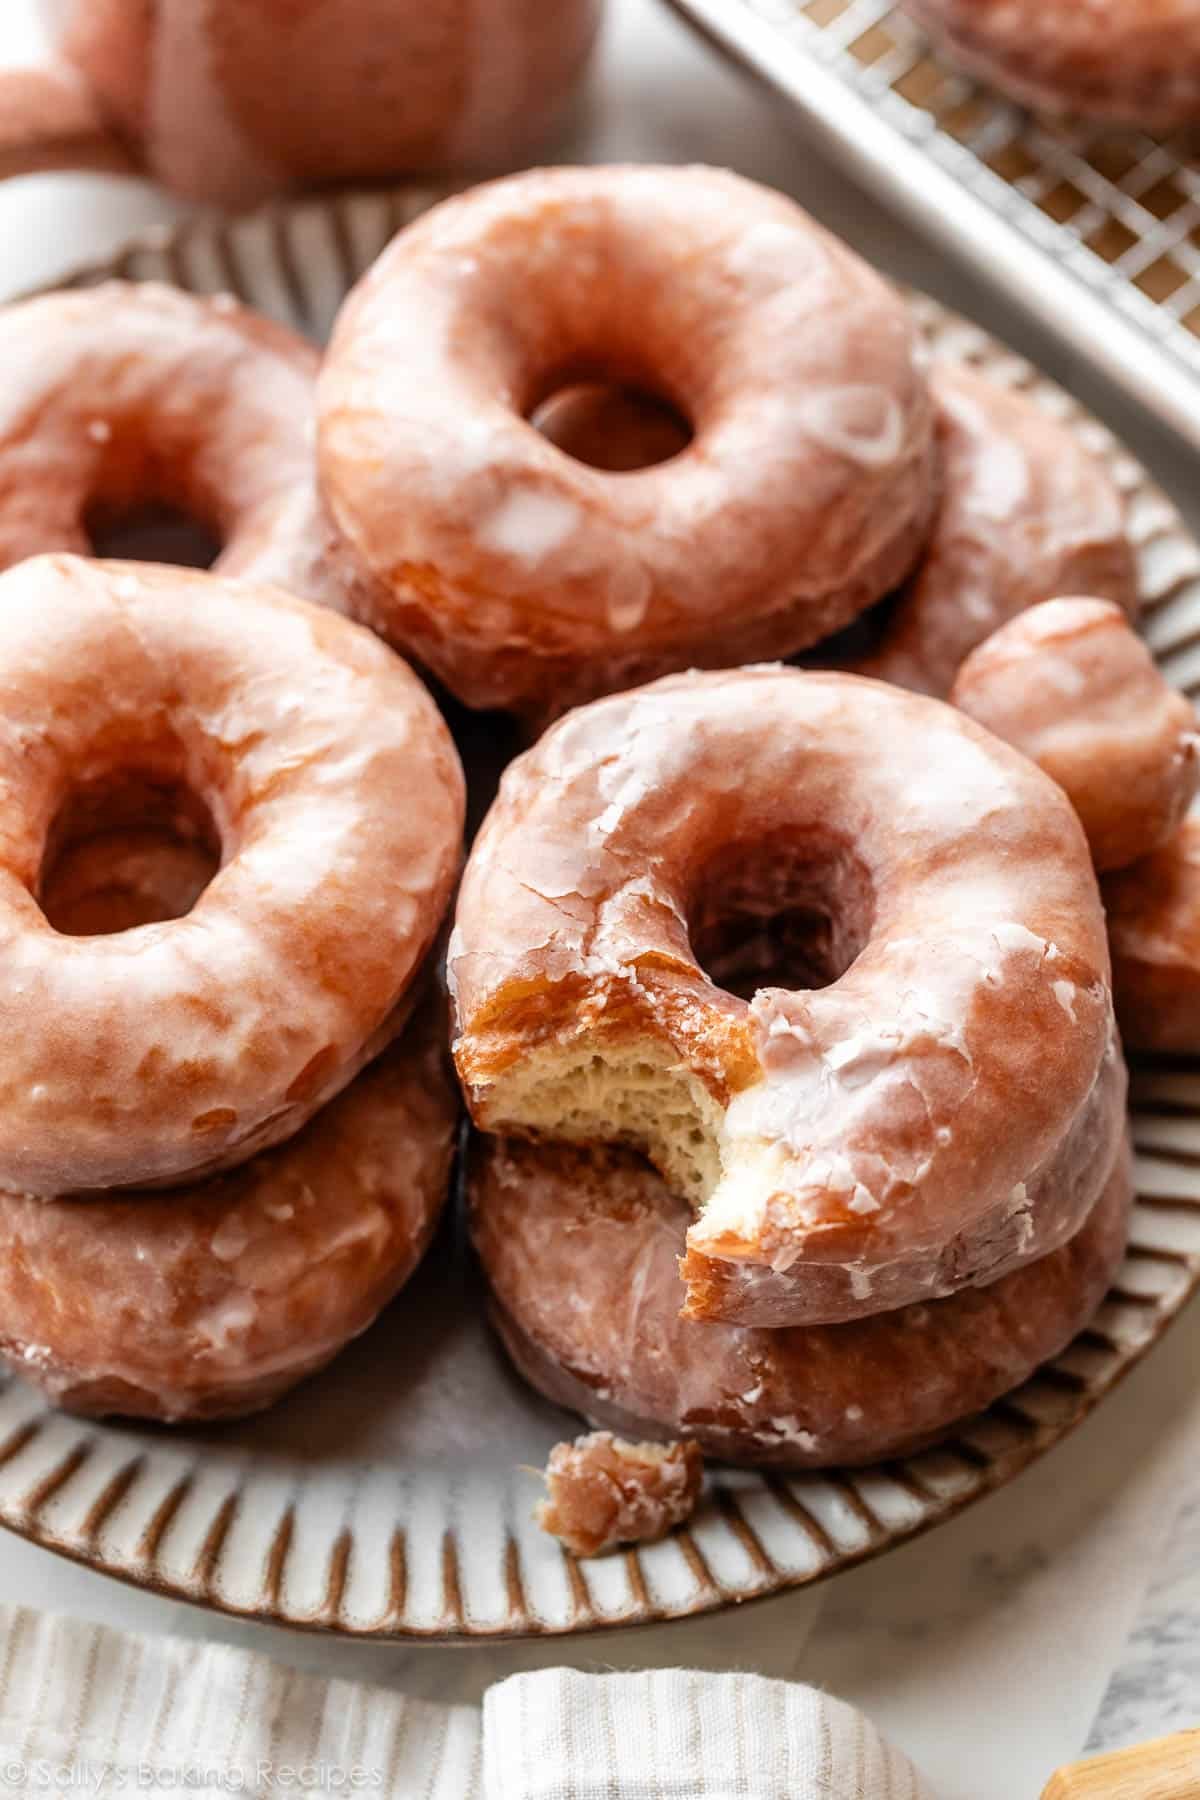
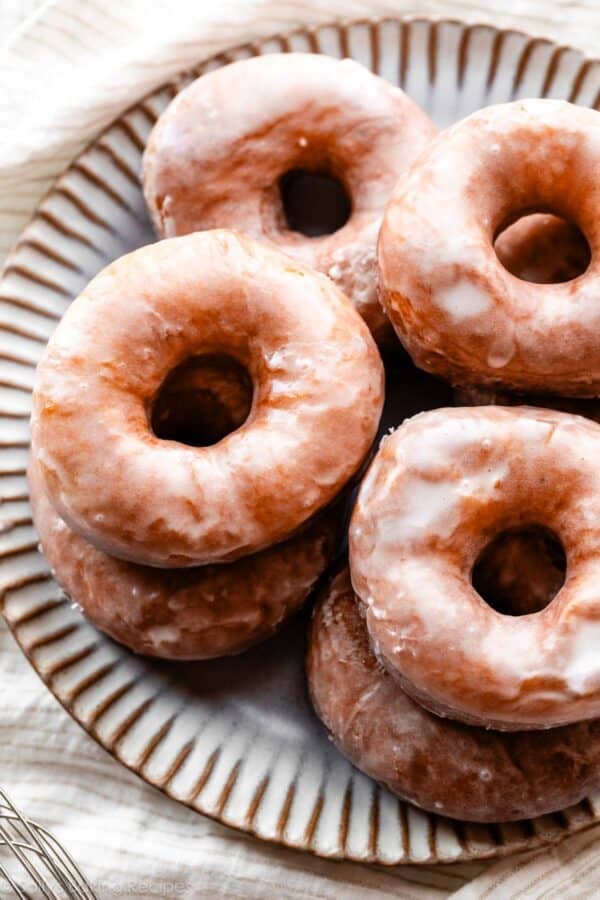
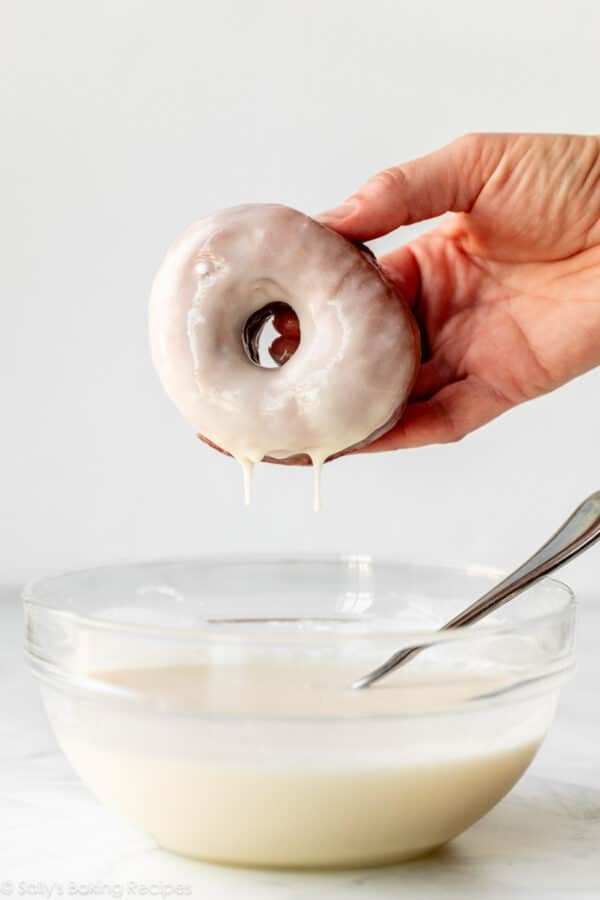
Make a easy 3-ingredient glaze—simply milk, confectioners’ sugar, and vanilla extract. This half couldn’t be simpler; actually simply whisk the three elements collectively. Dunk either side of the nice and cozy doughnuts into the glaze. After about 20 minutes, the glaze will set.
Searching for different flavors? Strive my strawberry, chocolate, and vanilla donut frostings.
This Dough is Greatest for Frying
I don’t suggest baking this dough—this dough is finest for frying in oil. For those who’re on the lookout for a baked donut, attempt crumb cake donuts, pumpkin donuts, cinnamon sugar donuts, or lemon poppy seed donuts as a substitute. Listed below are all of my donut recipes.
Sure, completely. You’ll want a 3-inch biscuit or doughnut cutter and not using a gap within the middle. Use the dough recipe beneath. Scale back the oil temperature to 350°F (177°C). Fry doughnuts for 1.5-2 minutes on either side, ensuring to decrease the range’s temperature if the oil begins to get too sizzling. Let donuts cool for 5-10 minutes earlier than filling. Jams or the pastry cream from this Boston cream pie are glorious fillings! Add filling to a piping bag fitted with an extended tip comparable to Ateco 230. Insert the piping tip into the doughnut and fill till the doughnut feels heavy.

Home made Glazed Doughnuts
Prep Time: 1 hour, 50 minutes
Prepare dinner Time: 10 minutes
Complete Time: 2 hours
Yield: 12 donuts and 12 holes
Class: Breakfast
Methodology: Frying
Delicacies: American
Description
Making do-it-yourself glazed doughnuts is simpler than you assume, however requires a bit persistence. Prepared in about 2.5 hours, these style like doughnuts out of your favourite bakery, however they’re made within the consolation of your individual house. For doughnut success, comply with my step-by-step pictures, useful success ideas, and video tutorial beneath.
Directions
- Put together the dough: Whisk the nice and cozy milk, yeast, and 1 Tablespoon sugar collectively within the bowl of your stand mixer. Loosely cowl and permit to sit down for five–10 minutes till foamy and frothy on prime. *If you don’t personal a stand mixer, you are able to do this in a big mixing bowl and within the subsequent step, combine the dough along with a big wood spoon/rubber spatula. It’s going to take a little bit of arm muscle. A hand mixer works, however the sticky dough repeatedly will get caught within the beaters. Mixing by hand with a wood spoon or rubber spatula is a better option.*
- Add the remaining sugar, the eggs, butter, vanilla, nutmeg, salt, and a couple of cups (round 250g) flour. Beat on low pace for 1 minute. Scrape down the edges of the bowl with a rubber spatula as wanted. Add remaining flour and beat on medium pace till the dough comes collectively and pulls away from the edges of the bowl, about 2 minutes. If wanted, add extra flour, 1 Tablespoon at a time, till the dough pulls away from the edges of the bowl. Don’t add an excessive amount of flour, although. You desire a barely sticky dough.
- Knead the dough: Hold the dough within the mixer and beat for an extra 5-7 minutes or knead by hand on a frivolously floured floor for 5-7 minutes. After kneading, the dough ought to nonetheless really feel a bit comfortable. Poke it together with your finger—if it slowly bounces again, your dough is able to rise. If not, hold kneading.
- Let Dough Rise: Frivolously grease a big bowl with oil or nonstick spray. Place the dough within the bowl, turning it to coat all sides within the oil. Cowl the bowl and permit the dough to rise in a comparatively heat atmosphere for 1.5-2 hours or till double in dimension. (For a tiny discount in rise time, see my reply to The place Ought to Dough Rise? in my Baking with Yeast Information.)
- Form Doughnuts: When the dough is prepared, punch it right down to launch the air. Take away dough from the bowl and switch it out onto a frivolously floured floor. Utilizing a rolling pin, roll the dough out till it’s 1/2 inch thick. Utilizing a 3-3.5 inch doughnut cutter, minimize into doughnuts. Re-roll the scraps and minimize extra. *For those who don’t have a doughnut cutter, you should utilize 1 massive + 1 smaller circle cookie cutter (massive ought to be about 3 and 1/2 inches).
- Line 1 or 2 baking sheets with parchment paper or silicone baking mats. Place doughnuts and doughnut holes on every. Loosely cowl and permit to relaxation for half-hour as you warmth the oil. They may rise a bit as they relaxation. Place a cooling rack over one other baking sheet.
- Pour oil into a big heavy-duty pot fitted with an oil thermometer. Flip range on to medium warmth. Warmth oil to 375°F (191°C). Add 2-3 doughnuts at a time and cook dinner for 1 minute on either side. Fastidiously take away with a steel spatula or steel slotted spoon. Remember to decrease range’s temperature if oil temperature is rising; you need it to remain at 375°F (191°C). Put on kitchen gloves if oil is splashing. Place fried doughnuts onto ready rack. Repeat with remaining doughnuts, then flip off warmth.* (See notice for doughnut holes.)
- Make the glaze: Whisk the entire glaze elements collectively. Dip every heat doughnut (don’t look forward to them to chill!) into the glaze, ensuring to coat each side. Place again onto ready rack as extra glaze drips down. After about 20 minutes, the glaze will set.
- Doughnuts are finest loved the identical day. You possibly can retailer in an hermetic container at room temperature or within the fridge for 1-2 additional days.
Notes
- Freezing Directions: Put together recipe by step 5. Freeze formed doughnuts for as much as 3 months. On the day you serve them, let the doughnuts thaw and relaxation at room temperature for about 4-5 hours. Fry as directed. You can too freeze the fried doughnuts (unglazed). Enable them to chill fully, then freeze for as much as 3 months. Thaw within the fridge or at room temperature, then reheat as desired (microwave is nice) and dunk in glaze.
- In a single day Directions: Full dough by step 3. As a substitute of permitting to rise in a heat atmosphere in step 4, place the lined dough into the fridge in a single day (8-12 hours). The following morning, take away from the fridge and permit to rise in a heat atmosphere till doubled. The dough will frivolously rise within the fridge in a single day, so the rise the following morning received’t be too lengthy. After rising, proceed with step 5.
- Particular Instruments (affiliate hyperlinks): Electrical Stand Mixer | Giant Heavy Bottomed Pot or Dutch Oven | Excessive-Warmth Thermometer (I like this thermometer, too) | 3-3.5-inch Doughnut Cutter (I like this one and this one) | Baking Sheets | Silicone Baking Mats or Parchment Paper | Metallic Slotted Spatula | Cooling Rack | Glass Mixing Bowl | Whisk
- Doughnut Holes: Add holes to sizzling oil and fry till golden, about 30 seconds, on either side.
- Milk: Entire milk is a should for essentially the most tender dough—or you possibly can attempt buttermilk. Decrease fats or nondairy milks work in a pinch, however the doughnuts aren’t as flavorful or wealthy.
- Yeast: If utilizing an immediate yeast, your rise time might be a bit shorter. Reference my Baking with Yeast Information for solutions to frequent yeast FAQs.
- Oil: The quantity of oil actually depends upon how broad or tall your pot is. You need oil to fill about 1/3 of the pot. I take advantage of a bit greater than 1 quart for my 4 and 1/2 quart Dutch oven.
- Leftover Oil: Don’t pour used oil down the sink drain. Enable to chill, then pour into an empty container and discard within the trash or reuse it.
- Tailored from Mark Bittman and Prime Pot Doughnuts
Key phrases: do-it-yourself doughnuts