

Learn to make enjoyable and festive pie crust designs that can take your selfmade pies to the subsequent degree with this easy-to-follow tutorial and video. Get your pie dough prepared!
I really like making pie. You understand this. However I didn’t simply get up someday and know the way to make one. My first makes an attempt at selfmade pie weren’t precisely cookbook cover-worthy. You need to know the toughest a part of making a selfmade pie? The toughest half is discovering the braveness to begin. And when you do, you’ll surprise why you didn’t start sooner. Nothing is extra satisfying than making a pie fully from scratch. Till, after all, you eat a slice.
However Sally… you is likely to be saying… my pies won’t ever prove fairly! To which I say, nonsense! 
The pie crust designs on this web page look fairly {and professional} as a result of I’ve practiced a lot over time. All of us have to begin someplace, and work our approach as much as creative pie masterpieces. All you want is the willingness to apply, and a very good tutorial. Should you’re prepared to supply the previous, I’ve acquired you on the latter. You CAN do that. Learn the step-by-step directions and watch the video tutorial under, then energy up your confidence and flour up your arms.
Right here’s What You’ll Discover on This Web page
- The Greatest Pie Crust to Use
- 5 Success Ideas for Pie-fection
- Instruments You’ll Want
- My 4 Favourite Pie Crust Designs
- Recipe Card Video Tutorial
- 3 Extra Designs Beneath the Recipe
The Greatest Pie Crust to Use
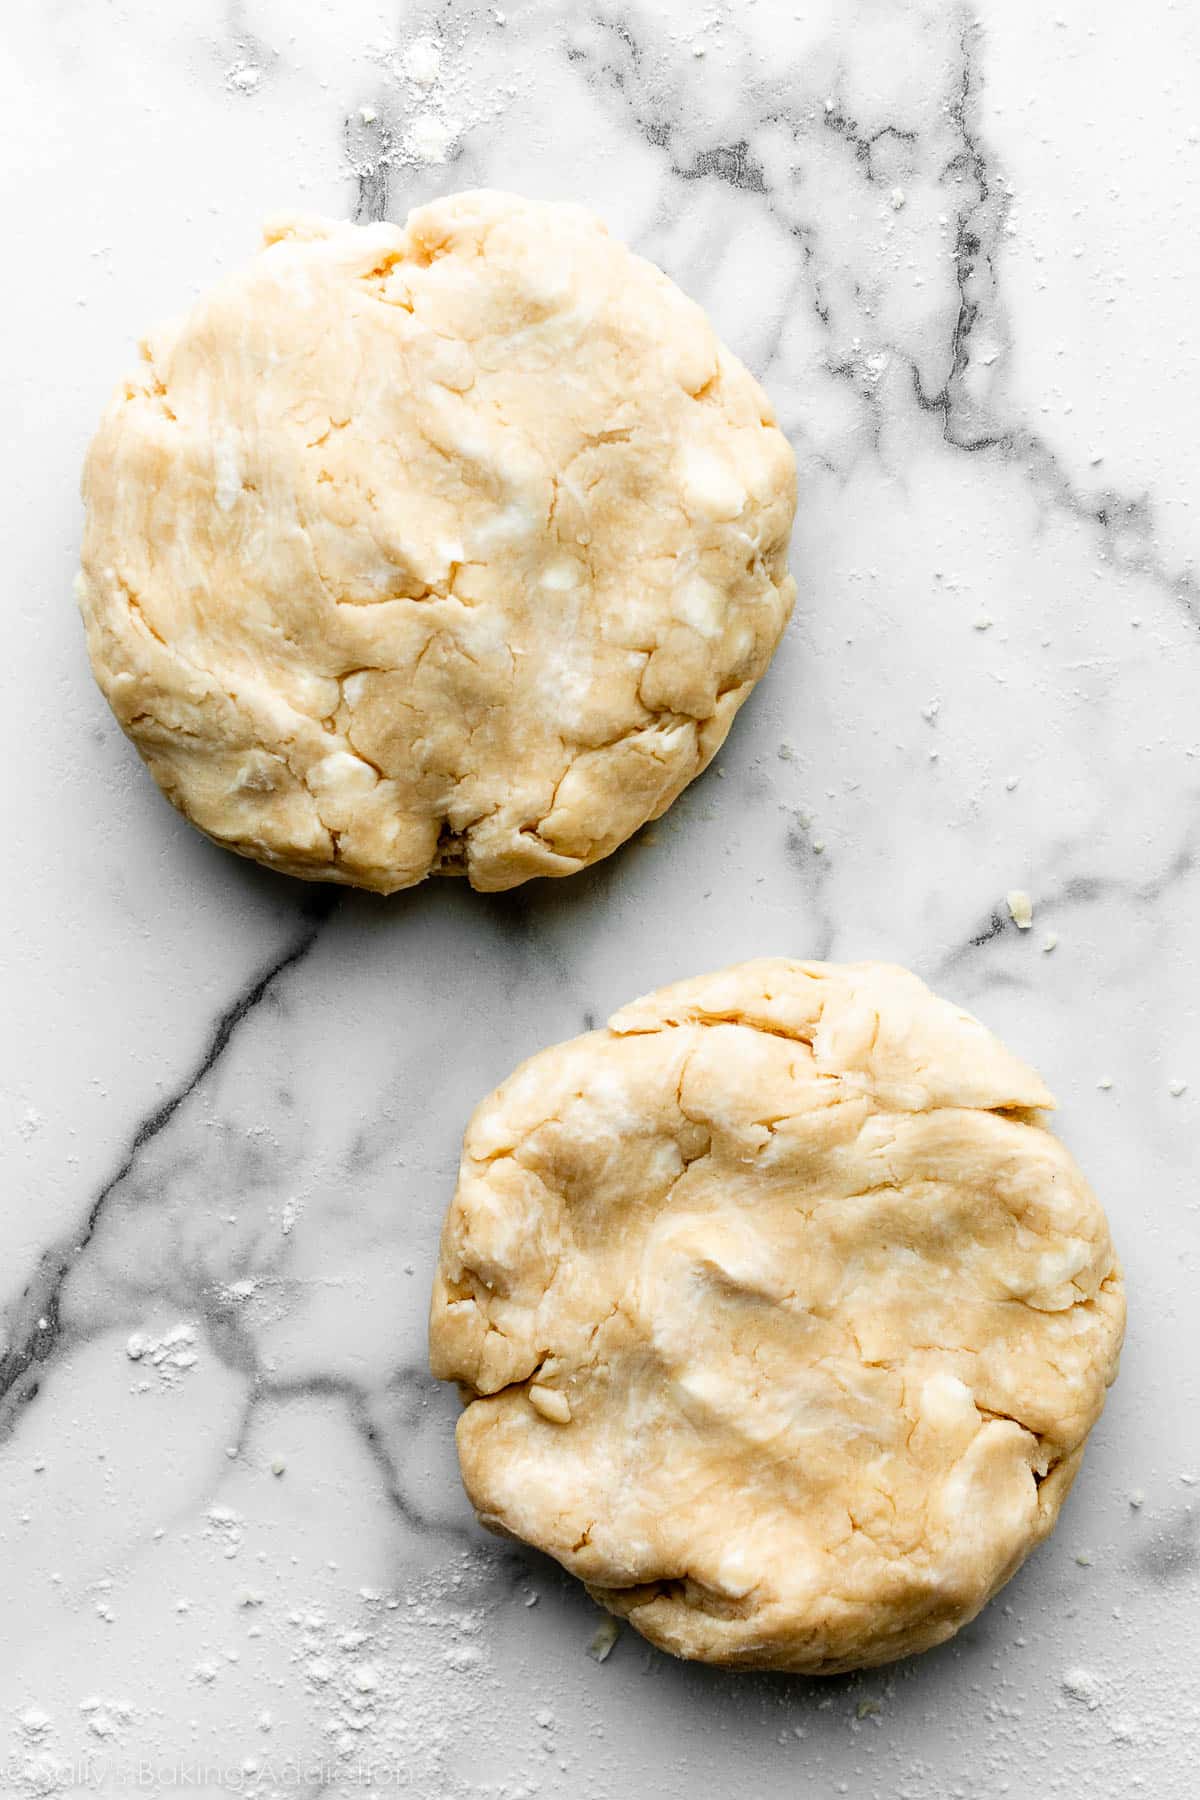
That is my favourite, tried-and-true pie crust. It’s buttery, flaky, and holds its form within the oven. However in the event you favor an all butter pie crust or need to use store-bought dough, that’s wonderful too.
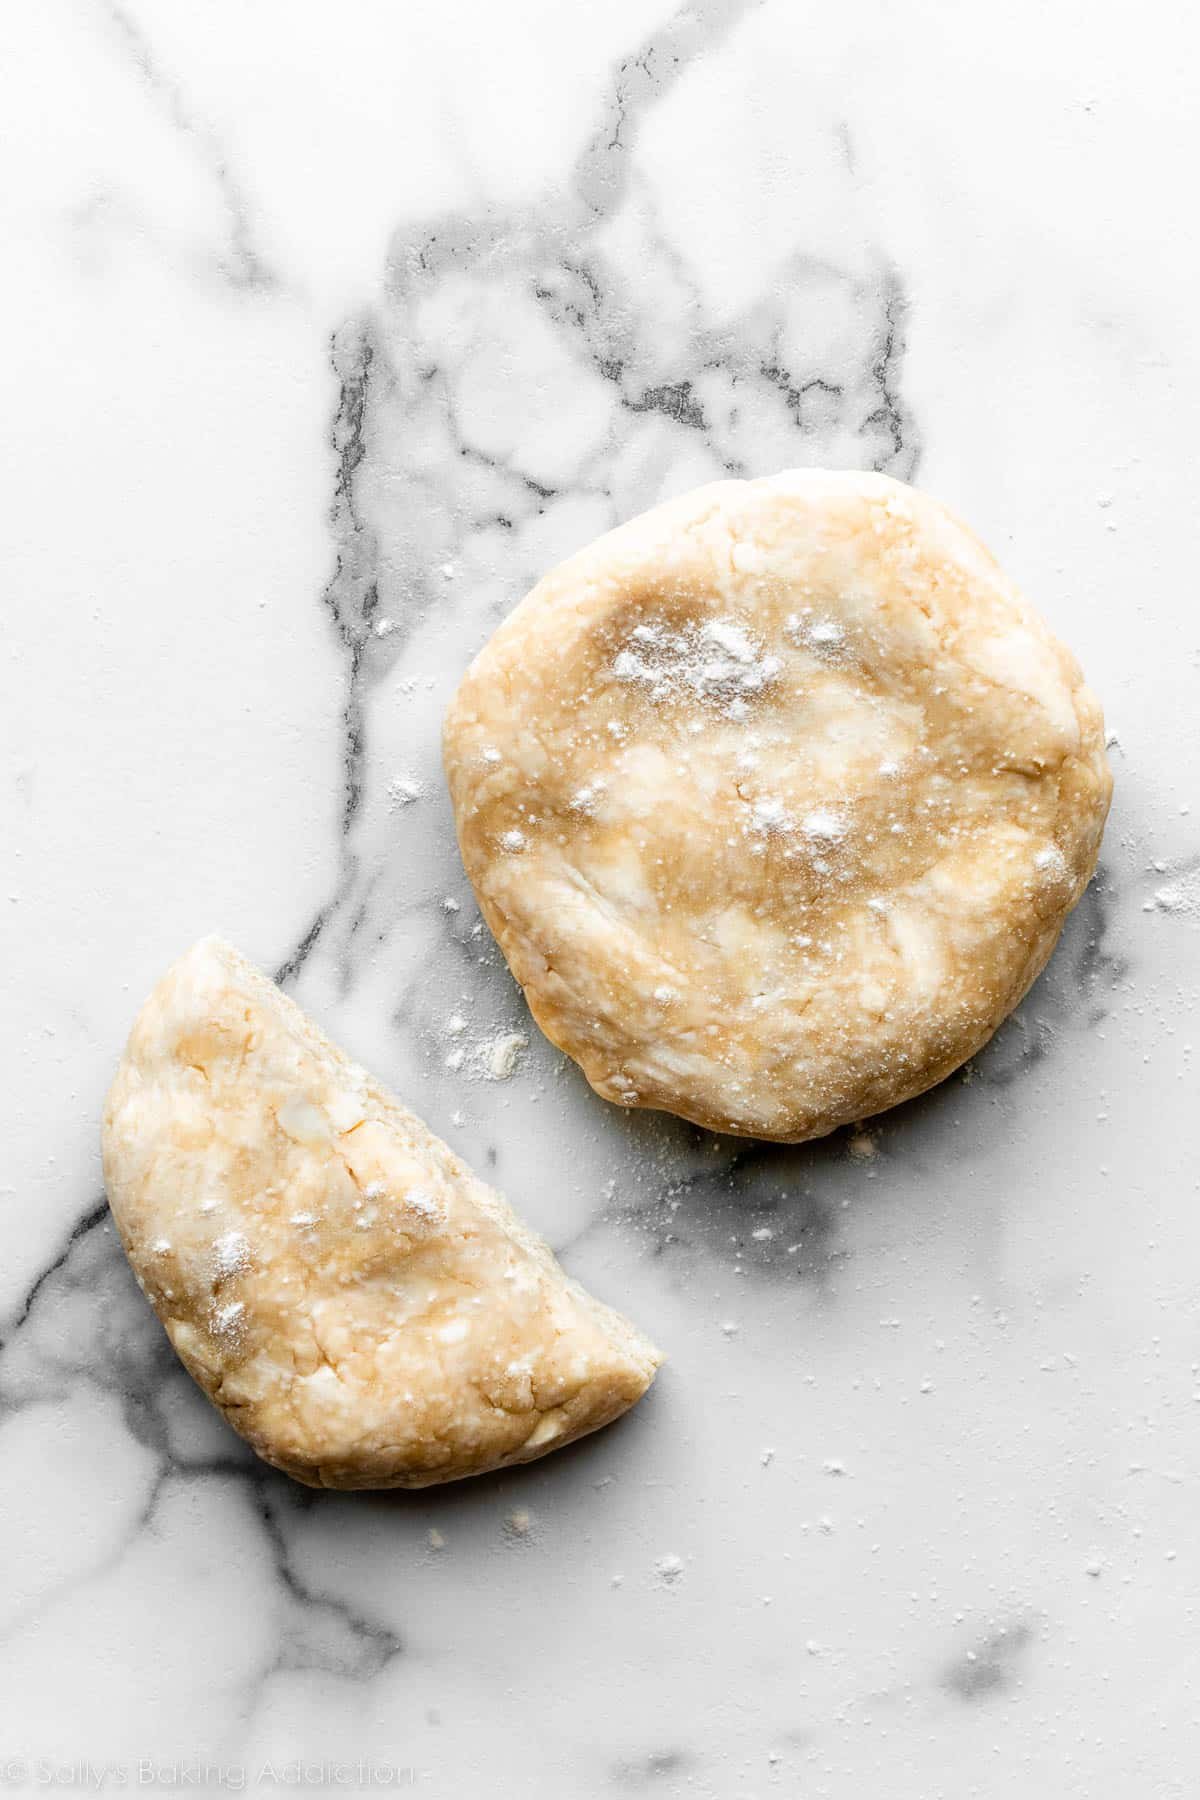
Each of the above linked pie crust recipes make 2 pie dough discs, which is sufficient dough for two pie crusts—both for a double-crust pie or for two separate backside crusts (like in the event you had been making 2 pumpkin pies). The pie dough discs want to sit back for a pair hours, so I all the time make them a day forward.
Earlier than I present you 4 distinctive pie crust designs and stroll you thru the strategies, listed here are 5 ideas that can enable you to choose up that rolling pin.
5 Success Ideas for Pie-fection
1. The toughest half is discovering the braveness to begin.
It’s time for one more pie pep speak! Like I discussed earlier than, the toughest half about working with selfmade pie dough is definitely mustering up the braveness to work with selfmade pie dough. It’s simple to withstand one thing if it intimidates you, however one thing (something!) has to begin someplace, proper? Such is the case with practically any objective or dream we’ve. You’ll apply, it’s going to really feel daunting, you’ll apply some extra, you’ll enhance, you’ll succeed. YOU CAN DO THIS!
2. Use a top quality pie crust.
You’re prepared to start making pies from scratch, so don’t sabotage your efforts with a lackluster crust. Pie crust is actually 3 issues: flour, fats, liquid. It’s the kinds of every and the ratios that make an actual distinction. My beloved pie crust recipe hits the mark. I combine butter and shortening collectively for the perfect taste and texture.
3. Hold all the pieces COLD.
Preserving your pie dough as chilly as attainable helps stop the fats from melting. If the butter melts contained in the dough earlier than baking, your pie crust will lose form within the oven. The perimeters will shrink down and, even worse, the crust will style greasy as a substitute of tender and flaky. Mainly any design you organized on high of the pie will shrivel up. Bear in mind this: the colder the pie is earlier than going into the oven, the higher your pie will style and the extra your pie crust will maintain its form. Hold your crammed pie within the fridge whilst you’re rolling out and chopping the dough for the highest. It’s also possible to place the finished unbaked pie again within the fridge earlier than placing it within the oven—a good suggestion in the event you’ve taken your time to make an intricate design and the dough has warmed up within the course of.
4. Add some sparkle and shine!
An egg wash—a easy mixture of milk (or water) and egg—creates that golden sheen we see on bakery pies AND it even provides the crust a bit of extra-crisp texture. With out the egg wash, the pie crust will brown however will look extraordinarily uninteresting. For a bit of sparkle, I all the time sprinkle pies with coarse sugar previous to baking. Offers the highest a stunning candy crunch and appears fairly, too.
5. Take your time and have enjoyable.
At all times take your time when working with pie dough. It’s not a race! Deal with the dough with a bit of TLC. You aren’t indignant on the pie dough (however possibly you’re LOL). Don’t roll it out too forcefully or rush by means of an ornamental topping. Put aside sufficient time to essentially think about it. Placed on some music or invite some buddies or household to affix you, and benefit from the course of. I promise it’s value it!
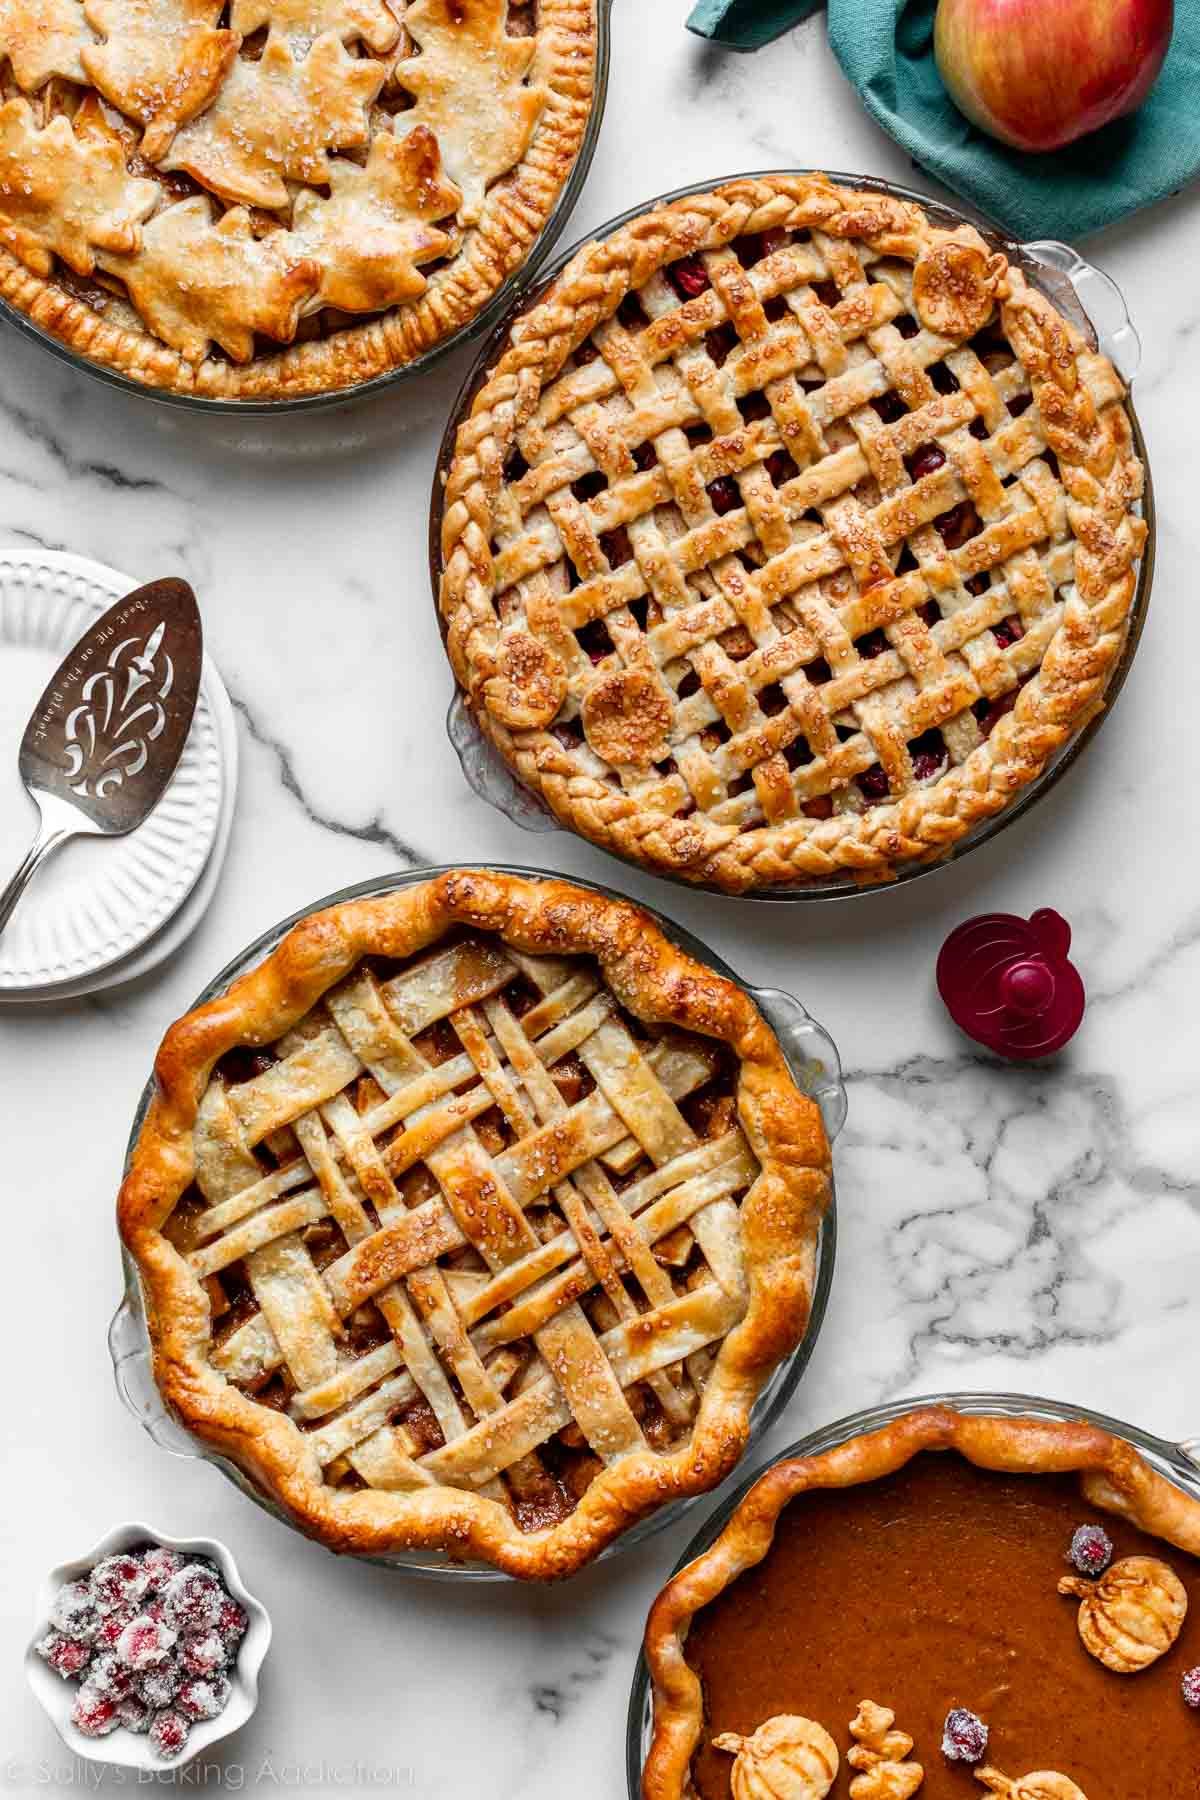
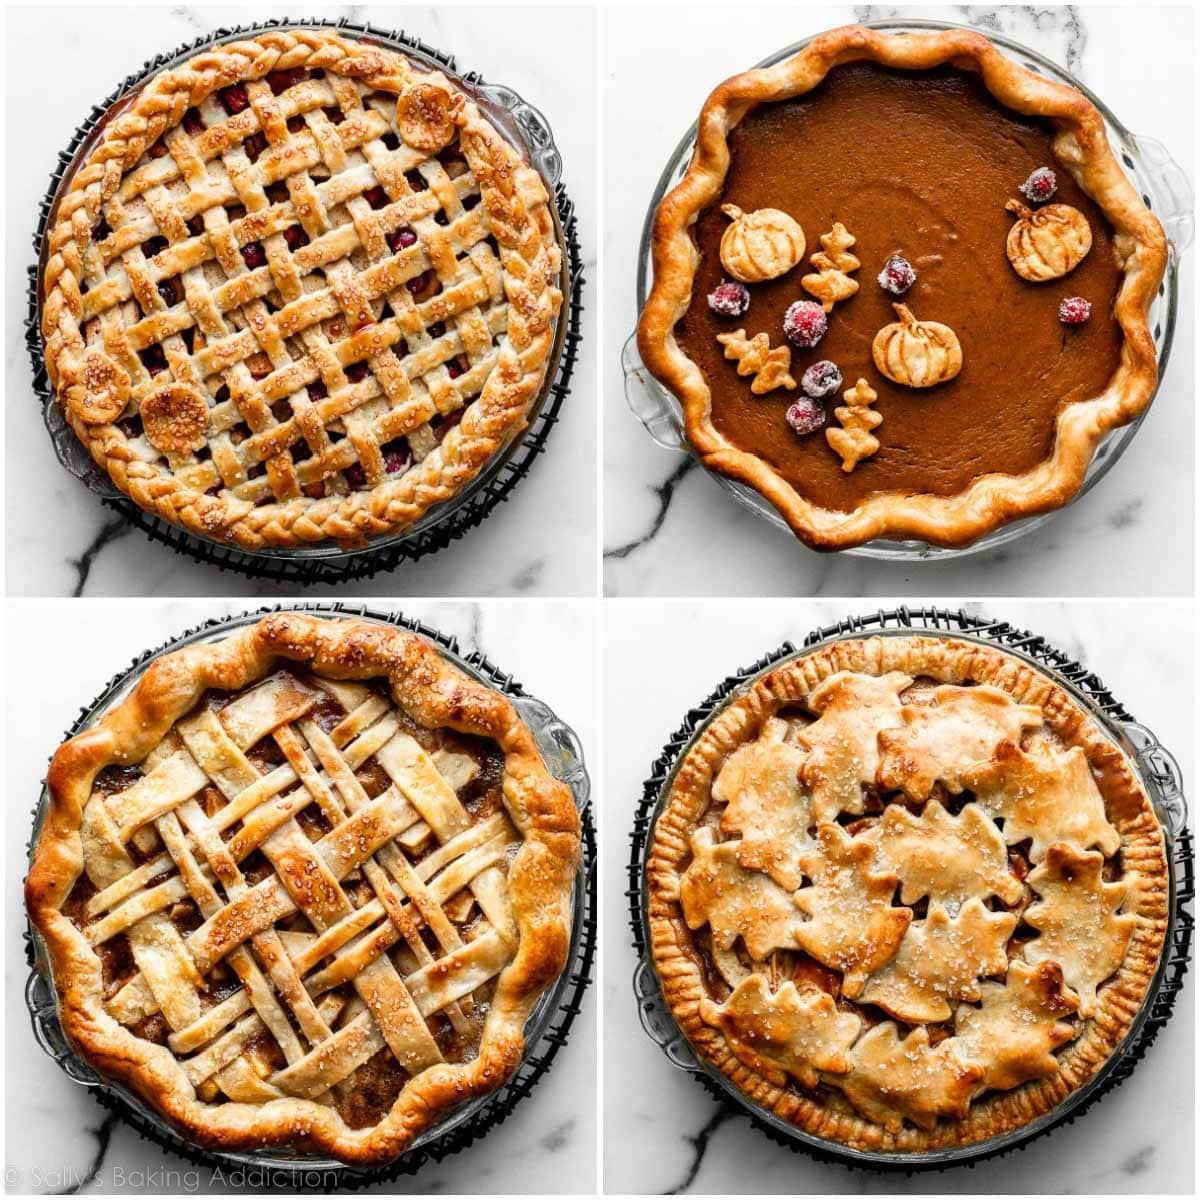
Listed here are the 4 pie crust designs I’m instructing you at this time:
Instruments You’ll Want
Every of those 4 completely different pie crust designs require a:
After you have your instruments and your backside crust crammed and prepared for a high crust, it’s time for the enjoyable half! These are my 4 favourite pie crust designs, and the way I make them. Observe: The video exhibits solely the primary 3 designs. I simply added the 4th design as a result of it’s very easy, but makes for a show-stopping presentation, particularly through the autumn months.
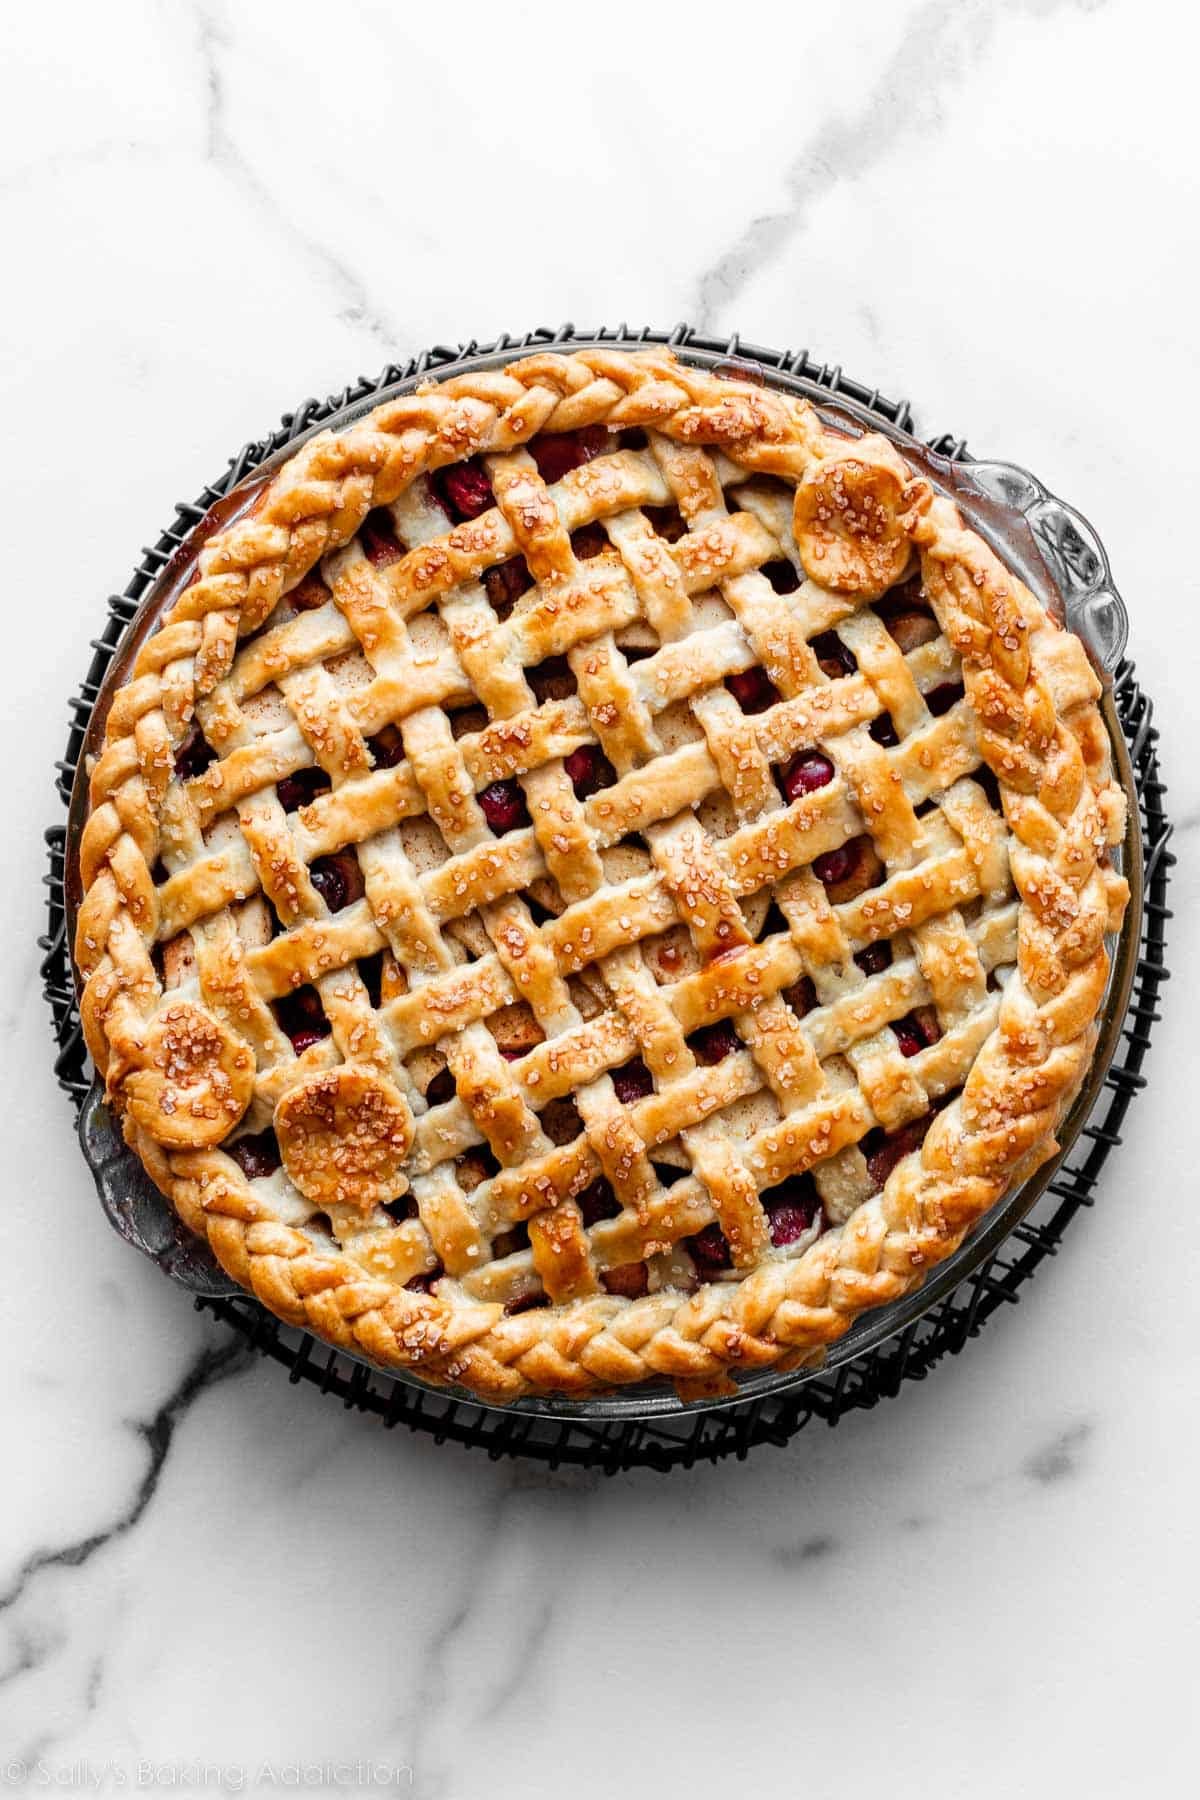
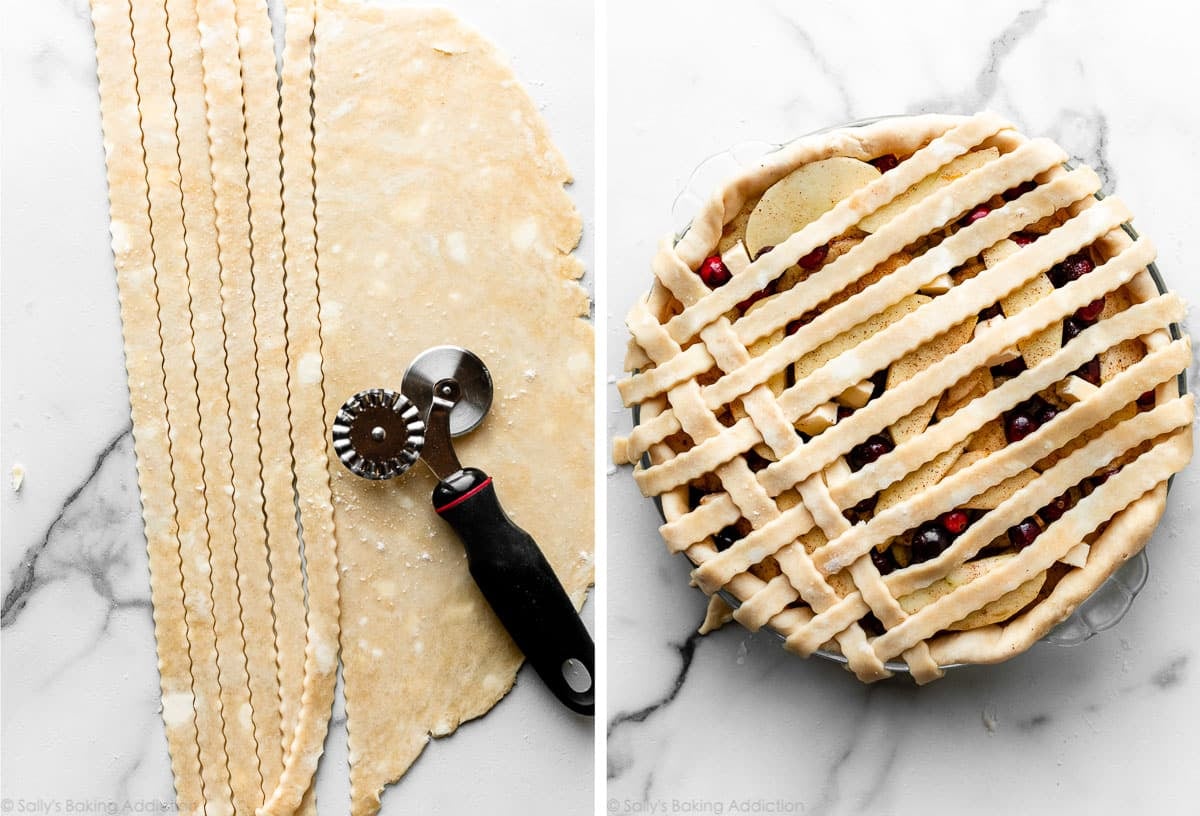
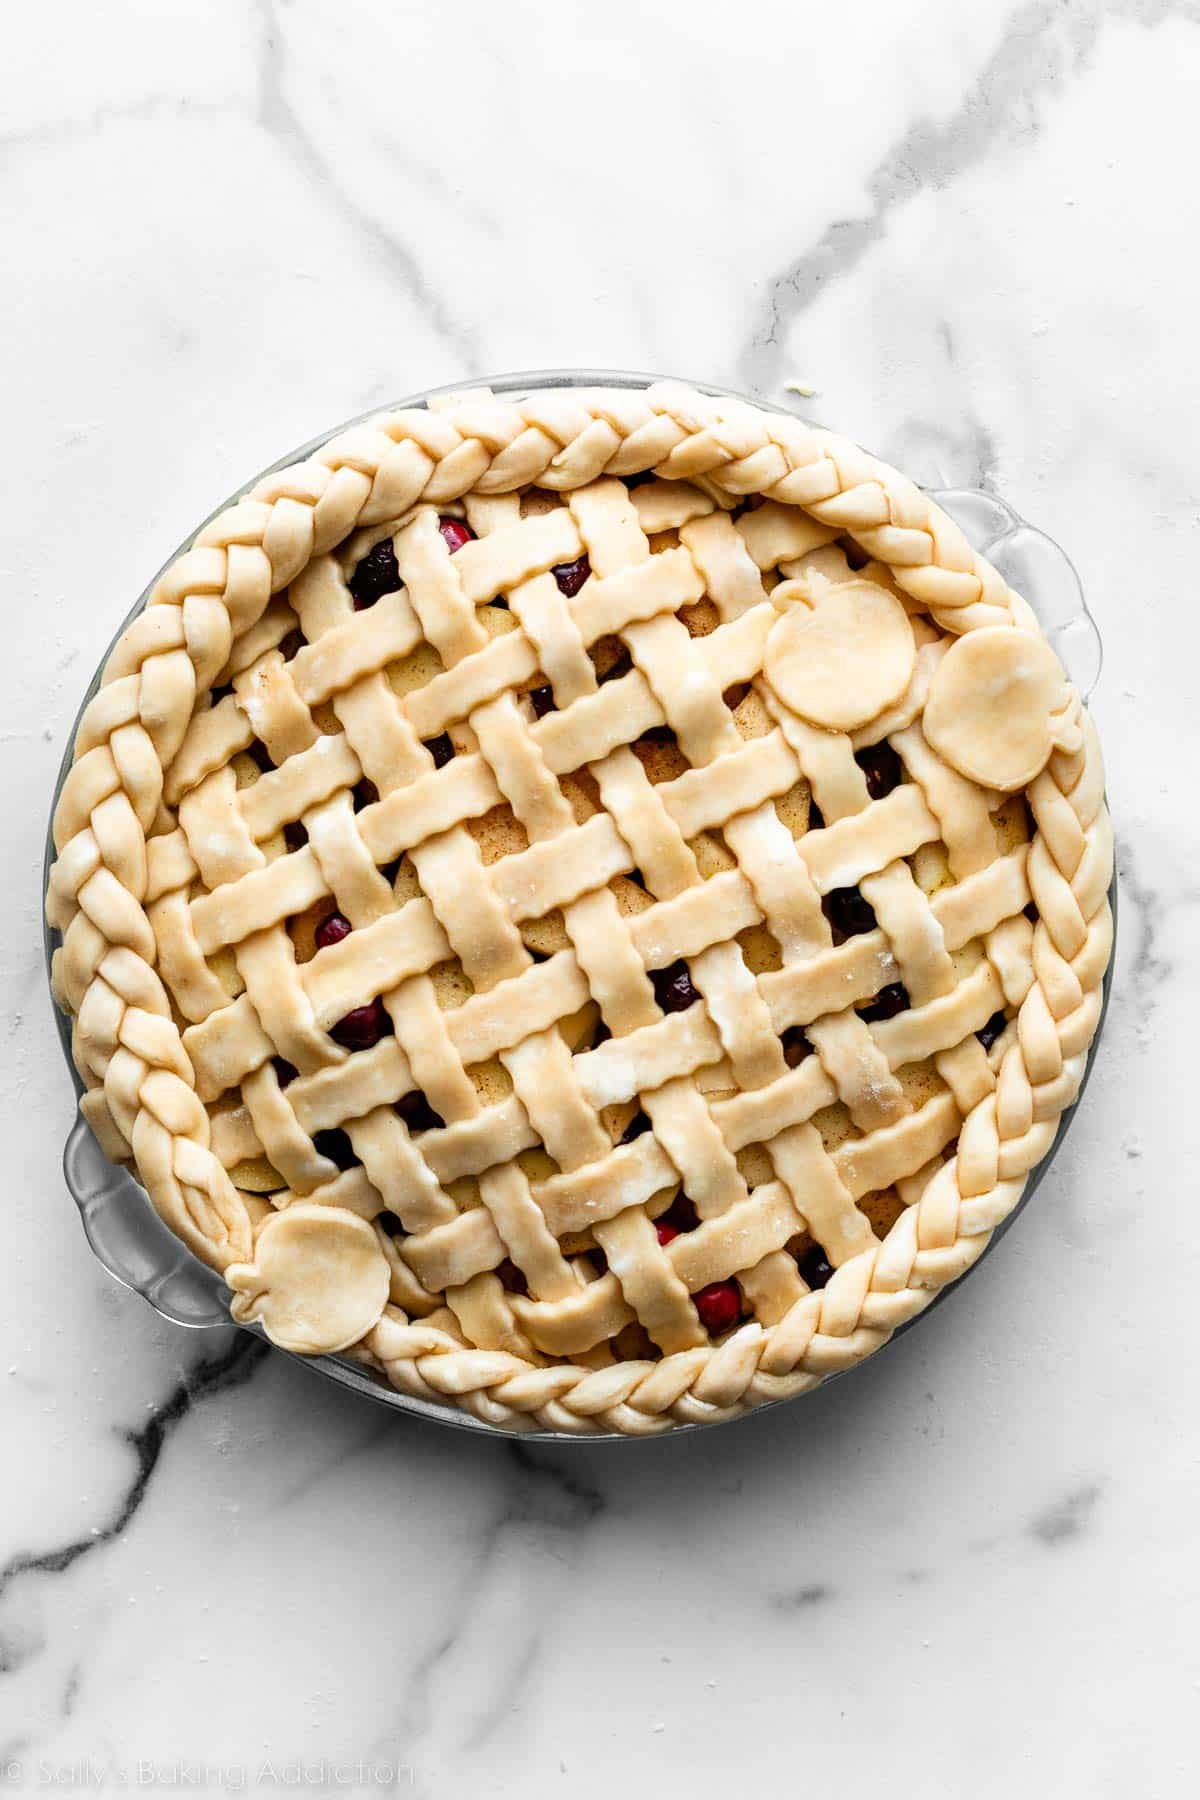
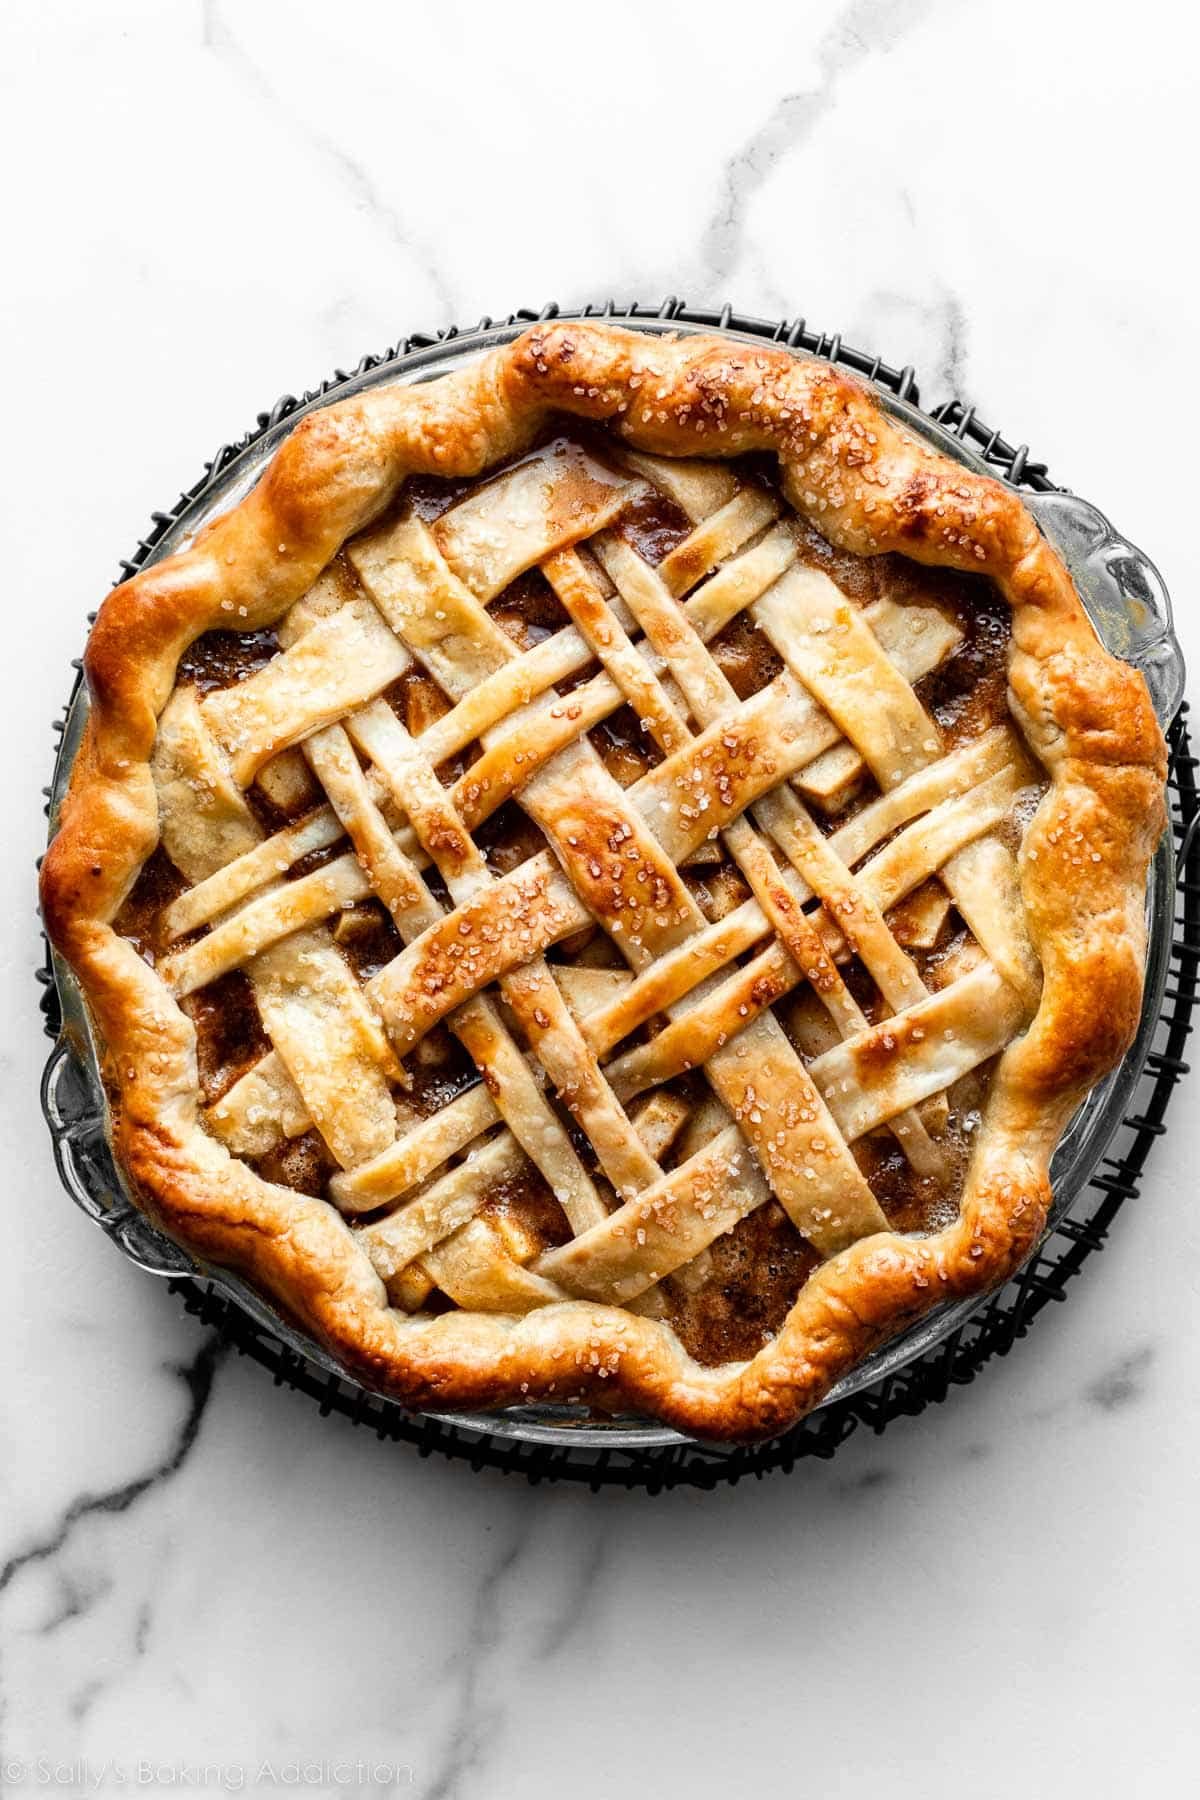
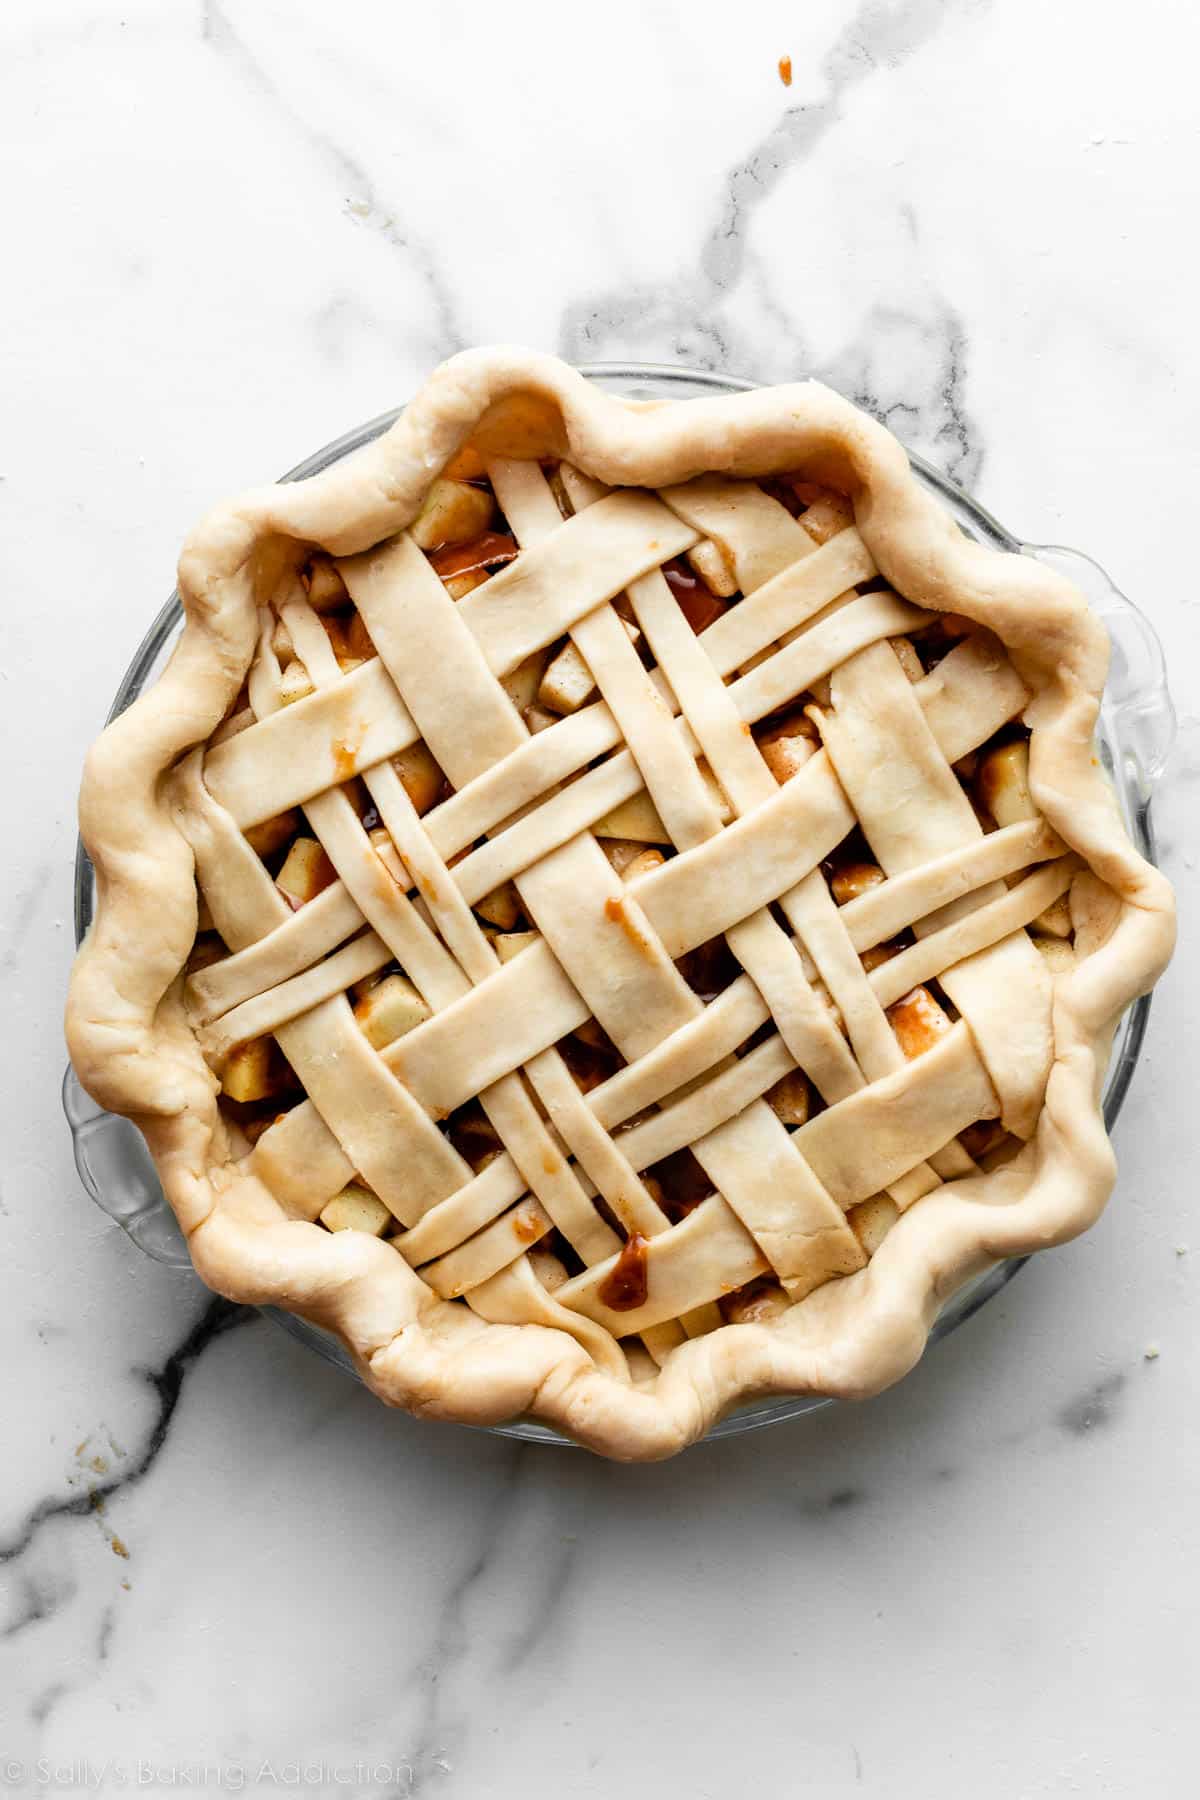
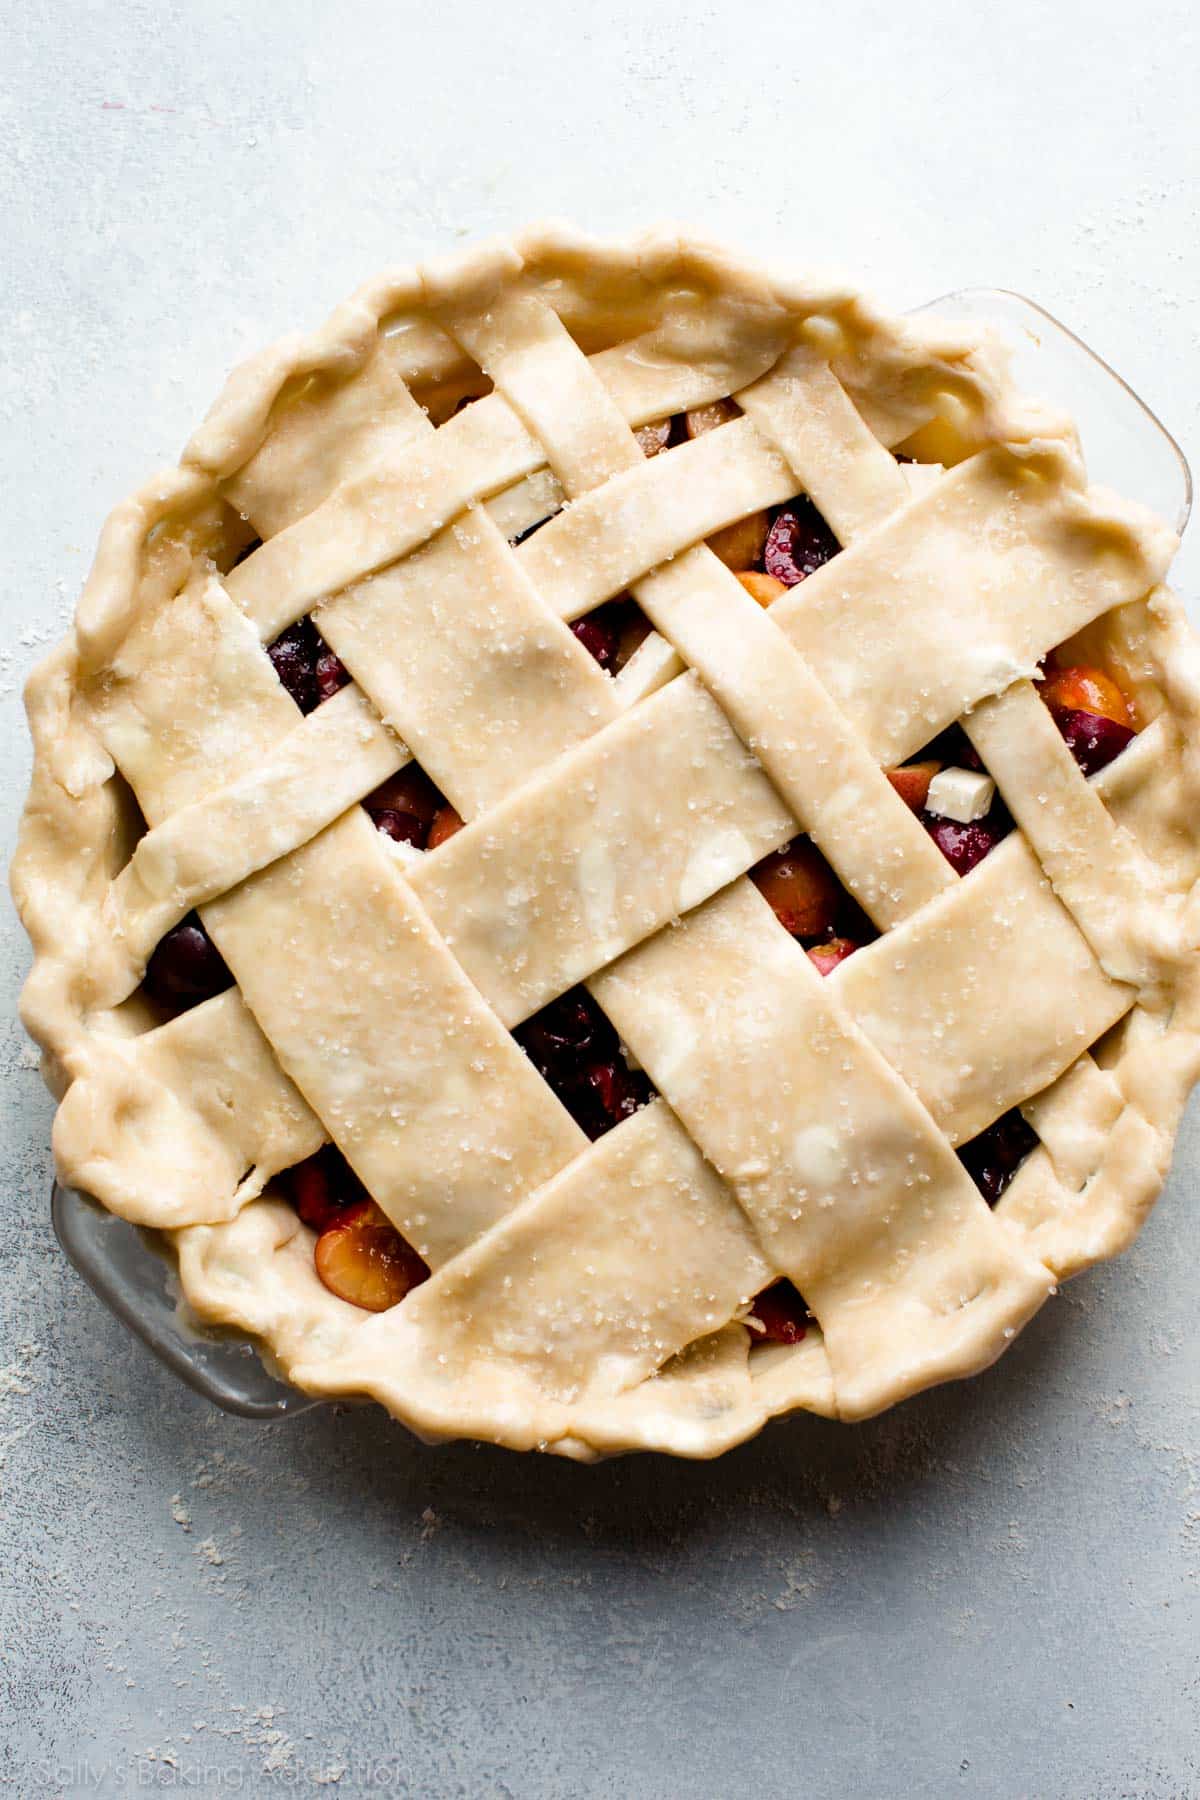
Wavy Lattice With Braided Edge
The pictured pie is my apple cranberry pie.
Right here’s what it’s good to make this pie crust design:
The fondant cutter is what you see me use within the video under, however the wavy facet of a pastry wheel can do the identical factor. A pastry wheel could be very useful as a result of you need to use the scalloped edge to make a reasonably wavy design, or you need to use the flat edge for a standard lattice pie crust. We’d like each a wavy cutter (for the lattice) and a flat cutter (for the braid strips) for this explicit pie design. I additionally used a pie punch so as to add apple shapes, however you need to use any cookie cutter or pie punch form.
This topping really requires 1.5 discs of dough, plus one other disc of dough for the underside crust. I like to recommend making the total pie crust recipe twice, so that you’ll have loads of dough to work with. Should you don’t use all of it, the discs of pie dough freeze superbly, for as much as 3 months, so it can save you them for a future pie.
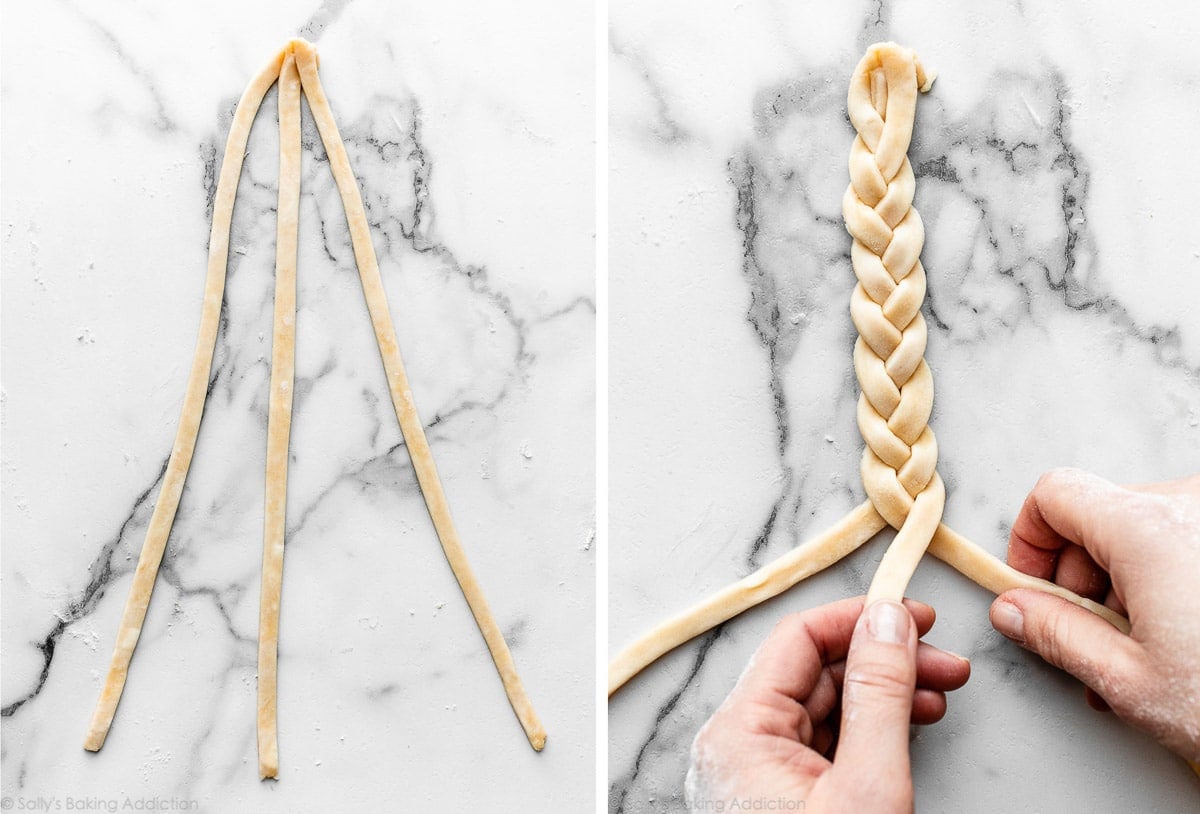
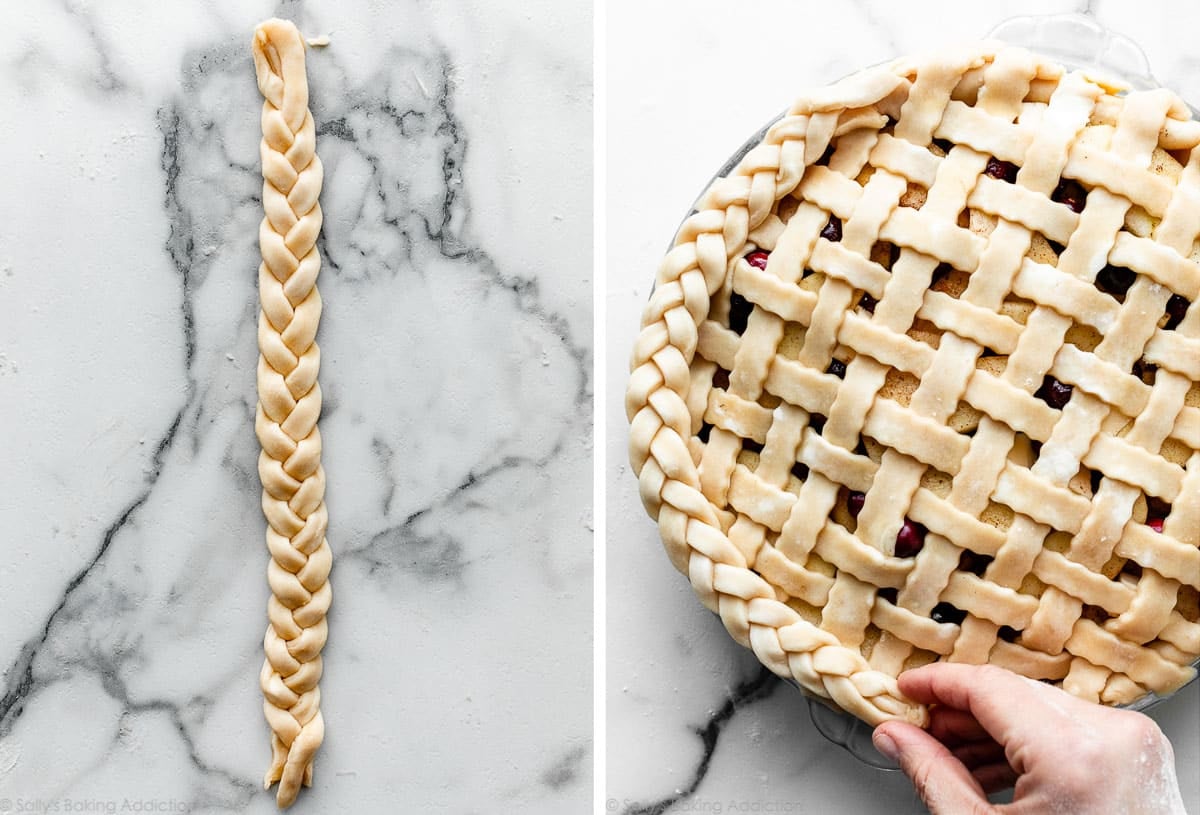
See the recipe card under for detailed written directions. We’re making a lattice pie crust topping and braided pie crust edge element. Design the lattice, after which trim extra dough across the edges. Make 2 braids, then press each across the fringe of the pie, urgent them gently into one another to safe. To cover the locations the place the braids join, place a dough cut-out form over them. (Sneaky!) End by brushing with egg wash and sprinkling with coarse sugar.
Listed here are my in-depth tutorials for the way to braid pie crust and the way to lattice pie crust.
Baked Cookie Cutter Shapes
This pie-decorating technique is completely different from the others since you’re going so as to add the ornamental pie crust topping to a completely baked and cooled pie, equivalent to brownie pie or chocolate chess pie, quite than an unbaked pie. The pictured pie is my favourite pumpkin pie. Right here’s what it’s good to make this pie crust design:
For the baked cookie cutter shapes design, you possibly can actually use any small cookie cutters. It’s also possible to search for impression pie punches, typically known as “plunger cookie cutters,” which make such lovely designs within the dough. I really like utilizing autumn-themed impression cutters to brighten pumpkin pie and candy potato pie. The precise set I personal is now not accessible, however there are many related ones, like these fall pie punches. These harvest impression cutters would additionally make attractive pie toppers, and sugar cookies, too!
Until you need to embellish your baked pie with MANY pie crust shapes, you actually don’t want a ton of dough for this. I often solely use 1/2 of a pie dough disc.
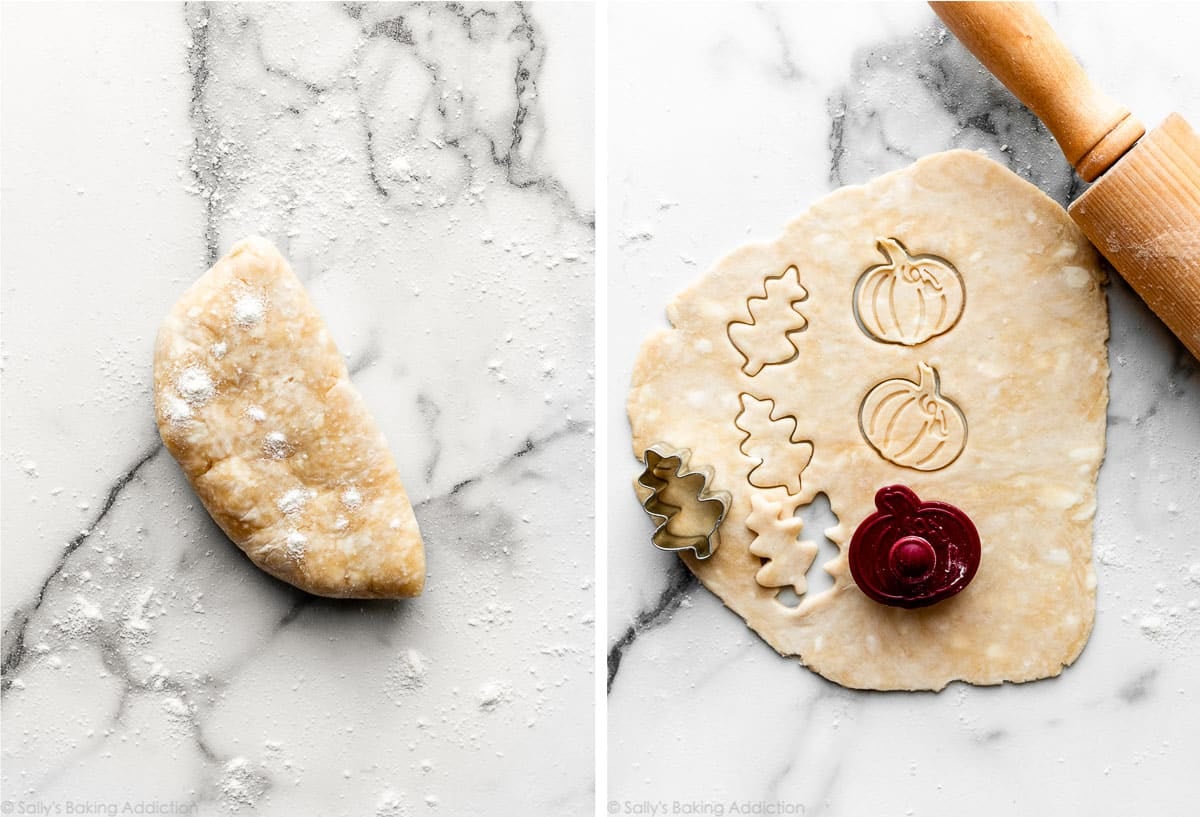
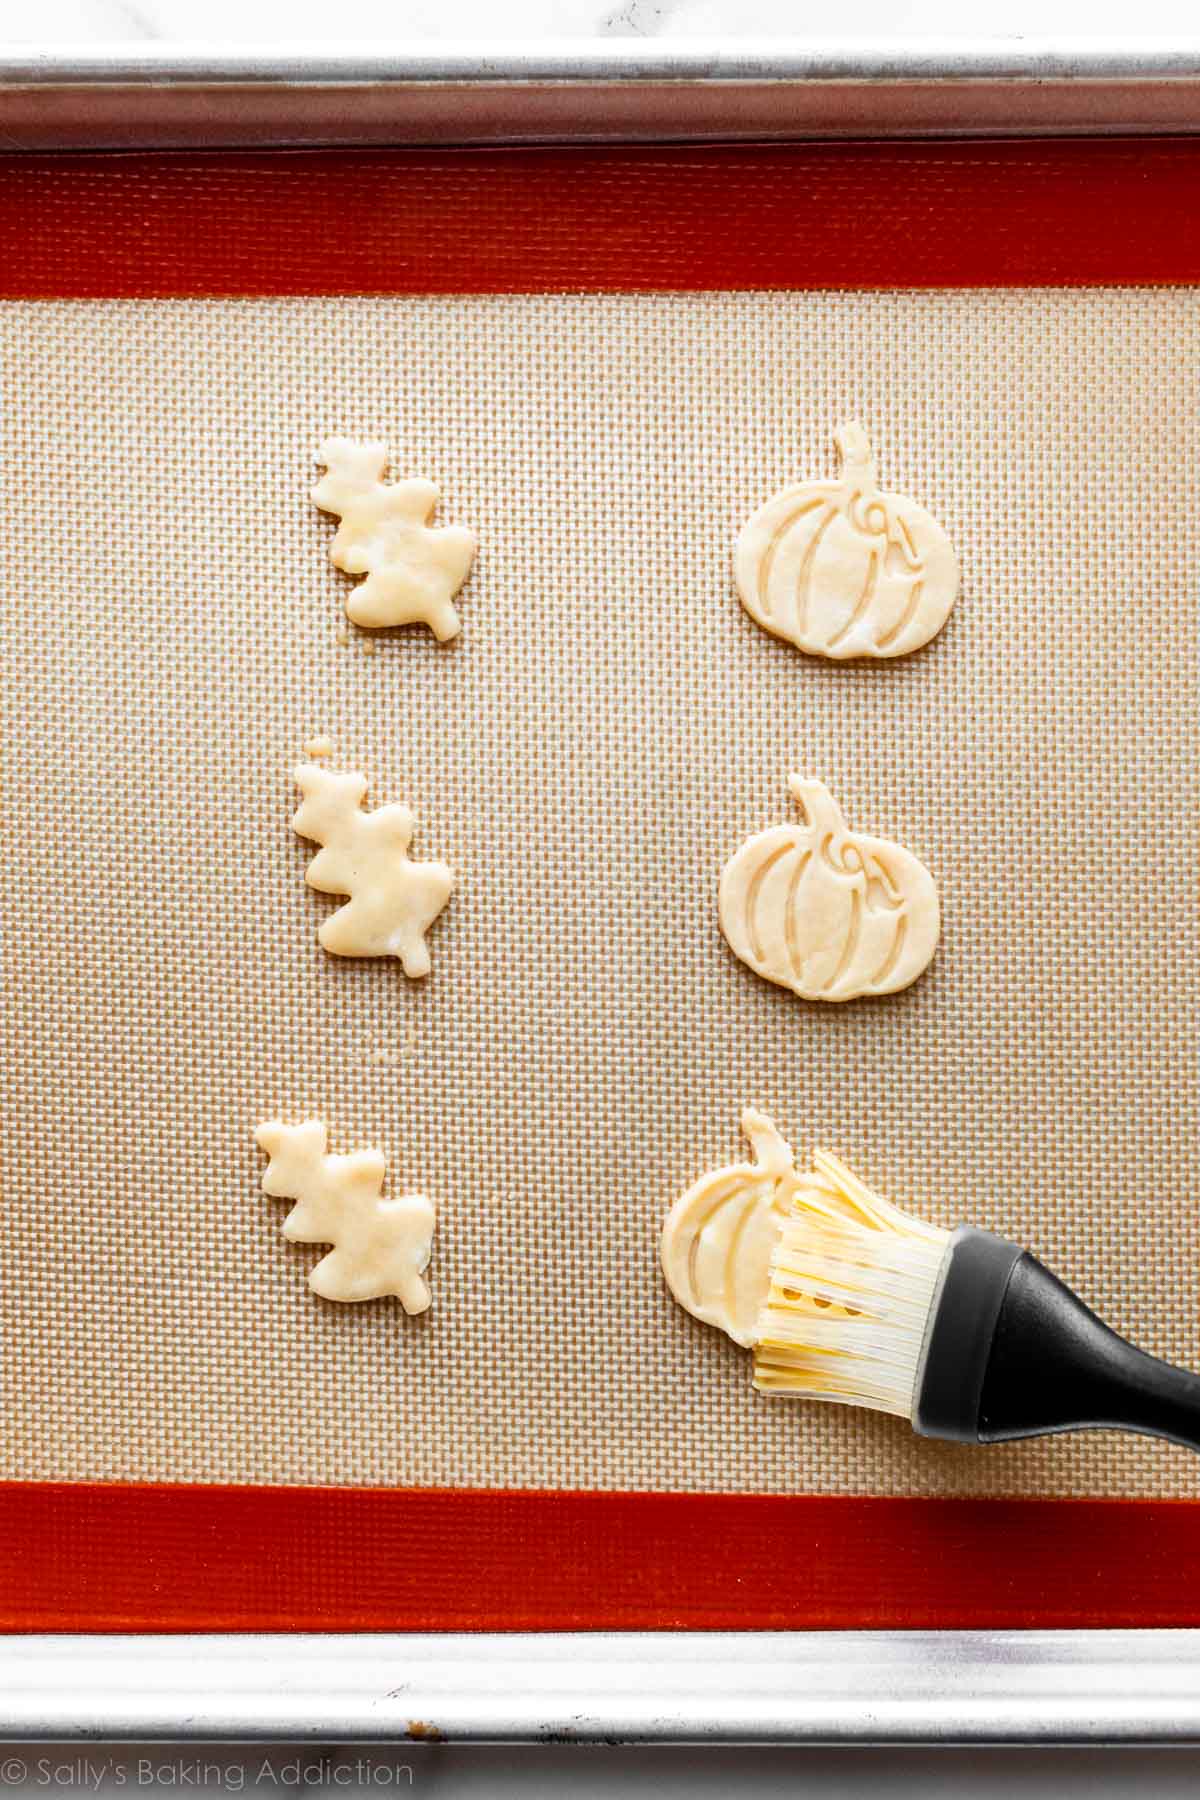
See the recipe card under for detailed written directions. You’ll roll out your pie dough and minimize shapes identical to you do for gingerbread cookies. Place onto a lined baking sheet, brush with egg wash, and bake at 350°F (177°C) for 10 minutes or till calmly browned. Take away and put aside to chill earlier than adorning pie.
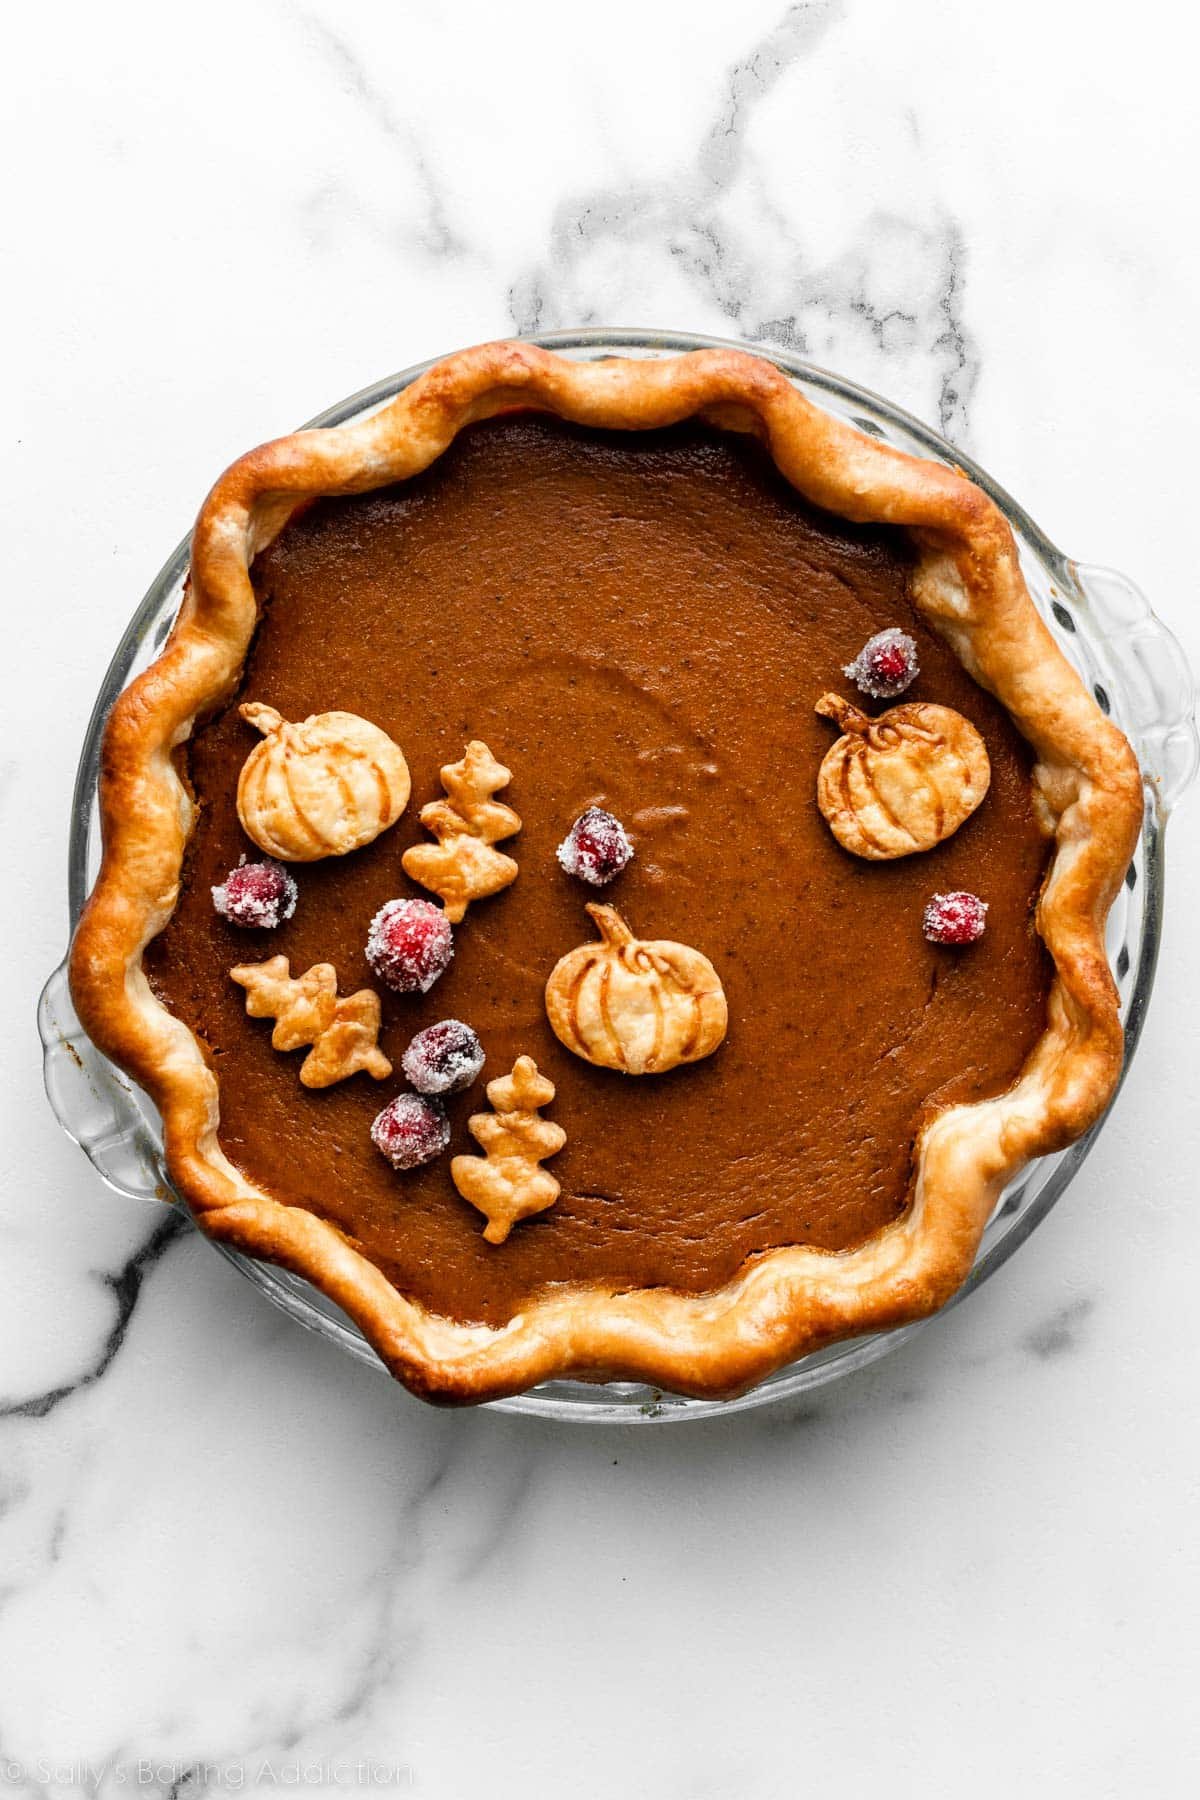
Should you’d wish to make the pictured sugared cranberries, you’ll find directions within the pumpkin pie recipe.
Thick & Skinny Lattice
The pictured pie is my caramel pear pie.
Right here’s what it’s good to make this pie crust design:
For the thick & skinny lattice, you want a pastry wheel or a pizza cutter. 2 pie dough discs is sufficient for this whole pie (once more, my pie crust recipe yields 2 discs). You want 1 disc for the underside of your pie and 1 for the designed high.
See the recipe card under for detailed written directions. You’ll minimize the rolled-out dough into 10 strips, about 1-inch vast. Then minimize each different strip in half, lengthwise, so you have got 8 skinny strips and 6 vast strips in your lattice pie crust. End by brushing with egg wash and sprinkling with coarse sugar.

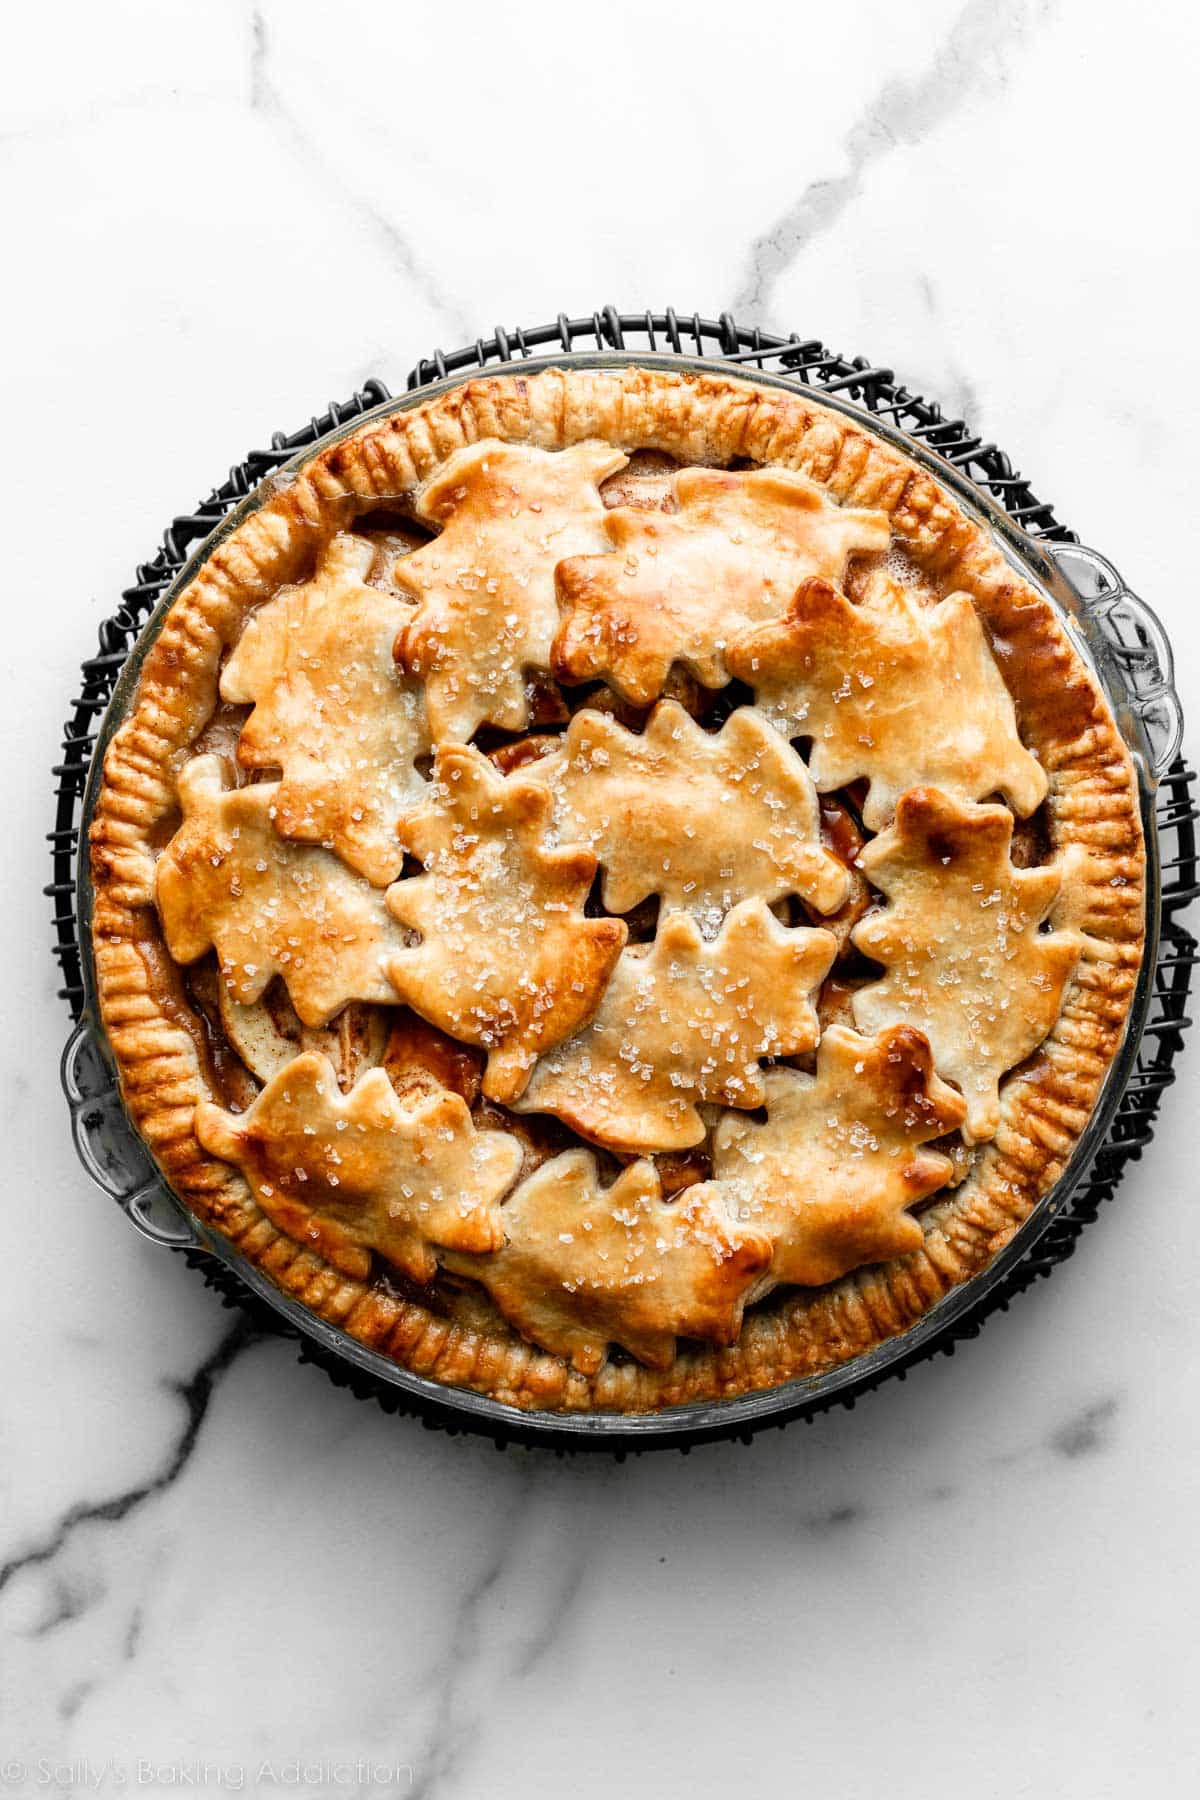
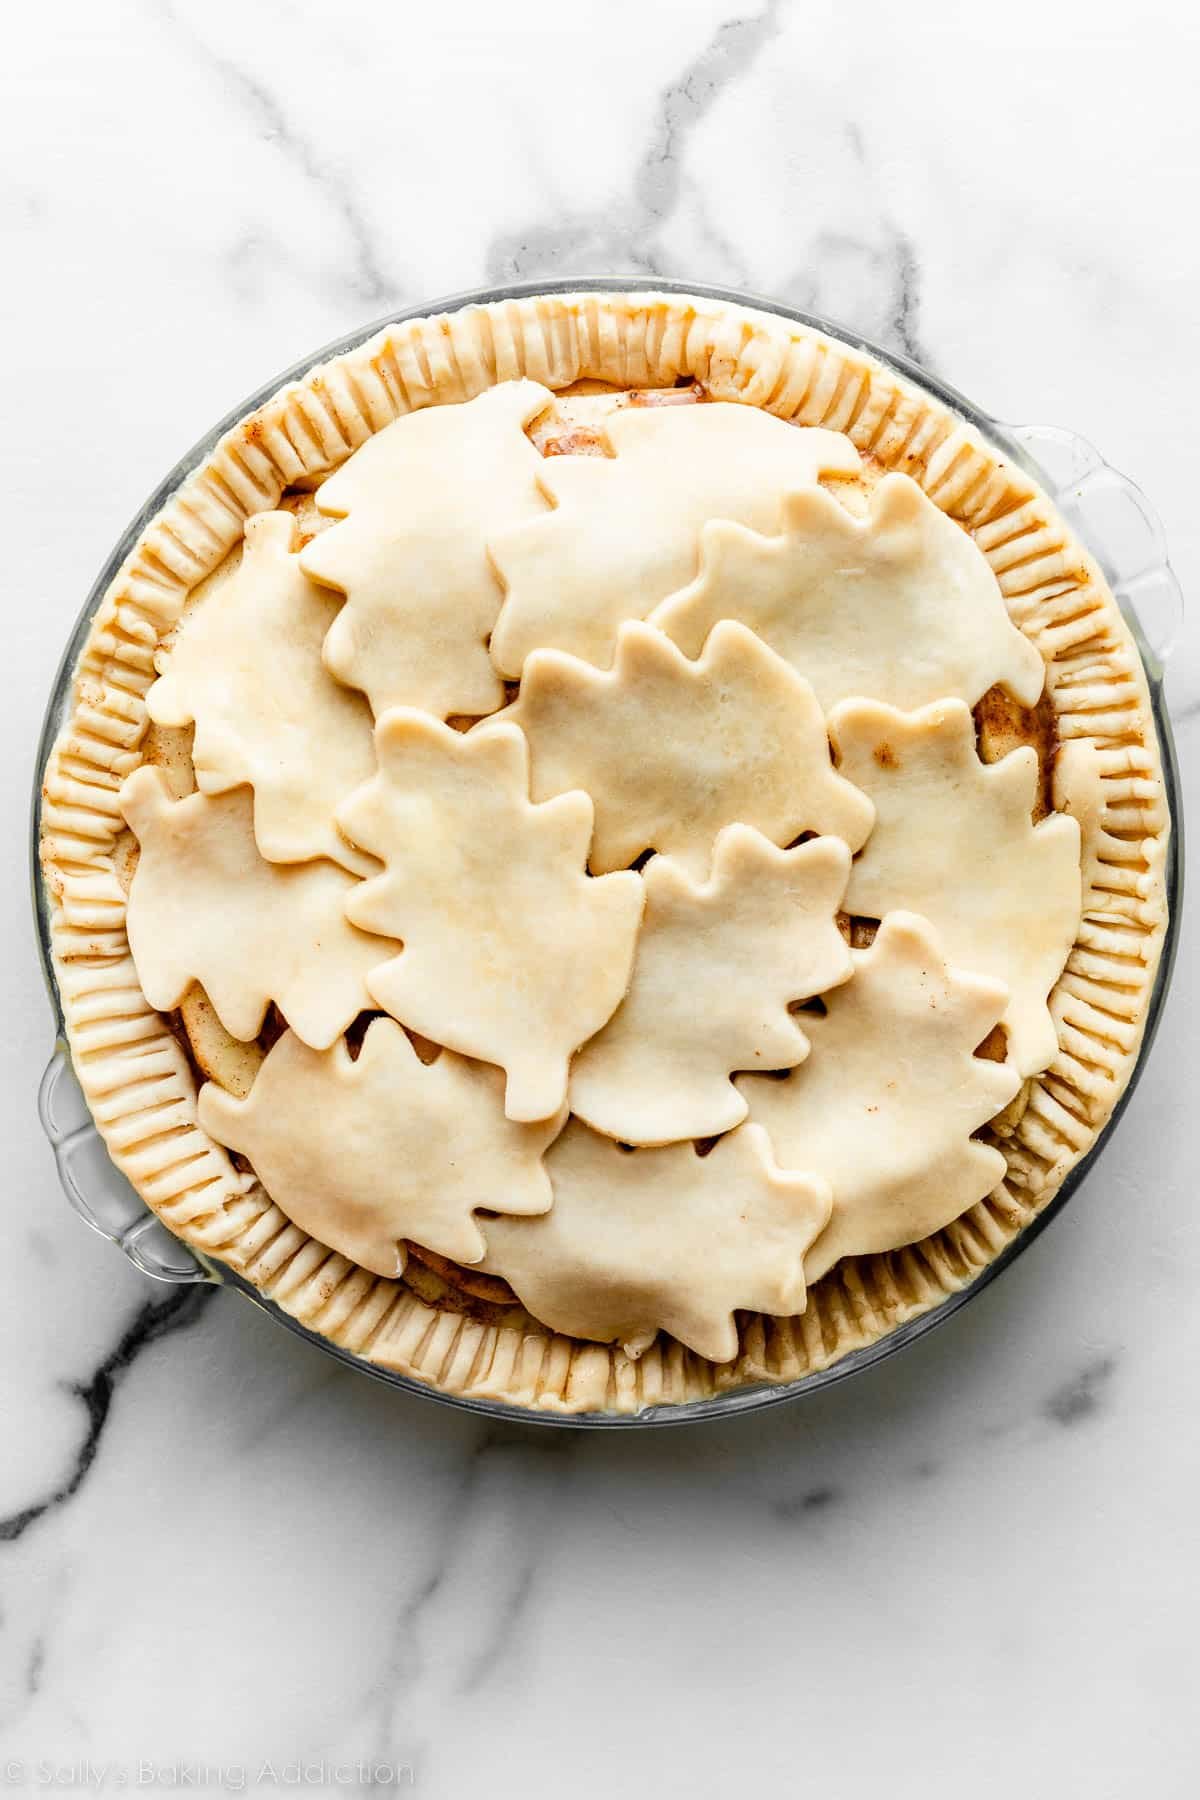
Autumn Leaves Crust
The pictured pie is my beloved apple pie.
Right here’s what it’s good to make this pie crust design:
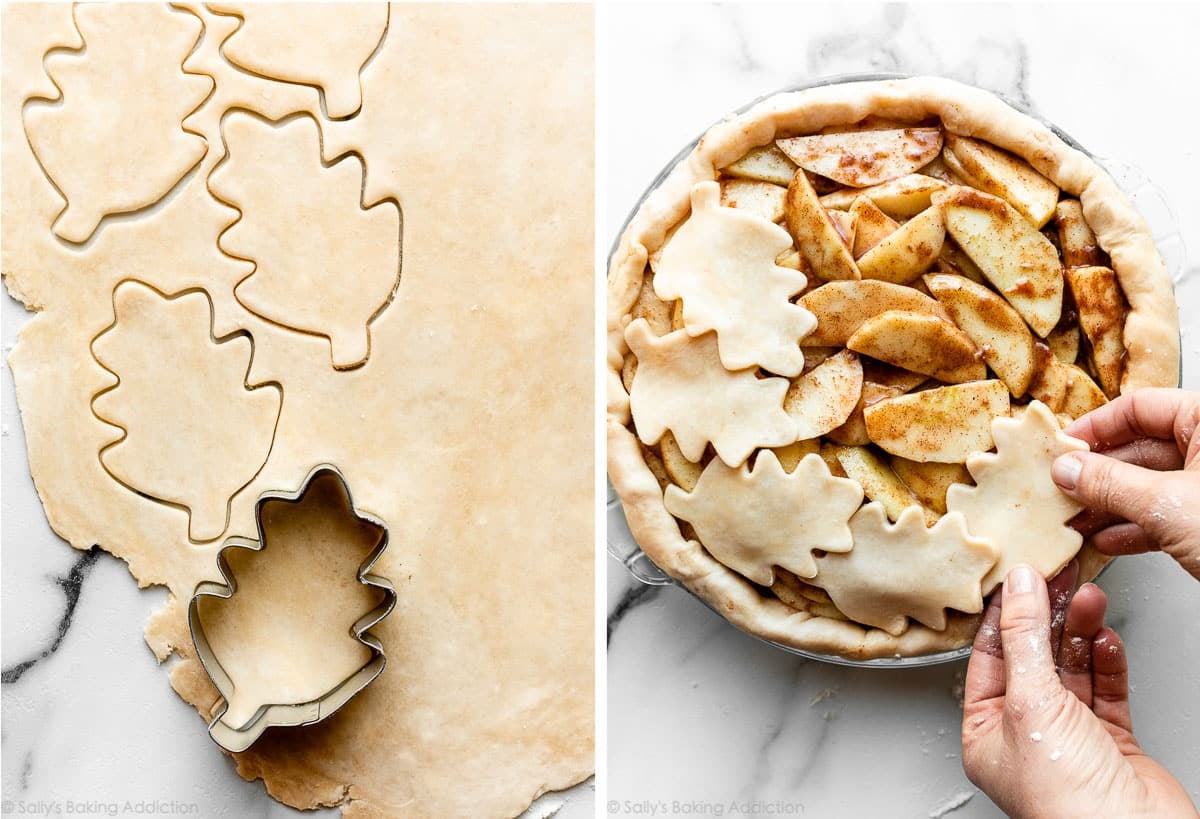
For the autumn leaves crust, you want a medium-size leaf cookie cutter.
See the recipe card under for detailed written directions. Roll out your pie dough about 1/8-inch thick. Minimize out leaves—the quantity you’ll get will rely on the scale of your cookie cutter. Fastidiously prepare the leaves, overlapping, on high of the pie. End by brushing with egg wash and sprinkling with coarse sugar.
You may prepare these designs on many various kinds of pies together with blueberry pie, cherry pie, apple pie, strawberry rhubarb pie… choose your favourite!
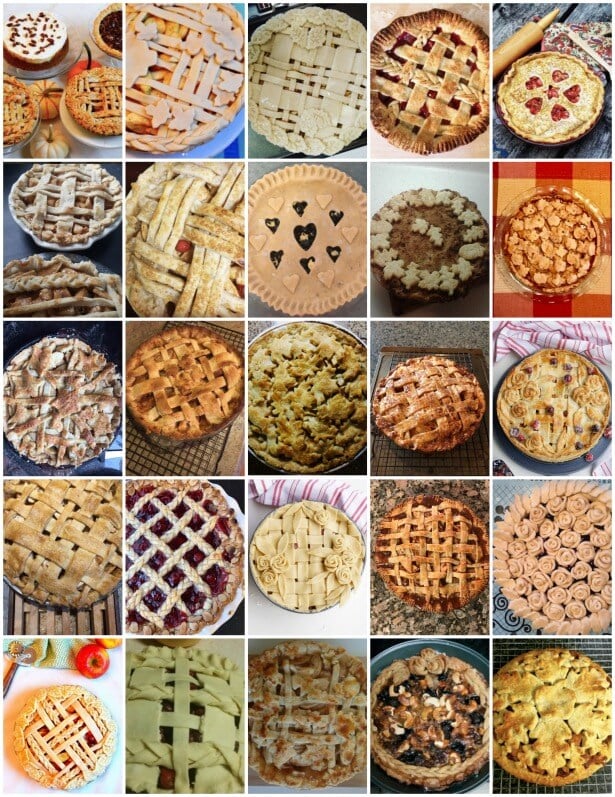
See Your Pie Crust Designs
A number of years in the past, readers made completely different pie crust designs as a part of a month-to-month baking problem. Take a look at their lovely work!
Description
Get impressed with these 4 enjoyable, festive, and exquisite pie crust designs! Selfmade pie has by no means seemed so gorgeous on the dessert desk.
- Observe Earlier than You Start: These designs, aside from the baked cookie cutter shapes design (step 3 under), all go on high of an unbaked pie. So begin together with your pie already crammed and prepared for a pie dough topping. After topping together with your designed high crust, bake in line with the pie recipe you’re utilizing, equivalent to this apple pie, apple cranberry pie, caramel pear pie, or different pie recipe.
- Wavy Lattice With Braided Edge: Watch the video tutorial under earlier than you begin. You want 1.5 discs of pie dough for this high crust design, along with the underside crust (one other disc). Begin with 1 disc of pie dough (preserve the remaining dough, and the crammed pie, within the fridge till you’re prepared for them). On a calmly floured floor with a calmly floured rolling pin, roll the disc of dough right into a circle that’s about 12 inches (30cm) in diameter. Utilizing a scalloped pastry wheel or fondant ribbon cutter, minimize 18 wavy strips. Take away the second disc of dough from the fridge and minimize it in half. (Save the opposite half for one more use.) Roll it out right into a tall rectangular form, near 14 inches lengthy. With a pointy knife, pizza cutter, or the flat fringe of a pastry wheel, minimize 6 1/4-inch vast, 14-inch lengthy strips of dough. With mild pressure as a result of the dough is delicate, tightly braid 3 strips collectively. Repeat with remaining 3 strips, so you have got 2 braids. Minimize 2-3 cookie cutter shapes out of any additional rolled-out dough. Take away the crammed pie from the fridge and punctiliously thread the 18 wavy pie dough strips over and beneath each other, pulling again strips as essential to weave. Press the sides of the strips into the underside pie crust edges to seal. Use kitchen shears to trim off any extra dough. Fastidiously place one braid round half of the pie and press calmly to safe. Repeat with 2nd braid, then connect the two braids by urgent one into the opposite. Evenly press the cookie cutter shapes on high of the place the braids join. Brush all of it with egg wash and sprinkle with coarse sugar. Observe your pie recipe’s baking directions.
- Baked Cookie Cutter Shapes: Watch the video tutorial under earlier than you begin. Begin with a completely baked pie. You want 1/2 disc of pie dough for these cut-outs. On a calmly floured floor with a calmly floured rolling pin, roll out the dough to about 1/8-inch thickness. Utilizing cookie cutters, minimize out shapes. Place the shapes onto a parchment paper- or silicone baking mat-lined baking sheet. Brush with egg wash. Bake at 350°F (177°C) for 10 minutes or till calmly browned. Enable to chill earlier than adorning cooled pie.
- Thick & Skinny Lattice: Watch the video tutorial under earlier than you begin. You want 1 disc of pie dough for this high crust design. On a calmly floured floor with a calmly floured rolling pin, roll the disc of dough right into a circle that’s about 12 inches (30cm) in diameter. With a pizza cutter or pastry wheel, minimize 10 strips of dough, about 1 inch vast. Minimize each different dough strip in half, lengthwise, so you have got 6 thick strips and eight skinny strips. Weave the lattice, alternating 1 vast strip and a couple of skinny strips, as proven within the video. You must have 3 thick strips and 4 skinny strips in every route. Trim extra dough across the edges, if wanted, then tuck in and flute or crimp the sides. Brush with egg wash and sprinkle with coarse sugar. Observe your pie recipe’s baking directions.
- Autumn Leaves Crust: This look will not be proven within the video (but it surely’s very simple!). You want 1 disc of pie dough for this high crust design. On a calmly floured floor with a calmly floured rolling pin, roll the disc of dough right into a circle that’s about 12 inches (30cm) in diameter, about 1/8-inch thickness. Use a leaf cookie cutter or pie impression cutter to chop out leaves. Prepare the pie dough leaves on high of the crammed pie, barely overlapping. Brush with egg wash and sprinkle with coarse sugar. Observe your pie recipe’s baking directions.
Key phrases: pie crust designs
Put your personalized effect on pie crust and make it stand out on the Thanksgiving desk. Let your creativeness run wild and create some edible artwork. Right here’s much more pie inspiration for you!
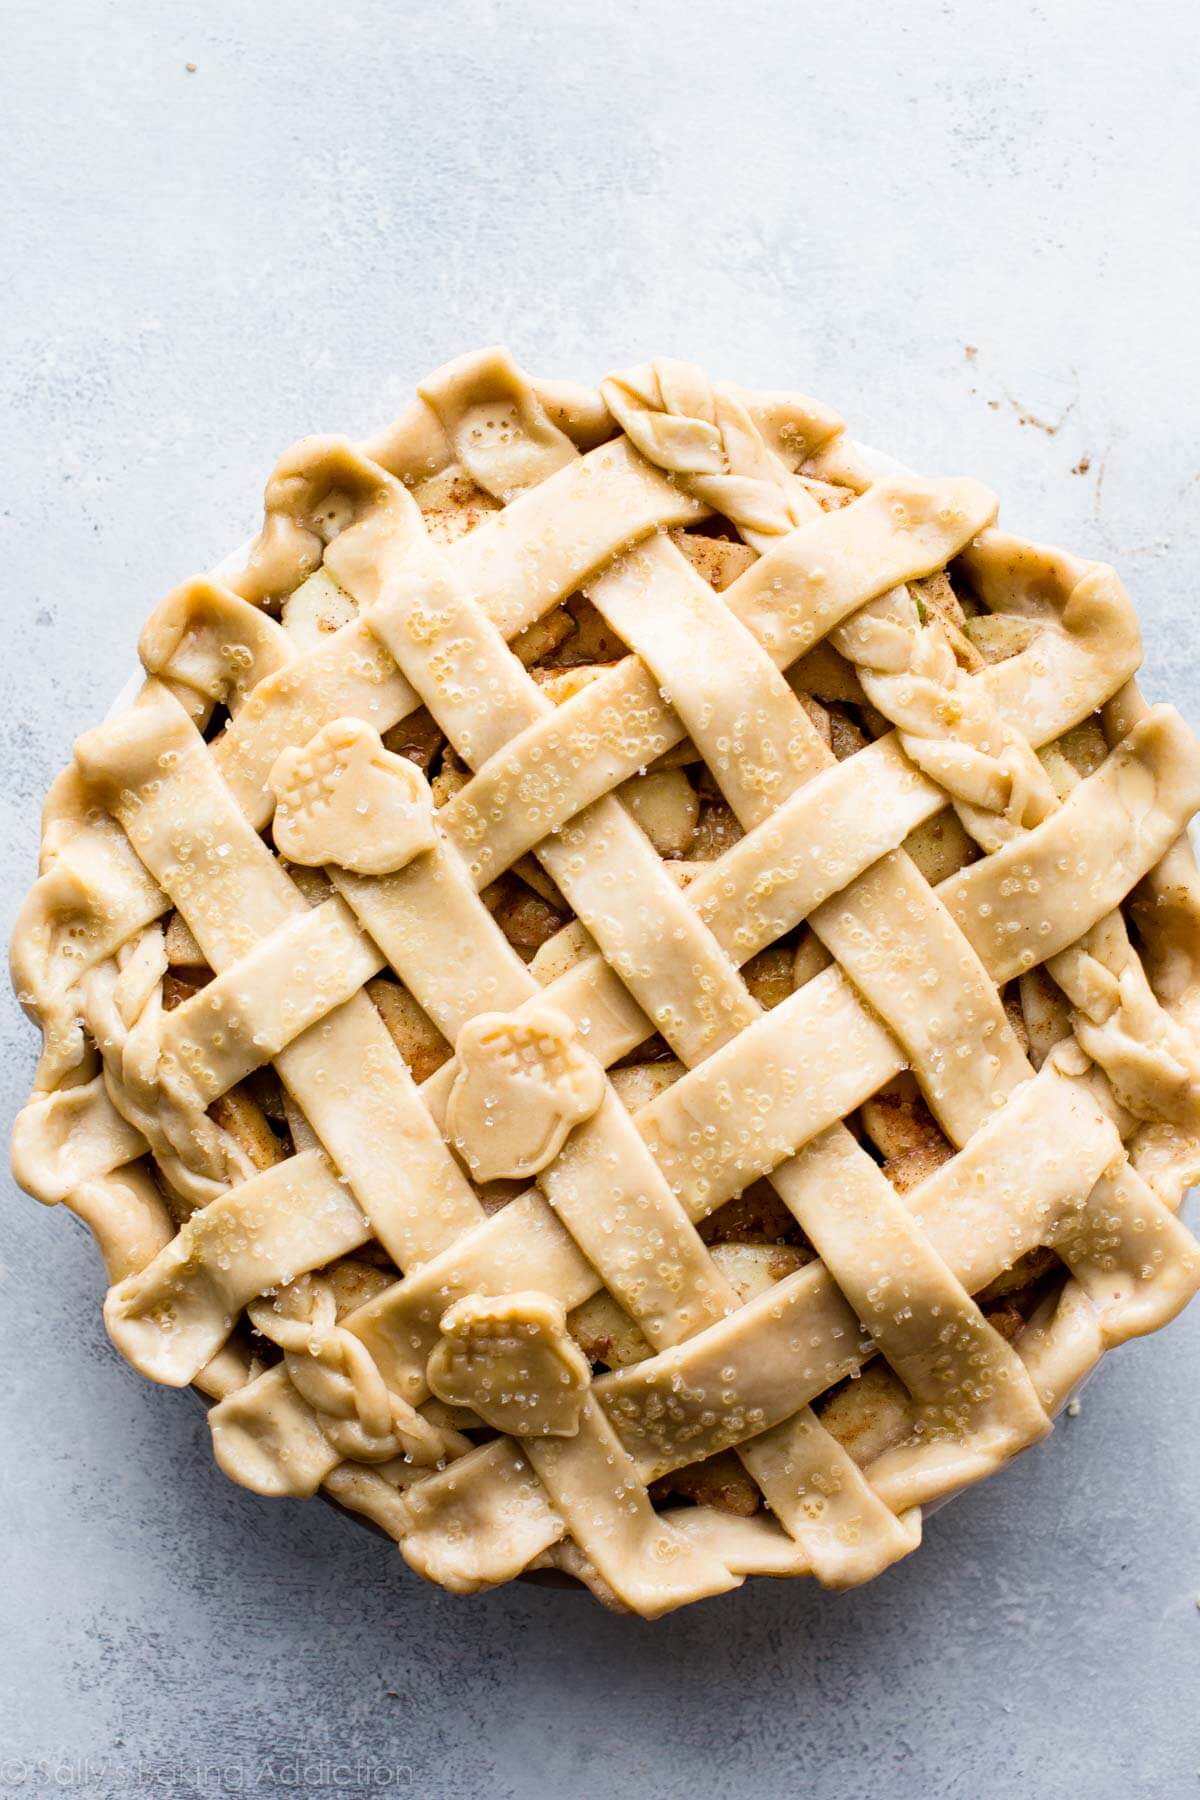
Above: I created a easy lattice pie crust with 1-inch strips of dough and added two strips of braids on the sides. Braids are three 1/4-inch vast strips of dough. Right here’s the way to braid pie crust. I additionally added some acorns on high utilizing a cookie cutter. Braiding requires numerous pie dough, and to make sure you have loads, I like to recommend 1.5 discs of dough for this look.
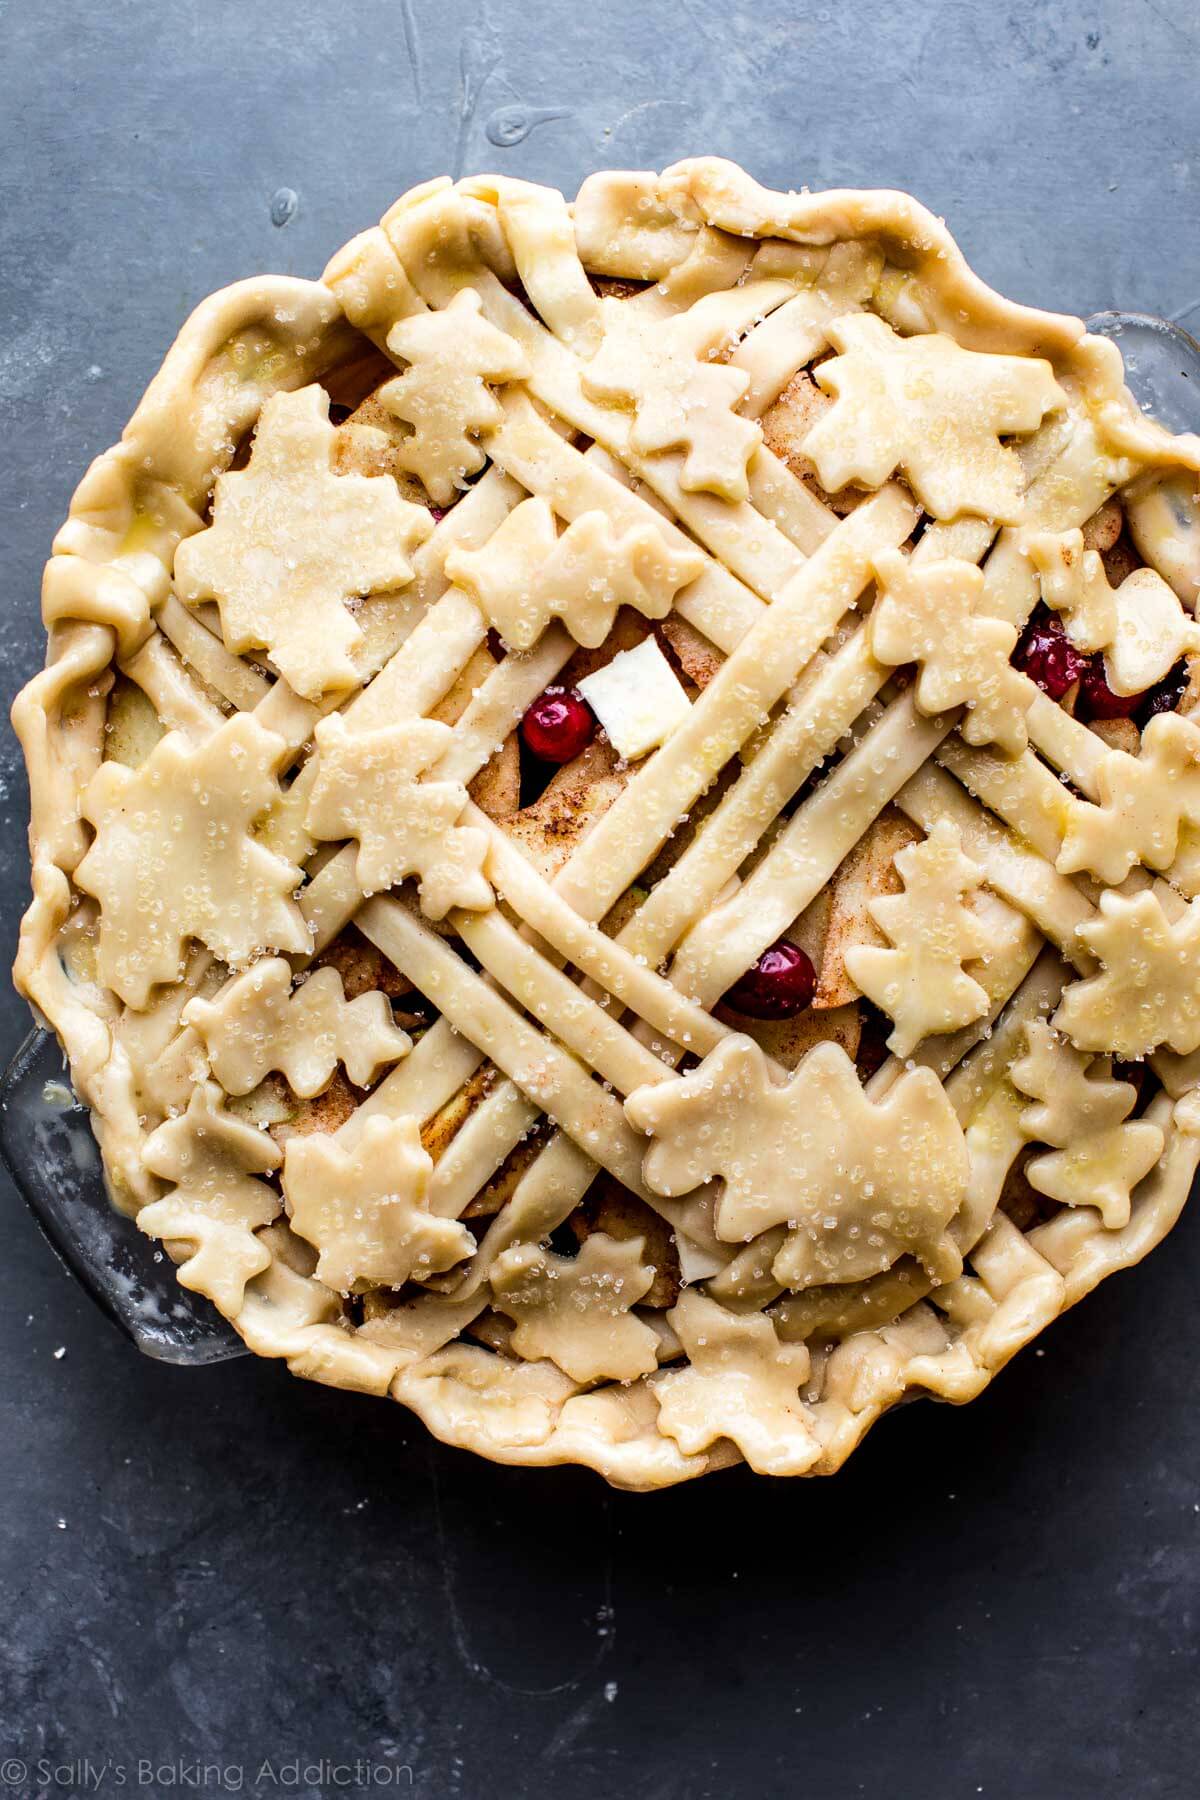
Above: That is my cranberry almond apple pie. I created a lattice pie crust with 1/2-inch strips grouped into three’s. I additionally added leaf cut-outs everywhere in the high. 1 disc of pie dough is often sufficient for this pie crust topping, however once more, it’s useful to have additional dough. I all the time counsel having a pair additional discs of pie dough within the freezer while you’re making creative pie designs.
Above: That is my selfmade cherry pie. One other lattice utilizing 4 strips 2-inches vast and 4 strips 1-inch vast. 1 disc of pie dough is sufficient for this topping.
You are able to do this! I’m cheering for you.
Subscribe
Baking Made Straightforward
Are you new to this web site? This electronic mail collection is a superb place to begin. I’ll stroll you thru a number of of my hottest recipes and present you precisely why they work.