


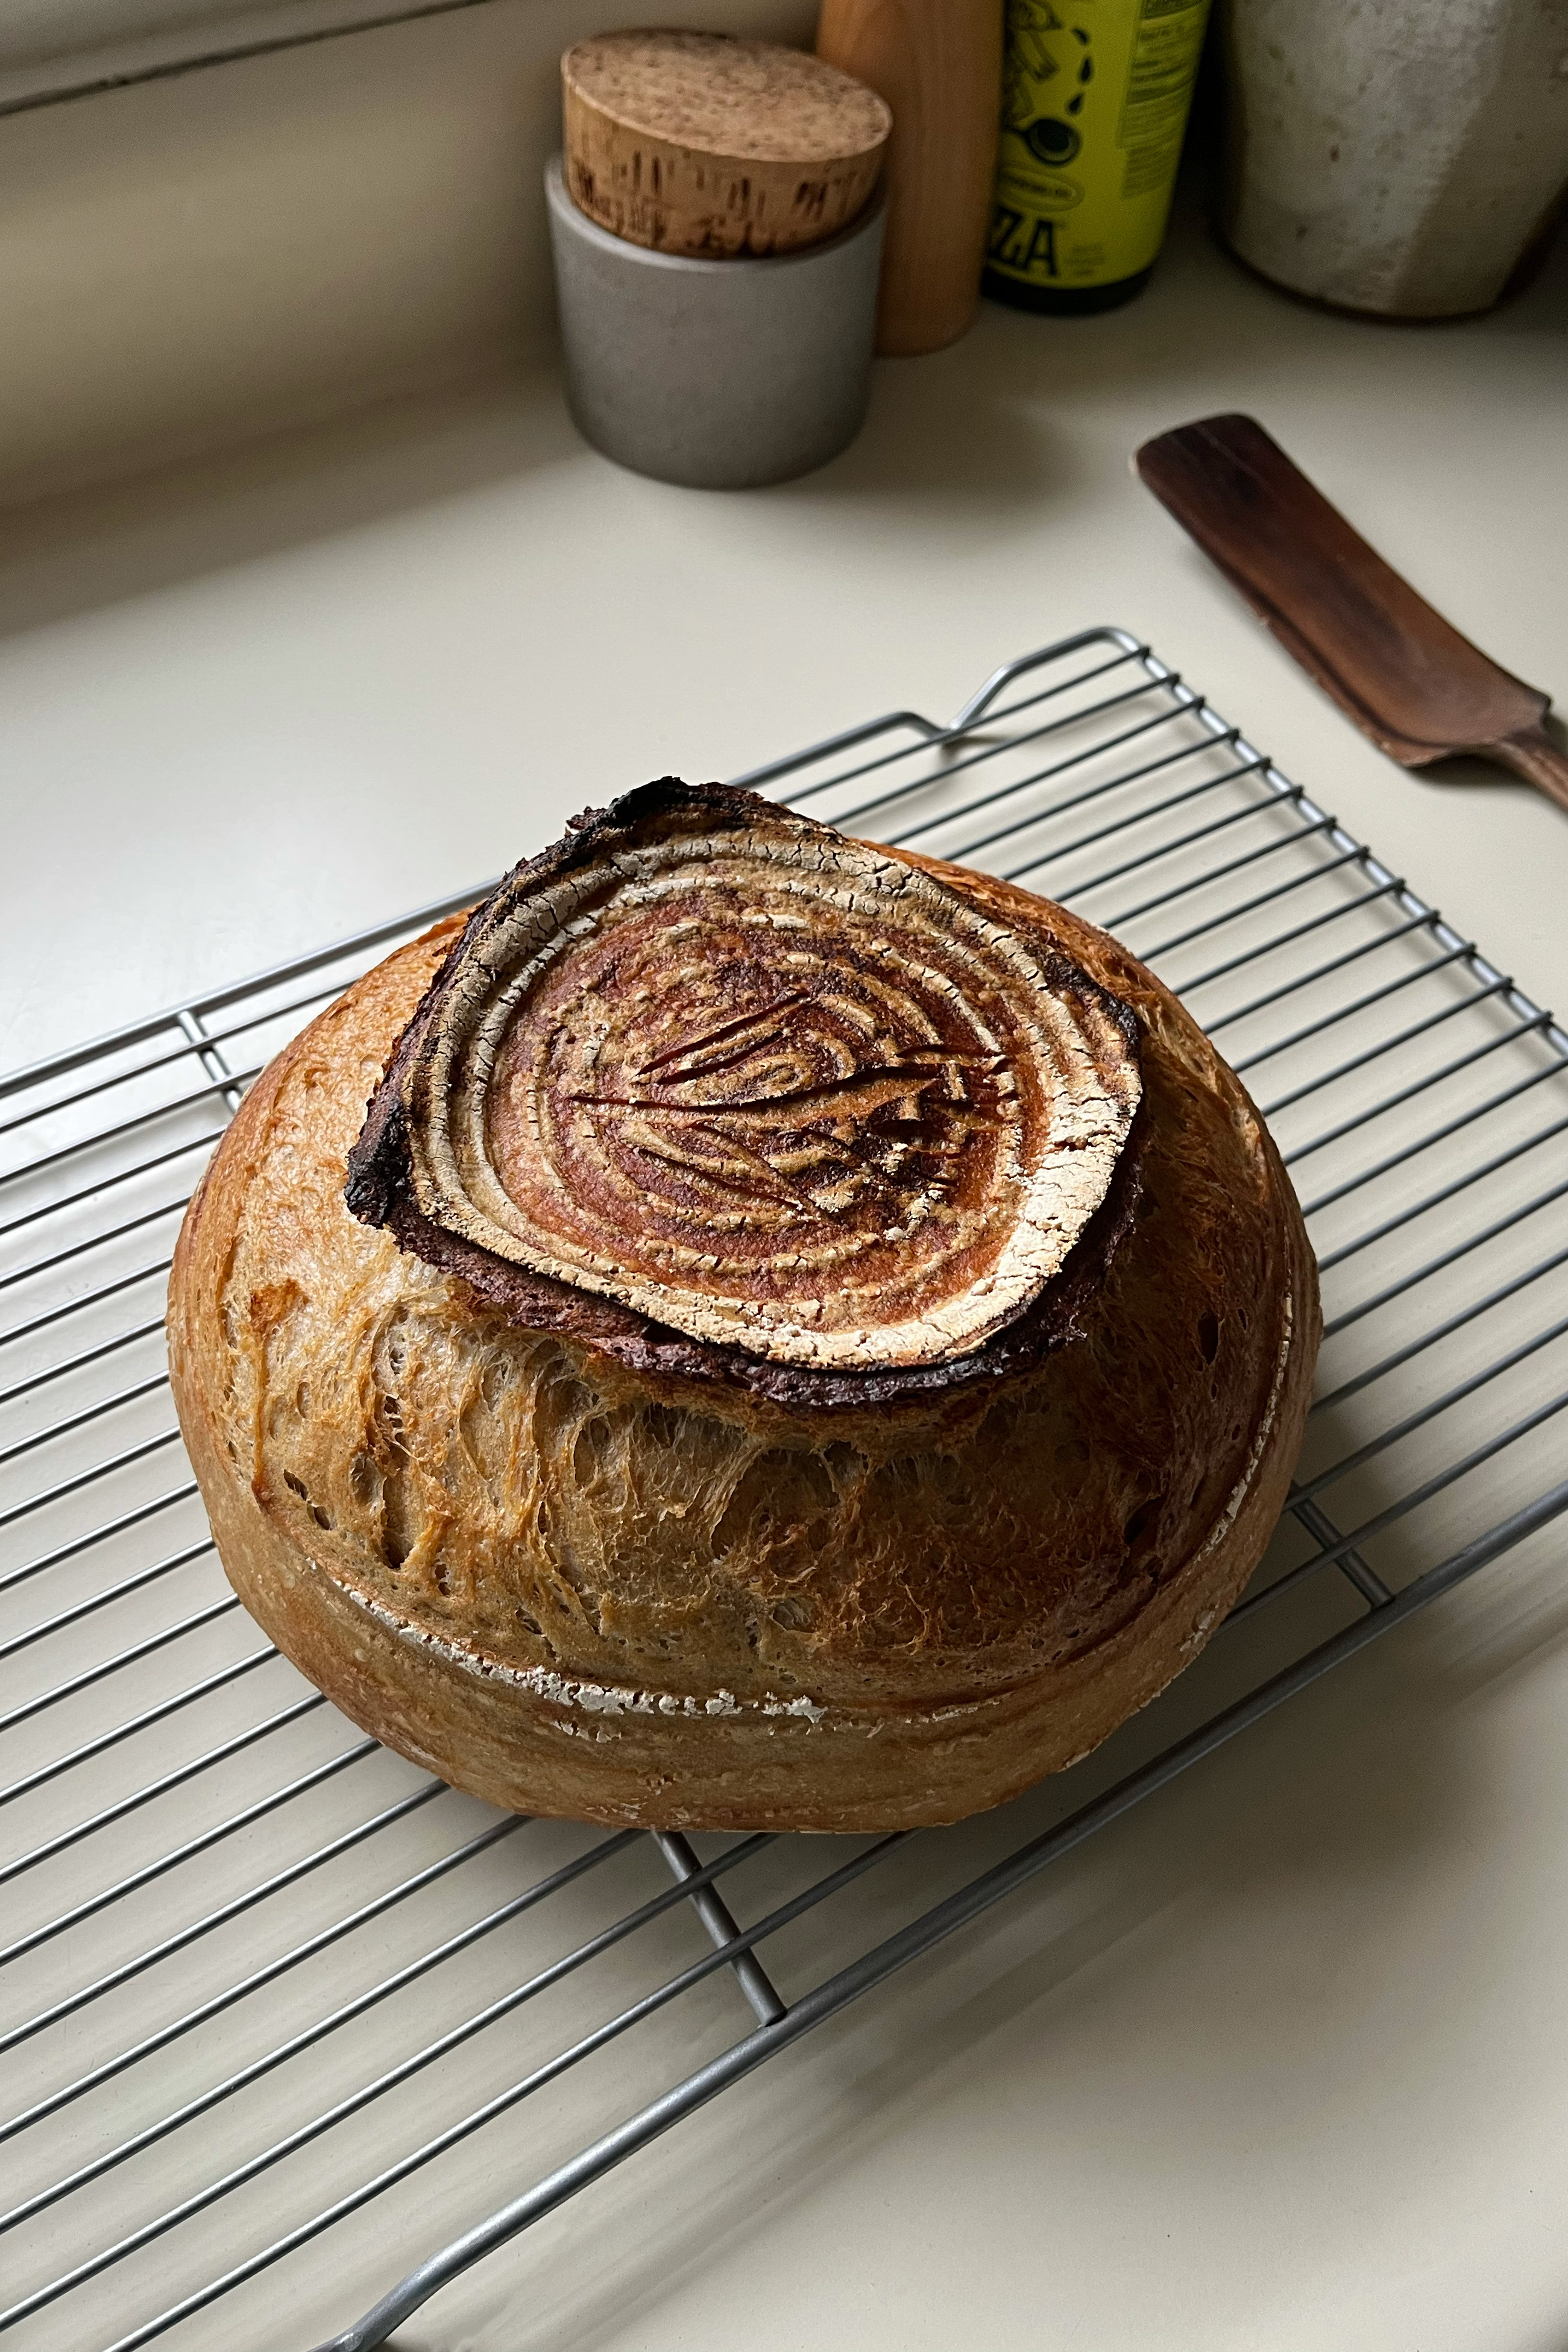
That is the recipe for the sourdough bread that I bake a few times per week. I’m repeatedly awestruck by the truth that a stunning, golden loaf of bread comes from solely flour, water, salt, and time. It’s magic. And it’s been very nice to weave this magical course of into the mundane routines of life. I made an in-depth video describing and exhibiting my total sourdough bread routine (above), and I included some hyperlinks to my favourite sourdough assets under.
Be taught Extra About Sourdough
Sourdough Starters
Sourdough Discard Recipes
Instruments
Sourdough Bread
Elements
- 375 g lukewarm water, divided
- 125 g ripe sourdough starter
- 450 g all function flour or bread flour
- 50 g entire wheat flour or spelt flour
- 9 g sea salt
- rice flour, for dusting the proofing basket (optionally available)
Directions
- Make the dough. In a big bowl, mix 350 g of water with the sourdough starter, stir to dissolve the starter. Add the all function/bread flour and entire wheat/spelt flour. Start mixing the flour in with a spoon or fork, then proceed mixing along with your hand, till all of the flour is included and you’ve got a shaggy dough. Cowl the bowl with a plate and/or towel and go away to sit down and hydrate (aka autolyse) for half-hour. Add the salt and the remaining 25 g of water. Use your palms to combine within the salt completely.
- Bulk fermentation. Depart the dough to sit down, coated, for 30 extra minutes. Start doing stretch and folds. Stretch one aspect of the dough out, then fold it in on itself. Repeat with the opposite three sides of the dough, then flip the dough seam aspect down. Cowl and let the dough sit for an additional half-hour. Hold doing the stretch and folds each half-hour for a complete of 4-6 occasions. Throughout this time, the dough ought to develop in dimension by about 30%, in addition to turn out to be extra structured, easy, and aerated, with some bubbles on the floor. If the dough hasn’t risen sufficient after 6 folds, proceed doing the stretch and folds till the dough is prepared. Take care to not over-ferment; over-fermented dough will begin feeling slack and sticky.
- Form the dough. Watch the video above for a visible. Put together a banneton, proofing basket, or a bowl lined with a clear kitchen towel by flouring it with rice/common flour. Put together your working floor by flouring half of it with rice flour or common flour. The opposite half of the floor ought to stay un-floured. Switch the dough from the bowl to the floured half of the work floor. Gently stretch the dough out into an oblong form by pulling on the sides. Fold the underside finish of the dough about midway up the dough. Fold the highest finish over the underside finish. It’s best to now have a protracted, skinny form. Roll up the dough, then put it seam aspect down on the un-floured half of the work floor. Push the dough away from your self, then pull it in direction of your self in round motions, repeat a number of occasions to construct stress. Upon getting a spherical, taut loaf, flour the highest with extra rice/common flour. Fastidiously flip the loaf seam aspect up and switch it to the proofing basket prime down. Optionally, do a number of ‘stitches’ to seal the underside of the dough by crossing the sides of the dough over a number of occasions. Wrap the proofing basket in a kitchen towel and refrigerate for 18 hours.
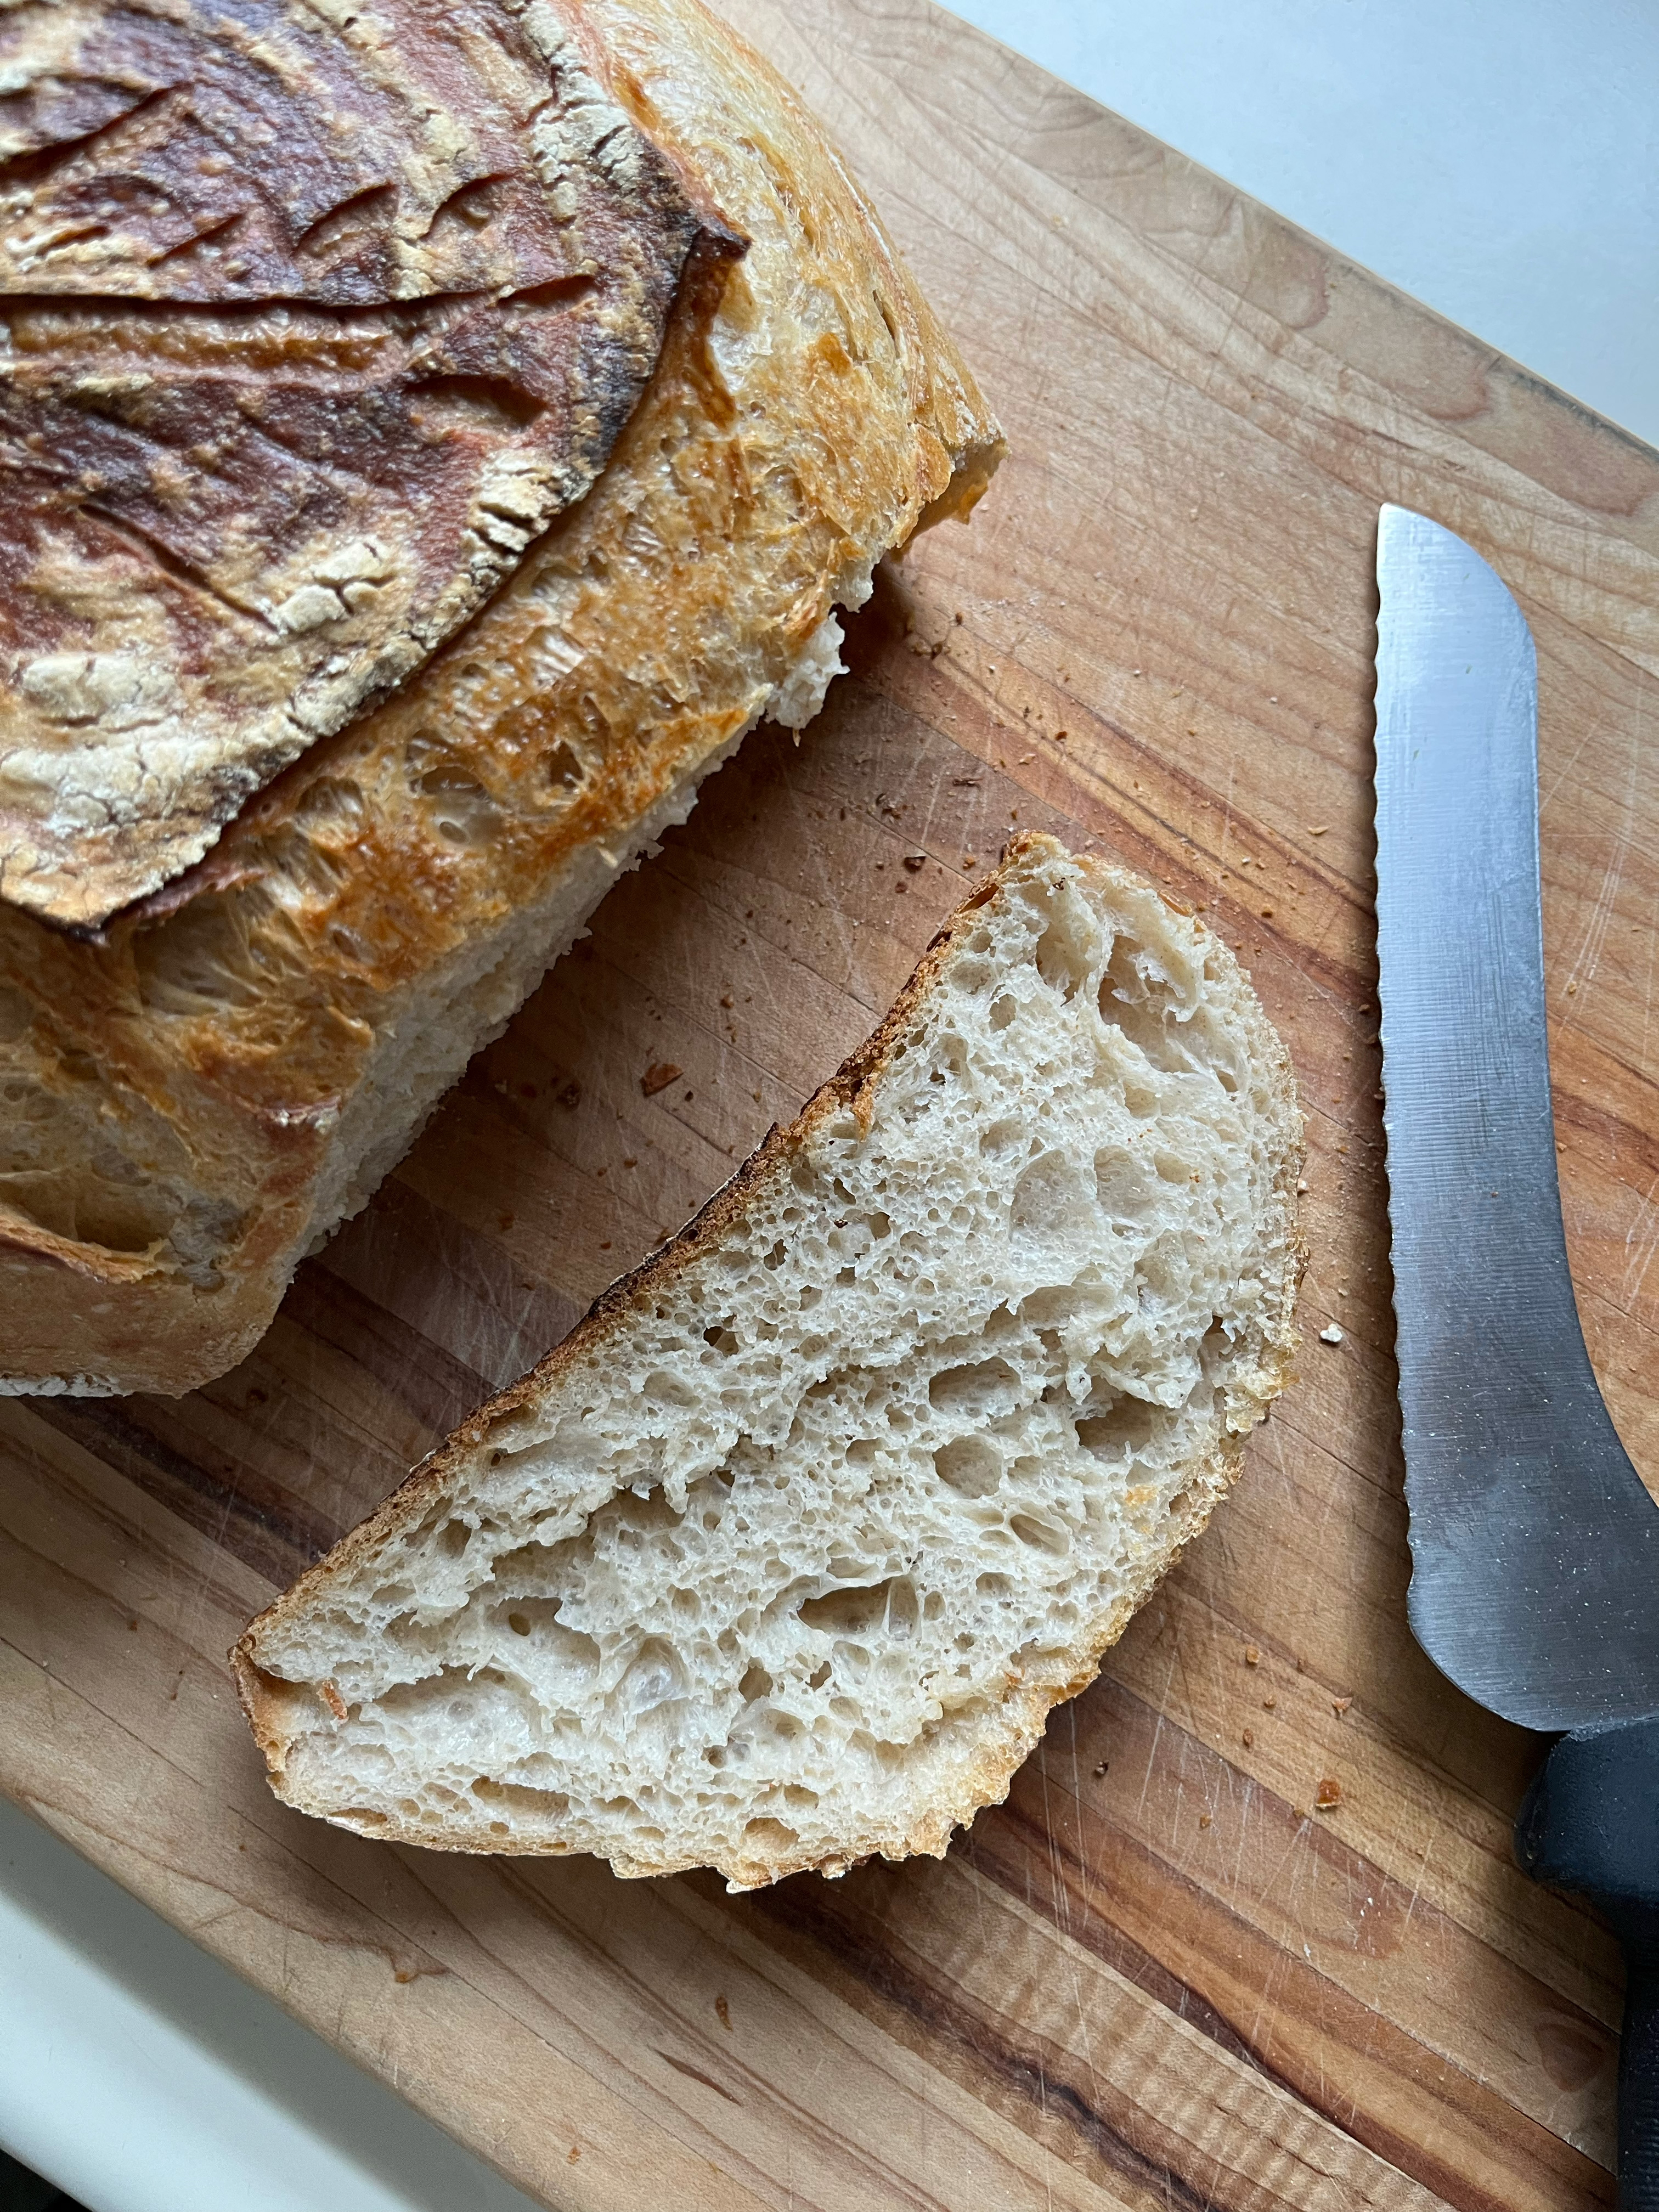
- Bake the bread. Put a Dutch oven within the oven and preheat it to 500° F/260° C. Put a bit a parchment paper that’s concerning the width of your proofing basket over the basket, adopted by a plate. Flip the proofing basket over in order that the dough inverts onto the plate with the parchment paper. Take away the proofing basket and rating the dough nevertheless you like, utilizing a razor blade, a bread lame, or a pointy knife. Utilizing the parchment paper as a sling, switch the dough to the preheated Dutch oven. Optionally, add a splash of water to the Dutch oven for a crispier crust. Cowl the Dutch oven with a lid and put it within the oven. Cut back the oven temperature to 450° F/230° C and bake for 20 minutes (see notice relating to the temperature). Take away the lid and bake for an additional half-hour, or till the bread is golden brown. Switch the bread to a wire rack and let it cool for about 1 hour earlier than slicing.
Notes
All ovens are completely different, particularly house ovens. I’ve discovered that 450° F/230° C (as acknowledged in most sourdough recipes) is simply too low of a temperature for my oven to make good bread. I bake my bread at 500° F/260° C for the primary quarter-hour, then at 475° F/250° C for the remaining 35 minutes. In case your bread seems to be pale or isn’t as crispy as you’d like, attempt experimenting with the next baking temperature.
3.5.3226